There’s something satisfying about perfectly cut chicken cubes—they cook evenly and stay tender without drying out. I love that they can be tossed into so many quick dishes without fuss, but nailing that uniform size is the trick that makes all the difference.
This recipe is about more than just chopping chicken; it’s about understanding how to handle it so every piece turns out juicy and flavorful. I’ve learned that proper prep, a hot pan, and a gentle touch keep the chicken from turning rubbery or dry. It’s a small skill that transforms weeknight meals into something special.
If you’ve ever had chicken that’s unevenly cooked or tough, this is your antidote. It’s simple but focused—getting those cubes just right, so every bite is juicy, tender, and ready to mingle with whatever you toss them into next.
Focusing on creating tender, evenly cooked chicken cubes that stay juicy and flavorful, even when added to quick stir-fries or salads, emphasizing precise cutting and cooking techniques.
The story behind this recipe
- This chicken cubes recipe came about during a hectic week when I needed quick, reliable protein that still felt like I put some care into it. I remembered a simple trick I picked up from a chef friend—cutting the chicken into uniform cubes makes all the difference in how evenly they cook and stay juicy. It’s a small detail, but it’s changed how I approach weeknight dinners.
- One evening, I was tired of overcooked, rubbery chicken in my stir-fries. I started paying closer attention to the size and how I handled the raw meat. That’s when I realized that controlling the heat and keeping the pieces even was the secret to tender, flavorful chicken every time. Now, I keep a sharp knife handy and make these cubes whenever I need a fuss-free, satisfying main.
- heading
- story_type
Ingredient breakdown: key components
- Chicken breasts: I prefer skinless, boneless breasts—they cook evenly and stay tender. If yours are thicker, pound them to uniform thickness for even cooking.
- Salt and pepper: A simple seasoning that enhances the chicken’s natural flavor. Don’t be shy—season generously before cooking to get that savory punch.
- Olive oil: I use just enough to coat the pan; it helps with browning and keeps the chicken juicy. For a richer flavor, a splash of sesame oil works beautifully.
- Garlic powder: Adds a subtle depth. Fresh minced garlic can work too, but ensure it doesn’t burn—add it later for a fragrant boost.
- Lemon juice: Brightens the whole dish with a zesty pop. A squeeze at the end brings out the chicken’s natural juiciness and adds a fresh note.
- Optional herbs (thyme or parsley): I toss these in at the end for color and aroma. Fresh herbs give a more vibrant flavor, but dried work in a pinch.
- Cornstarch (if thickening sauce): I use a teaspoon to coat the chicken before cooking for a slight crispy exterior. Skip if you prefer a lighter finish or are aiming for a saucier dish.
Spotlight on key ingredients
Chicken breasts:
- I prefer skinless, boneless breasts—they cook evenly and stay tender. If yours are thicker, pound them to uniform thickness for even cooking.
- Salt and pepper: A simple seasoning that enhances the chicken’s natural flavor. Don’t be shy—season generously before cooking to get that savory punch.
- Olive oil: I use just enough to coat the pan; it helps with browning and keeps the chicken juicy. For a richer flavor, a splash of sesame oil works beautifully.
Lemon juice and herbs:
- Lemon juice: Brightens the whole dish with a zesty pop. A squeeze at the end brings out the chicken’s natural juiciness and adds a fresh note.
- Garlic powder: Adds a subtle depth. Fresh minced garlic can work too, but ensure it doesn’t burn—add it later for a fragrant boost.
- Optional herbs (thyme or parsley): I toss these in at the end for color and aroma. Fresh herbs give a more vibrant flavor, but dried work in a pinch.
Notes for ingredient swaps
- Dairy-Free: Use coconut aminos instead of soy sauce for a salty umami kick without dairy. It’s a bit sweeter and richer in depth.
- Low-Sodium: Swap regular soy sauce for a reduced-sodium version. Your seasoning will be milder, so taste and adjust accordingly.
- Herb Variations: Fresh thyme or rosemary can replace parsley for a more piney aroma. Dried herbs work, but add them earlier to develop flavor.
- Oil Choices: Avocado oil or light sesame oil can replace olive oil. They offer higher smoke points and subtle flavor differences.
- Citrus Acid: Lemon juice can be swapped for lime or vinegar if you prefer a different tang. Each adds a slightly different brightness.
- Sweetener: Honey or maple syrup can replace sugar in marinades for a richer, more rounded sweetness. Use sparingly to avoid caramelization.
- Protein Swap: Turkey or chicken thigh cubes can stand in if you want a darker, juicier meat, but adjust cooking time slightly.
Equipment & Tools
- Chef’s knife: For precise, uniform cutting of chicken into cubes.
- Mixing bowl: To marinate or season the chicken before cooking.
- Skillet or cast iron pan: To sear and cook the chicken evenly.
- Tongs: To flip and turn the chicken cubes without piercing the meat.
- Paper towels: To dry chicken for better searing and less splatter.
Step-by-step guide to chicken cubes
- Equipment & Tools: Sharp chef’s knife for clean cuts, large mixing bowl for marinade, non-stick skillet or cast-iron pan for searing, tongs for flipping, paper towels for drying.
- Prepare chicken: Pat the chicken breasts dry with paper towels, then cut into 1-inch cubes. Uniform size helps cook evenly.
- Season: Toss the cubes with salt, pepper, and optional garlic powder. Let sit for 10 minutes to absorb flavors.
- Heat pan: Place your skillet over medium-high heat (~200°C / 390°F). When hot, add a tablespoon of olive oil. The oil should shimmer but not smoke.
- Cook chicken: Add the cubes in a single layer. Let them sear undisturbed for 2-3 minutes until golden brown. Flip with tongs and cook another 2-3 minutes.
- Check doneness: The chicken should be opaque and slightly caramelized on the surface. If using a probe, internal temp should reach 75°C / 165°F.
- Adjust heat: If cubes are browning too quickly or sticking, lower heat slightly. If they’re pale, increase heat briefly for more color.
- Finish and rest: Transfer chicken to a plate, let rest for 3 minutes. This keeps juices inside. Serve immediately or toss into salads, stir-fries, or wraps.
- Final check: The cubes should be evenly cooked, juicy, and lightly browned. The texture should be tender yet firm, with no pink in the center.
Transfer the cooked chicken to a plate and let rest for 3 minutes. This helps retain juices. Serve hot, sliced into smaller pieces if needed, or toss into your favorite dishes.
How to Know It’s Done
- Golden brown exterior with slight caramelization.
- Internal temperature at 75°C / 165°F.
- Juices run clear when cut or pressed.
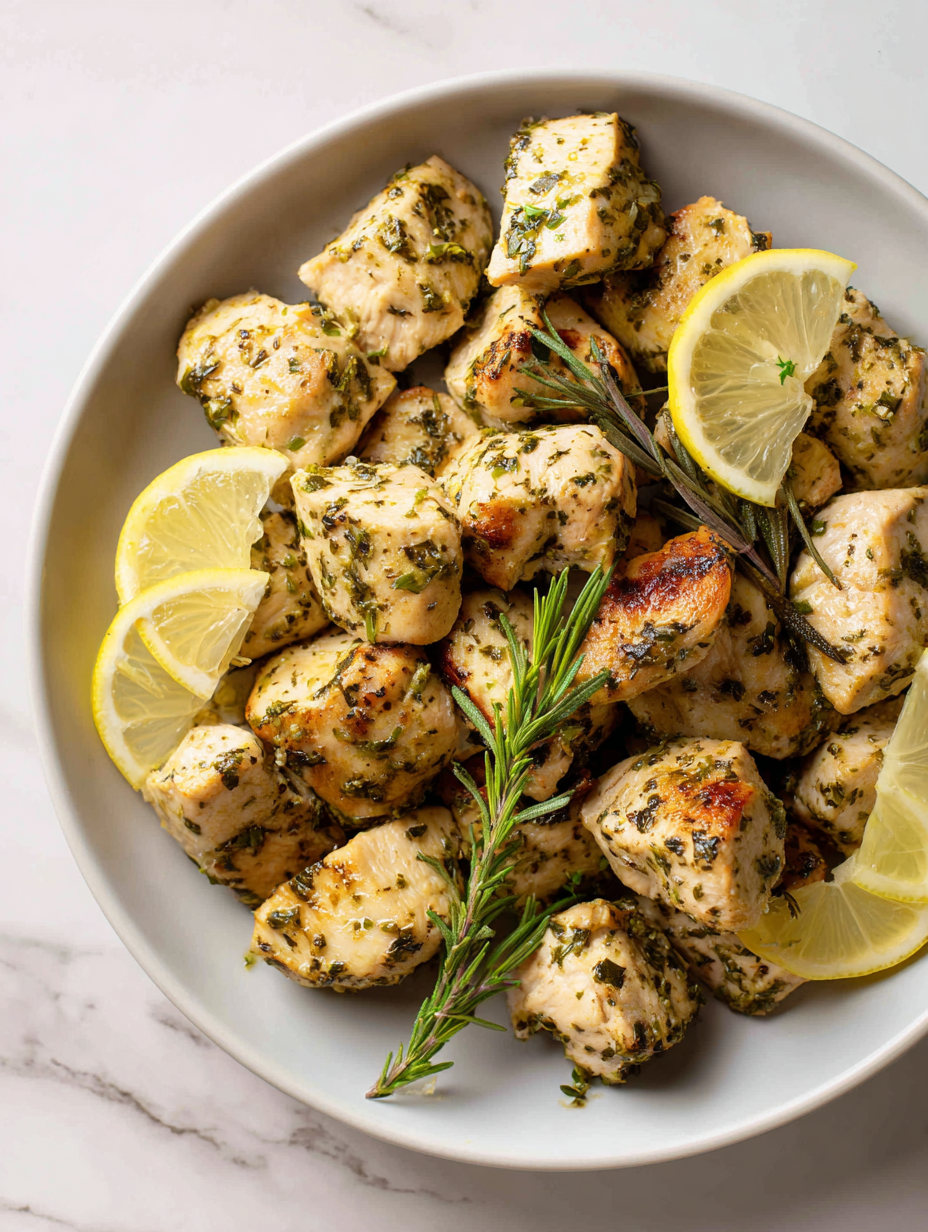
Perfectly Cubed Chicken
Ingredients
Equipment
Method
- Pat the chicken breasts dry with paper towels to remove excess moisture, which helps achieve a good sear.
- Place the chicken on a cutting board and use a sharp chef’s knife to cut into 1-inch cubes, ensuring each piece is roughly the same size for even cooking.
- Transfer the cubes to a mixing bowl and season generously with salt, pepper, and garlic powder. Toss to coat evenly, allowing the flavors to meld for about 10 minutes.
- Heat a skillet over medium-high heat until shimmering, then add the olive oil. Swirl to coat the pan evenly.
- Once the oil is hot and starts to shimmer, add the chicken cubes in a single layer. Let them sear undisturbed for 2-3 minutes until they develop a golden-brown crust.
- Use tongs to flip the cubes, then cook for another 2-3 minutes until they are evenly browned and opaque in the center.
- Check that the internal temperature reaches 75°C (165°F) or the chicken is no longer pink in the center. Remove from heat and squeeze lemon juice over the cubes for a bright finish.
- Optionally, sprinkle with chopped fresh herbs like parsley or thyme for added aroma and color. Serve immediately for juicy, tender, and beautifully browned chicken cubes.
Pro tips for perfect chicken cubes
- High heat: Preheat your pan until it shimmers to get that perfect sear without sticking.
- Uniform cubes: Cut all chicken pieces to the same size—this ensures even cooking and juicy results.
- Dry surface: Pat chicken dry thoroughly; moisture causes steaming instead of browning.
- Gentle flip: Use tongs to turn cubes; avoid piercing to keep juices sealed inside.
- Don’t overcrowd: Cook in a single layer; overcrowding drops temperature and causes steaming, not searing.
- Rest briefly: Let the cooked chicken rest for 3 minutes—juices redistribute for maximum tenderness.
- Check doneness: Ensure internal temp hits 75°C (165°F) or chicken is opaque and firm to touch.
Common mistakes and how to fix them
- FORGOT to dry chicken: Causes uneven searing. Pat dry thoroughly before cutting.
- DUMPED seasoning: Too much salt or spices can overpower. Adjust to taste after seasoning.
- OVER-TORCHED pan: Burns the chicken’s exterior. Lower heat if browning too quickly.
- MISSED resting time: Juices escape if not rested. Let the cooked cubes sit for 3 minutes.
Quick fixes and pantry swaps
- When chicken sticks, splash a little water and scrape the bottom of the pan.
- If chicken is unevenly cooked, rest briefly and then sear for a minute more.
- DUMPED too much oil? Patch with a paper towel to absorb excess and prevent splatters.
- When in doubt, check internal temp—75°C (165°F) means safe and juicy.
- Splash some lemon juice or herbs to mask overcooked or bland flavors.
Prep, store, and reheat tips
- Prep the chicken: Cube and season the chicken up to 24 hours in advance. Keep covered in the fridge for fresh, juicy results.
- Storage: Keep cooked chicken cubes in an airtight container in the fridge for up to 3 days. Reheat gently to avoid drying out.
- Shelf life: Raw cubed chicken is good for 1-2 days if kept cold. Cooked cubes are best used within 3 days for optimal flavor and texture.
- Reheating: Warm in a skillet over low heat or in the microwave, covering loosely. Look for steam and a slight shimmer of oil—don’t overcook to prevent dryness.
- Sensory notes: The chicken should smell savory, with no sour or off odors. Reheated cubes should be hot, tender, and slightly juicy.
Top questions about chicken cubes
1. How do I ensure the chicken cubes cook evenly?
Use a sharp knife to cut even 1-inch cubes for uniform cooking.
2. Can I season the chicken ahead of time?
Preseason the chicken with salt and pepper, and let it sit for 10 minutes before cooking for better flavor.
3. How long should I cook the chicken cubes?
Cook the cubes over medium-high heat until golden and opaque, about 4-6 minutes total, flipping halfway.
4. How do I know when the chicken is done?
Check internal temperature with a meat thermometer; it should read 75°C (165°F).
5. Why is my chicken sticking to the pan?
Pat the chicken dry before cooking to prevent sticking and steaming, which keeps the meat tender.
6. Can I cook all the cubes at once?
Avoid overcrowding the pan; cook in a single layer for the best sear and juiciness.
7. Should I rest the chicken after cooking?
Let the cooked chicken rest for 3 minutes to retain juices and improve tenderness.
8. How should I turn the chicken cubes in the pan?
Use tongs for flipping to avoid piercing the meat and losing juices.
9. How do I reheat cooked chicken cubes?
Reheat in a skillet over low heat or in the microwave, covered loosely, until steaming hot.
10. My chicken is dry after cooking. What can I do?
If chicken turns tough, lower the heat and cook for a minute longer, or add a splash of broth to rehydrate.
This chicken cubes recipe is a small dance of technique and patience, but the juicy, evenly cooked bites are worth every minute. It’s simple enough for a busy weeknight but feels like a step up from the usual grilled or roasted. I keep coming back to this method when I want something reliable, tender, and packed with flavor.
In the end, it’s about understanding the little details—how the size, heat, and resting time all come together. That moment when the cubes are perfectly golden and just cooked through, that’s when I know I’ve nailed it. And honestly, that satisfaction is what keeps me coming back to the stove.