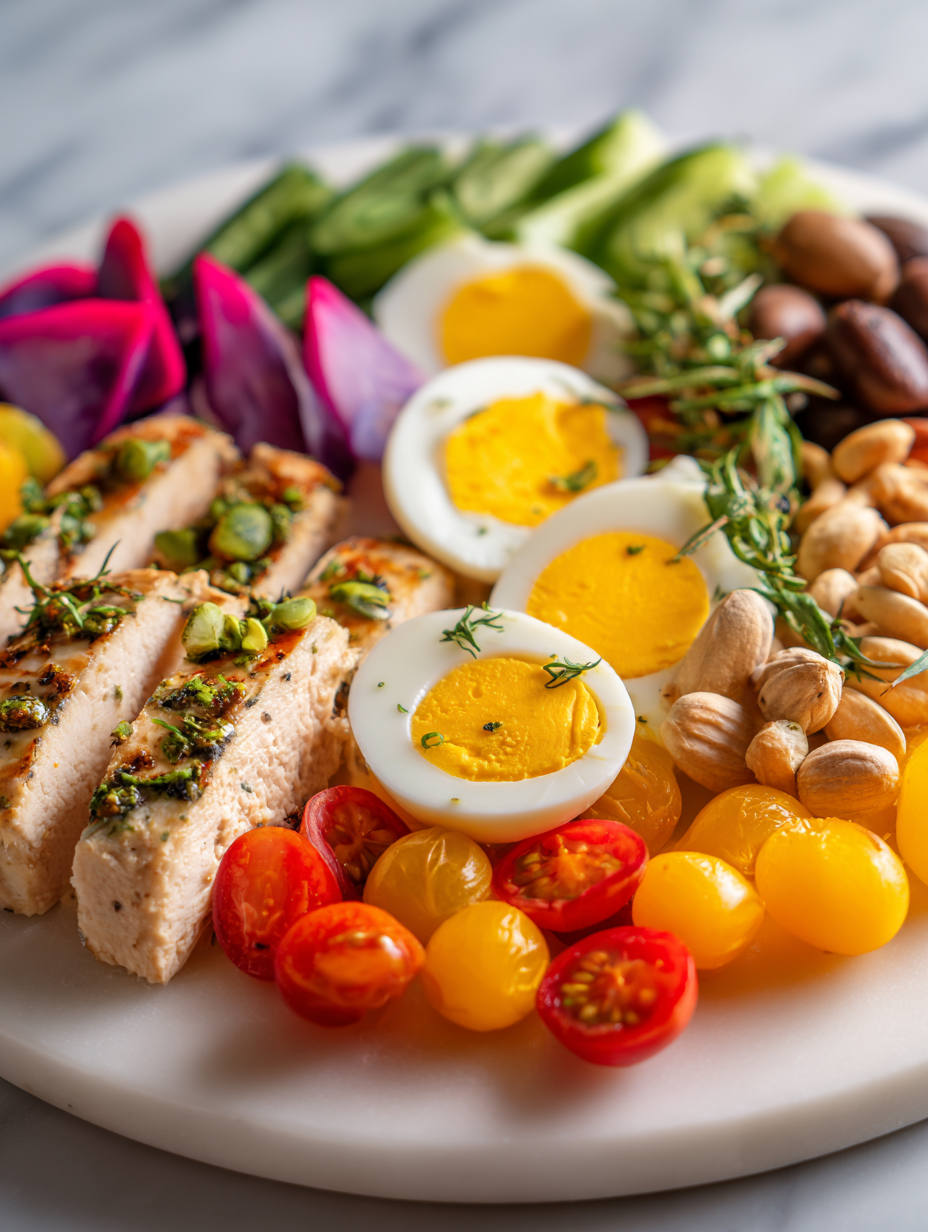
A protein snack plate might seem straightforward, but I see it as a way to celebrate textures and flavors—crisp, creamy, chewy, smoky—all on one small canvas. It’s like a little party for your palate, turning everyday ingredients into a tactile, colorful display that invites curiosity and joy.
This isn’t just about filling up; it’s about the sensory dance of each bite. Juicy slices of cured meat, crunchy nuts, silky cheese, and punchy dips come together in a way that sparks a kind of simple thrill. It’s perfect for sharing or just treating yourself to a mini celebration of flavor.
Plus, it’s endlessly adaptable. You can swap ingredients based on what’s in the fridge or your mood, making it a flexible, approachable way to add a little fun to snack time. No fancy tools needed—just a bit of thought, a few good ingredients, and an eye for color and contrast.
Focusing on how a protein snack plate can serve as a mini celebration of different textures and flavors, turning simple ingredients into a colorful, tactile experience that sparks joy and curiosity at the snack table.
The story behind this recipe
- This recipe was born out of a lazy Sunday afternoon, when I wanted something quick but satisfying—something that felt a little special without much fuss. I started tossing together whatever I had in the fridge, thinking about how a good snack should surprise you with at least one new texture or flavor each time. It struck me that a well-curated protein plate could be like a small, edible mosaic of textures—salty, smoky, crunchy, creamy—all in one handful.
- I remember once assembling a plate for a friend who was recovering from a rough week. Watching her smile as she picked through the colorful array reminded me that snack time isn’t just about hunger—it’s about small moments of joy, a little celebration of simple ingredients. Since then, I’ve kept tweaking it, always chasing that perfect balance of flavor and contrast, like a tiny, edible gallery that you can build on or strip down as needed.
- heading
- story_type
Key ingredients, honest insights
- Cherry tomatoes: I love the burst of sweetness and acidity, especially when they’re just starting to soften and crackle at the edges. Try halving them and roasting lightly for a smoky punch.
- Cured meats: Salami or prosciutto add a rich, salty chew. If you prefer a leaner option, turkey jerky can give that savory hit without the grease, but it won’t be as tender.
- Cheese: Aged cheddar or gouda bring a deep, nutty flavor that contrasts beautifully with fresh ingredients. For a softer touch, try a tangy goat cheese, which melts into your palate.
- Nuts: Toasted almonds or walnuts add crunch and a nutty aroma. If you want extra flavor, toss them in a little smoked paprika or cayenne before roasting.
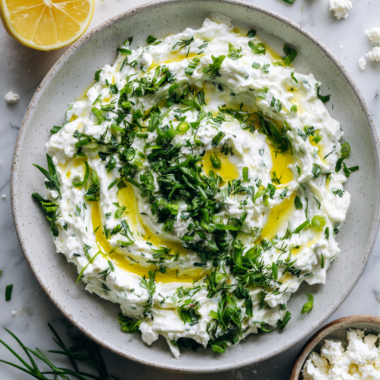
- Dips & spreads: Hummus or a smoky baba ganoush turn this into a more indulgent experience. For a brighter note, mix in lemon zest or a splash of vinegar.
- Fresh herbs: A sprinkle of basil, parsley, or thyme brightens everything up. Chop them finely and sprinkle just before serving to preserve their vibrancy.
- Crackers or bread: A hearty whole-grain cracker or a sliced baguette provides that satisfying crunch and a neutral base for all the toppings.
Spotlight on key ingredients
Cheese:
- I love how aged cheddar or gouda develop a deep, nutty aroma that contrasts sharply with fresh veggies. They turn slightly crumbly at room temp, inviting bites that are rich and satisfying.
- Nuts: Toasted almonds or walnuts add a warm, smoky crunch. During toasting, they crackle and release a buttery scent—watch for slight charring, which quickly turns bitter if overdone.
Cured meats:
- Cherry tomatoes: Their skin shimmers when halved, bursting with a sweet acidity. When roasted lightly, they soften and develop a smoky, oozy interior—perfect for adding juiciness and brightness.
- Salami or prosciutto offer a salty, chewy bite. They have a natural oily sheen and a faintly smoky scent, which intensifies as they sit, inviting you to pick and savor slowly.
Notes for ingredient swaps
- Dairy-Free: Swap cheese for marinated artichoke hearts or olives. They add briny, umami punch without dairy’s richness.
- Nut-Free: Use crispy chickpeas or roasted seeds instead of nuts. They give a similar crunch and toasty flavor.
- Vegetarian Protein: Replace meats with smoked tofu slices or tempeh strips. Both offer a satisfying chew and smoky flavor.
- Low-Sodium: Choose unsalted nuts and herbs, and opt for fresh, unsalted cheeses to control salt levels.
- Vegan: Use plant-based cheeses and hummus, which bring creamy texture and tang. Adds a fresh, bright note.
- Spicy Kick: Incorporate sliced jalapeños or a dab of hot sauce in dips for heat. Just a tiny bit can elevate the flavor.
- Sweet Contrast: Add dried fruits like apricots or figs for a chewy sweetness that balances savory components.
Equipment & Tools
- Cutting board: For slicing meats, cheese, and vegetables.
- Chef’s knife: To cut ingredients precisely and safely.
- Small bowl or ramekin: Holding dips for easy dipping and presentation.
- Skillet: To toast nuts and enhance their aroma.
- Serving platter: To arrange and serve the snack components attractively.
Step-by-step guide to assembling
- Gather all ingredients and tools. Set out cheese, meats, nuts, veggies, dips, and crackers on your prep surface.
- Use a small bowl or ramekin for dips. Place it centrally on your plate for easy access.
- Slice cured meats into manageable strips or rounds, about 0.5 cm thick. Arrange artistically around the bowl.
- Cut cheese into bite-sized cubes or slices. Tuck these into gaps, balancing colors and textures.
- Halve cherry tomatoes and scatter them for pops of color and acidity. Lightly season with salt if desired.
- Toast nuts in a dry skillet over medium heat (around 160°C/320°F) for 3-5 minutes until fragrant. Cool slightly, then sprinkle over the plate.
- Add fresh herbs and optional garnishes, like olives or pickles, to enhance flavor and visual contrast.
- Finish with a few crackers or slices of bread, fanning them out to fill gaps and add crunch.
- Rest the assembled plate for 2-3 minutes to allow flavors to meld slightly. Serve at room temperature.
Allow the assembled plate to sit at room temperature for 2-3 minutes before serving. This helps flavors settle and makes for a more harmonious bite. Finish with a final sprinkle of fresh herbs or a drizzle of olive oil if desired.
How to Know It’s Done
- Colors should be vibrant and well-distributed, inviting the eye.
- Cheese and meats should feel firm but not crumbly—pick up a piece, it should hold shape.
- Nuts should be toasted and aromatic, not burnt or bitter.
Colorful Protein Snack Plate
Ingredients
Equipment
Method
- Arrange your platter with the cheese, cured meats, and crackers, creating a colorful base that invites the eye.
- Slice the cured meats into thin strips or rounds, then artfully layer them around the cheese, adding visual interest and texture.
- Halve the cherry tomatoes and scatter them across the plate for pops of bright color and juicy acidity.
- Lightly toast the nuts in a dry skillet over medium heat until fragrant and golden, then cool slightly and sprinkle over the plate for crunch.
- Place a small bowl of hummus or baba ganoush at the center or side of the platter for dipping and adding creamy contrast.
- Sprinkle the freshly chopped herbs over all components to add a burst of fresh aroma and color.
- Arrange the crackers or bread slices around the platter, filling gaps and adding a satisfying crunch to each bite.
- Give the platter a final glance and make any adjustments for balance and visual appeal, then serve at room temperature to enjoy the full range of textures and flavors.
Notes
Pro tips for perfect snack plates
- Use a hot skillet to get a quick sear, creating a smoky crust on meats.
- Chill your nuts before roasting for an even toast and crunchier texture.
- Arrange ingredients by color and texture to make the plate visually inviting.
- Let the cheese come to room temperature before serving to enhance flavor and creaminess.
- Use a sharp knife for clean cuts, especially on delicate cured meats and cheeses.
- Drizzle dips with a tiny splash of olive oil or lemon zest to brighten flavors.
- Rest assembled plates for 2 minutes so flavors meld and the presentation stays tidy.
Common mistakes and how to fix them
- FORGOT to check ingredient freshness → Use fresh, vibrant ingredients for better flavor.
- DUMPED ingredients into the plate → Arrange thoughtfully for visual appeal and balance.
- OVER-TORCHED nuts or meats → Keep a close eye to prevent burning; remove from heat early.
- MISSED resting time → Let the plate sit 2 minutes for flavors to meld and settle.
Quick fixes and pantry swaps
- When ingredients look dull, splash with a little lemon juice for brightness.
- If nuts are bitter, dump them back in the pan for a quick toast.
- Over-torched meats? Shield with a damp paper towel and lower the heat.
- Forgot to serve immediately? Rest the plate for 2 minutes for better flavor melding.
- Pantry swap: Use smoked paprika instead of fresh herbs for a quick flavor boost.
Prep, store, and reheat tips
- Prep ingredients like cheese, meats, and veggies a day ahead. Keep them covered in the fridge, smell should stay fresh and inviting.
- Store nuts in an airtight container at room temperature or in the fridge for up to a week. Toast just before serving for maximum crunch and aroma.
- Assemble the plate partially in advance—place cheeses, meats, and nuts on the platter, cover loosely, and refrigerate for up to 24 hours. Expect some ingredients to release moisture if stored too long together.
- Dips and spreads can be made a day ahead. Keep chilled in airtight containers; flavors often deepen overnight, but check for separation or dryness before serving.
- Reheating isn’t usually necessary, but if you want nuts extra crispy, toast them again in a hot skillet for 1–2 minutes until fragrant. Let cool slightly before plating to avoid burning your fingers.
Top questions about Protein Snack Plate
1. What exactly is a protein snack plate?
A protein snack plate is a colorful assortment of high-protein foods like meats, cheeses, nuts, and dips, arranged on a platter. It’s meant to be a fun, tactile, and flavorful experience, not just quick bites.
2. Can I customize the ingredients?
Yes, you can customize it with your favorite proteins—swap meats for tofu, add seeds, or include more veggies for crunch.
3. Can I switch ingredients easily?
Absolutely. Using different cheeses, nuts, or dips can change the flavor profile completely, making each plate unique.
4. Should I serve it cold or at room temperature?
Serve it at room temperature, which helps flavors settle and makes textures more appealing. Keep cold ingredients refrigerated until just before serving.
5. How far in advance can I prepare it?
A good rule is to assemble it about 10-15 minutes before eating so flavors meld and ingredients stay fresh.
6. What’s the best way to present it?
Use a large, flat platter or board. It makes arranging easier and creates an inviting visual contrast between ingredients.
7. When is the best time to serve a protein snack plate?
It’s versatile for any occasion—snack, light meal, party platter, or even a picnic. It’s especially good for sharing.
8. How long does it last in the fridge?
Yes, most ingredients like cheese, cured meats, and nuts keep well for a few days in the fridge if covered properly. Dips are best fresh, but can be stored for a day or two.
9. How do I refresh ingredients that look dull?
If ingredients look a little dull, splash them with lemon juice or drizzle olive oil to brighten flavors before serving.
10. Any quick tips for preparing or cutting ingredients?
Use a sharp knife for clean cuts on cheese and meats. Toast nuts just before serving to boost their crunch and aroma.
This plate isn’t just about protein; it’s about the joy of combining textures and flavors in a simple, honest way. Sometimes, the best snacks are the ones that surprise your senses and make you smile without much fuss.
In a world that’s constantly rushing, a well-assembled snack plate can be a small moment of calm and curiosity. It’s a reminder that good food doesn’t have to be complicated to be satisfying—and that the best bites come from a little thought and a lot of flavor.