After a big holiday feast, leftover turkey can feel like a chore—dry, uninspired, and just plain boring. But I’ve found that turning those leftovers into Turkey Roll Ups saves the day. It’s a simple way to reinvent turkey, wrapping it with cheese and herbs, making each bite feel special without extra fuss.
This recipe is about making the most of what you already have, in a way that feels cozy and manageable. No fancy ingredients needed, just some common staples and a little bit of love. It’s perfect for those days when you want comfort food that’s quick to pull together and totally satisfying.
Plus, it’s flexible—use what you’ve got, tweak the fillings, and make it your own. It’s a little victory after the chaos of holiday dinners, turning leftovers into something that feels fresh and full of flavor, even if it’s just for a weeknight treat.
Focusing on this recipe as a way to use up leftover turkey from holiday feasts, turning what could be dry and boring into something cozy, manageable, and full of flavor. It’s about transforming leftovers into a quick, satisfying meal that feels like a little victory after the chaos of big family dinners.
The story behind this recipe
- This recipe grew out of late-night fridge raids during a busy week. I wanted something warm, quick, and satisfying, but also a little different from the usual turkey sandwiches.
- One evening, I started wrapping turkey slices with cheese and herbs I had on hand. The result was unexpectedly good—melty, flavorful, and easy enough to throw together in a skillet.
- It’s become a go-to for those days when I need comfort food that doesn’t require much fuss, especially after holiday feasts where turkey is plentiful but leftovers need a new purpose.
Key ingredients and tips
- Turkey: I like using sliced leftover roast turkey, but shredded works just as well. It’s juicy and tender—look for that slight shimmer of juices. Swap with chicken if turkey’s not available, but the flavor will be milder.
- Cheese: I prefer a sharp cheddar or a creamy Swiss; the meltiness and flavor boost the whole roll. If you want a milder taste, go for mozzarella—less punch, more goo. For dairy-free, try a nut-based cheese; it melts differently but still adds richness.
- Herbs: Fresh parsley or thyme brighten the flavor with a clean, herbal note. Dry herbs work in a pinch, but they can be more pungent. Feel free to add a tiny dash of rosemary or sage for extra depth.
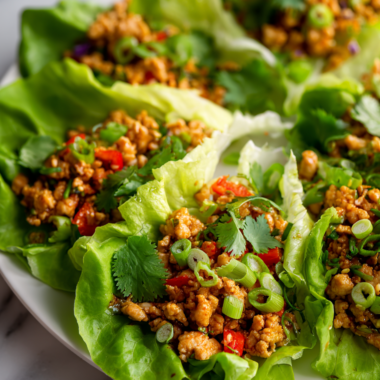
- Wraps: I use thin-sliced deli turkey or large lettuce leaves for a lighter option. Whole wheat tortillas work well too, adding a nutty flavor and satisfying chew. Skip if you prefer gluten-free—perhaps collard greens or rice paper.
- Spread: Mustard or a touch of mayo helps everything stick and adds tang. If you want a smoky kick, try chipotle mayo. For a dairy-free version, hummus brings creaminess and flavor, but it’s less sharp.
- Extras: A few chopped green onions or a sprinkle of crushed red pepper can add a little zing. Don’t overload—less is more here, let the main ingredients shine.
- Oil & Seasoning: A drizzle of olive oil or a quick spray on the pan helps with browning. Salt and pepper are essential—taste and adjust to your liking. If you’re feeling bold, a hint of garlic powder can boost flavor.
Spotlight on key ingredients
Turkey:
- I like using sliced leftover roast turkey, but shredded works just as well. It’s juicy and tender—look for that slight shimmer of juices. Swap with chicken if turkey’s not available, but the flavor will be milder.
- Cheese: I prefer a sharp cheddar or a creamy Swiss; the meltiness and flavor boost the whole roll. If you want a milder taste, go for mozzarella—less punch, more goo. For dairy-free, try a nut-based cheese; it melts differently but still adds richness.
Herbs:
- Cheese: I prefer a sharp cheddar or a creamy Swiss; the meltiness and flavor boost the whole roll. If you want a milder taste, go for mozzarella—less punch, more goo. For dairy-free, try a nut-based cheese; it melts differently but still adds richness.
- ingredient
- ingredient
Notes for ingredient swaps
- Turkey: I prefer using leftover roast turkey slices, but shredded cooked chicken works just as well. Watch for that slight shimmer of juices—swap with chicken if turkey’s not available, but the flavor will be milder.
- Cheese: Sharp cheddar or Swiss melt beautifully and add flavor. For a milder, gooey option, mozzarella is great. Dairy-free? Try nut-based cheeses—less melt, but still rich and satisfying.
- Herbs: Fresh parsley or thyme bring brightness. Dried herbs are okay in a pinch, but they’re more pungent—use sparingly. Consider a dash of rosemary or sage for added depth.
- Wraps: Thin-sliced deli turkey or large lettuce leaves work well. Whole wheat tortillas add nuttiness and texture. Need gluten-free? Collard greens or rice paper are good alternatives.
- Spread: Mustard or mayo helps hold everything together. For smoky flavor, chipotle mayo works. For dairy-free, hummus adds creaminess but less tang. Adjust to your preference.
- Extras: Green onions or crushed red pepper add zing, but don’t overdo it—let the turkey and cheese shine. Use sparingly for balanced flavor.
- Oil & Seasoning: Olive oil or a quick spray helps with browning. Salt and pepper are essential—taste and adjust. A pinch of garlic powder can boost flavor, if desired.
Equipment & Tools
- Large skillet: To cook and brown the roll-ups evenly.
- Cutting board: To assemble and roll ingredients.
- Sharp knife: To slice the roll-ups and serve.
- Tongs or spatula: To handle hot roll-ups safely.
Step-by-step guide to turkey roll ups
- Gather your ingredients: sliced leftover turkey, cheese, herbs, wraps, and any extras you like. Preheat a large skillet over medium heat (about 180°C / 350°F).
- Lay out a slice of turkey on a clean cutting board. If using shredded turkey, spread a thin layer evenly. Place a slice of cheese on top, about 1-2 cm thick.
- Sprinkle chopped herbs over the cheese—parsley, thyme, or whatever you have. Add any extras like green onions or red pepper flakes for zing.
- Carefully roll up the turkey and cheese into a tight log, sealing the edges. If the wrap feels loose, secure with a toothpick or press gently.
- Heat a drizzle of olive oil in the skillet. Once shimmering, place the turkey roll-ups seam-side down. Cook for 3-4 minutes until golden brown and crispy on the outside.
- Flip and cook the other side for another 2-3 minutes. The cheese should be melty, and the outside nicely browned. Keep an eye to avoid burning.
- If the cheese isn’t quite melting or the outside isn’t browning evenly, lower the heat slightly and cook a bit longer. If the turkey starts to dry out, cover loosely with a lid.
- Remove from heat and let rest for 2 minutes. This helps the cheese set a little and makes handling easier. Remove toothpicks if used.
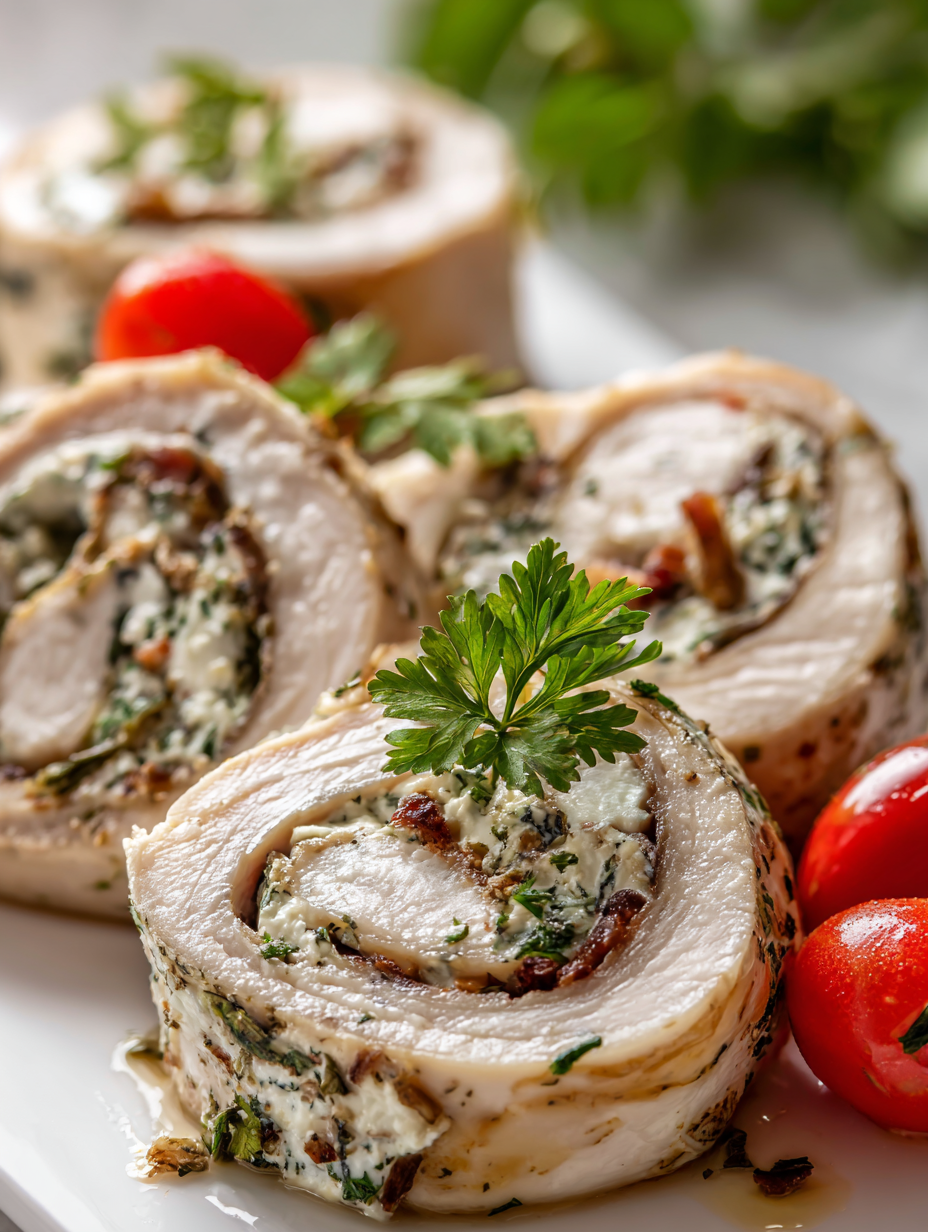
- Slice each roll-up in half diagonally for presentation. Plate immediately with a side salad or your favorite sauce. Serve hot, with the cheese oozy and the herbs fragrant.
Let the roll-ups rest for 2 minutes off heat to settle the cheese. Slice diagonally for serving, and plate with a simple salad or sauce. Serve immediately while hot and gooey.
How to Know It’s Done
- Cheese is fully melted and starting to ooze.
- Outside is golden and crispy, not burnt.
- Turkey is heated through and slightly browned.
Turkey Roll Ups
Ingredients
Equipment
Method
- Lay out the turkey slices on a clean cutting board. If using shredded turkey, spread it evenly into a thin layer.
- Place a slice of cheese on top of each turkey slice or shredded layer, covering it evenly.
- Sprinkle chopped herbs over the cheese, adding a fresh, fragrant note that brightens each roll-up.
- If using wraps like lettuce or tortillas, spread a thin layer of mustard or mayo on each before placing the turkey, then roll up tightly to seal.
- Starting from one end, carefully roll up each turkey slice with cheese and herbs into a tight log, sealing the edges as you go.
- Heat the olive oil in a large skillet over medium heat until shimmering and gently crackling, indicating it’s hot enough.
- Place the turkey roll-ups seam-side down in the skillet, cooking for about 3-4 minutes until golden and crispy on the outside, with the cheese starting to melt.
- Flip the roll-ups carefully with tongs or a spatula, cooking for another 2-3 minutes until the outside is browned and the cheese is gooey inside.
- Remove the roll-ups from the skillet and let them rest for 2 minutes to allow the cheese to set and prevent messy ooze.
- Slice each roll-up diagonally for a beautiful presentation, then serve immediately—hot, crispy, and filled with melted cheese and fresh herbs.
Pro tips for perfect Turkey Roll Ups
- Preheat your pan: Make sure the skillet is hot enough—listen for a gentle crackle when the oil hits the surface.
- Seal the edges: When rolling, dampen the edge slightly to help it stick and stay tight during searing.
- Cook in batches: Don’t overcrowd the pan; give each roll-up space to brown evenly and develop a crispy exterior.
- Check cheese melt: Gently press the roll with a spatula—if it feels soft and the cheese is oozy, it’s ready to flip.
- Use medium heat: Too high, and the outside burns before the inside melts; too low, and you miss that golden crunch.
- Rest briefly after cooking: Let the roll-ups sit for a minute to allow the cheese to set, avoiding messy ooze when slicing.
- Finish with a squeeze of lemon: Brightens flavors and adds a fresh zing—don’t skip this final touch for extra vibrancy.
Common mistakes and how to fix them
- FORGOT to check internal temperature → Use a thermometer for perfect doneness.
- DUMPED too much oil → Use just a light spray or a teaspoon to avoid greasiness.
- OVER-TORCHED the roll-ups → Cook on medium heat; flip frequently to prevent burning.
- SKIPPED resting time → Let roll-ups sit 2 minutes to set cheese and avoid ooze explosion.
Quick fixes and pantry swaps
- If the roll-ups stick, splash a little water in the pan—helps release and prevents tearing.
- When cheese isn’t melting fast enough, cover the skillet briefly—traps heat for oozy results.
- Dumped too much oil? Wipe excess with a paper towel—avoids greasy bites and crispy outside.
- Over-torched edges? Patch with a damp cloth during cooking—saves from burnt, bitter flavors.
- When in doubt, pantry swap with cooked bacon bits—adds smoky crunch and flavor contrast.
Prep, store, and reheat tips
- You can assemble the roll-ups a few hours ahead and keep them refrigerated; just cover tightly with plastic wrap. The flavors meld nicely overnight, and the cheese stays fresh.
- Store cooked roll-ups in an airtight container in the fridge for up to 2 days. Reheat in a hot skillet or microwave until the cheese is melty and edges crisp up slightly—look for that tempting sizzle.
- Leftovers will lose some crispness, so plan to reheat just before serving to regain that satisfying outside crunch. Expect a softer texture after refrigeration.
- For freezer prep, wrap individual roll-ups tightly in plastic wrap and freeze up to 1 month. Thaw overnight in the fridge, then reheat as above, watching for that cheesy, golden finish.
- Reheating tips: Use a skillet over medium heat—about 180°C/350°F—until warm and crispy. Keep an eye on the cheese to avoid over-melting or burning. The smell of toasted cheese and herbs will signal they’re ready.
Top questions about Turkey Roll Ups
1. Can I use shredded turkey instead of slices?
Use thin slices of leftover turkey, and look for that slight shimmer of juices for freshness. You can swap in cooked chicken if turkey isn’t available, but expect a milder flavor.
2. What cheese works best for melting?
A sharp cheddar or Swiss cheese melts well and adds flavor. For a milder, gooey texture, mozzarella works. Dairy-free options like nut-based cheeses melt differently but still bring richness.
3. Can I substitute dried herbs?
Fresh herbs like parsley or thyme give a bright, herbal flavor. Dried herbs are okay if used sparingly. Feel free to add rosemary or sage for extra depth.
4. What can I use instead of wraps?
Thin-sliced deli turkey or large lettuce leaves work as wraps. Whole wheat tortillas add nuttiness, but opt for collard greens or rice paper if gluten-free.
5. What spreads are best?
Mustard or mayo helps everything stick and adds tang. For smoky flavor, try chipotle mayo. Hummus adds creaminess if you’re dairy-free, but it’s less punchy.
6. Can I add other flavorings?
Chopped green onions or red pepper flakes add zing but keep it balanced. Use sparingly so the main ingredients shine without overwhelming.
7. How do I prevent burning?
A light spray of olive oil or a small drizzle helps with browning. Salt and pepper are essential—taste and adjust. Garlic powder can give a flavor boost if desired.
8. Can I prepare these in advance?
You can assemble the roll-ups a few hours ahead, cover tightly, and refrigerate. Reheat in a hot skillet or microwave until the cheese is melty and the outside crisp.
9. How long do leftovers last?
Store leftovers in an airtight container for up to 2 days in the fridge. Reheat until hot and crispy, watching for that satisfying sizzle and melty cheese.
10. What if the roll-ups stick or don’t melt?
If cheese isn’t melting, cover the skillet briefly to trap heat. For stuck roll-ups, splash water and loosen with a spatula. Use a thermometer to check internal temperature for safety.
This dish is a reminder that leftovers can become something special with just a little care and attention. The warm, cheesy bites with herbs and that crispy exterior make it feel like a little victory after busy days or holiday chaos.
In the end, it’s about transforming what’s already in your fridge into something cozy and satisfying. No fuss, just flavor, and a bit of that homemade magic that keeps leftovers from feeling dull.