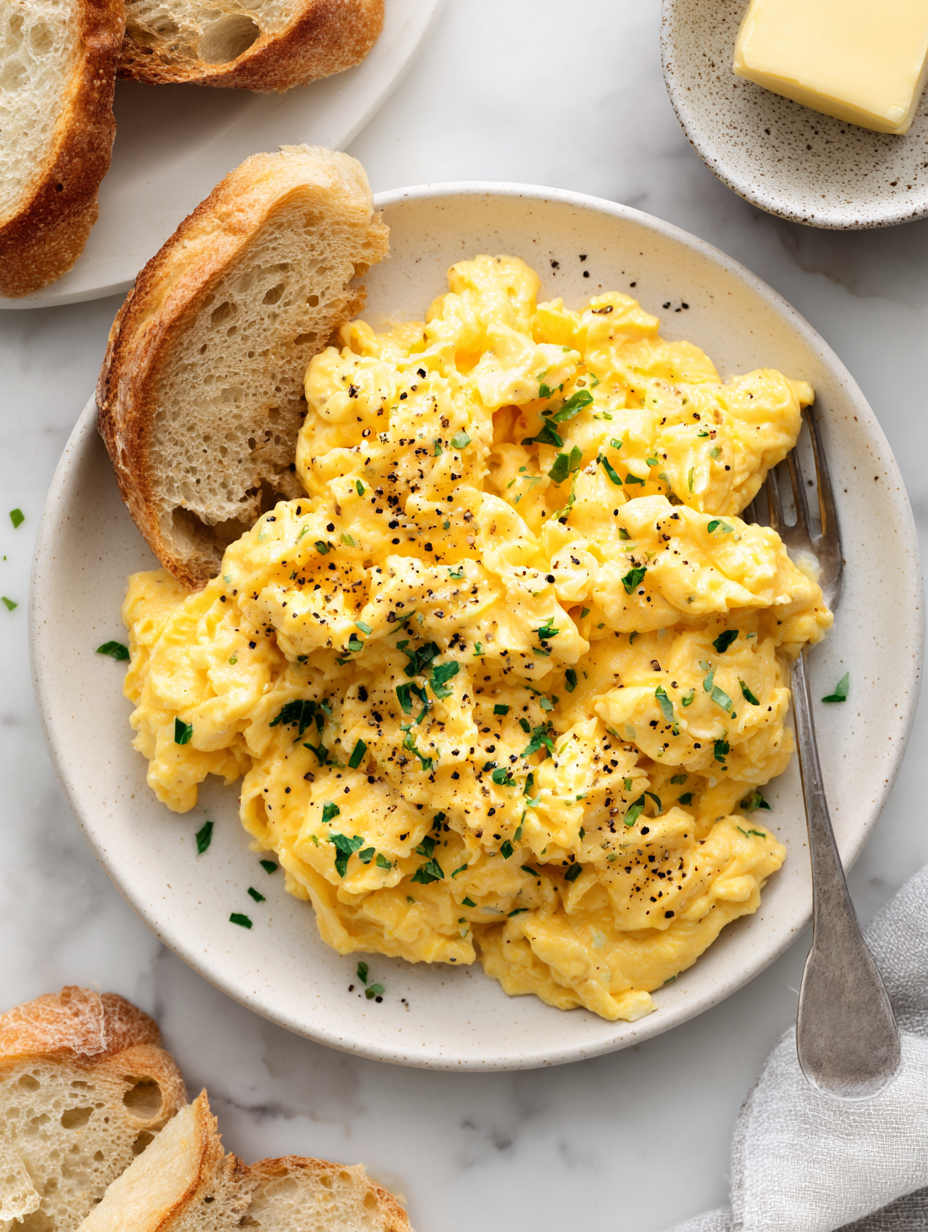
Blog

  • The Cozy Chef’s Unusual Spin on Taco Soup

    The Cozy Chef’s Unusual Spin on Taco Soup

    Imagine a chilly evening, the aroma of spices filling the air, and a pot simmering with vibrant ingredients. That’s the magic of this taco soup, a dish that marries comfort with an unexpected twist of flavor. I stumbled upon this variation when looking to add a bit of chaos to my weekly meal routine, and it turned into a delightful discovery.

    This recipe is more than just a warm bowl; it’s a reflection of my love for bold flavors and quick fixes. Perfect for busy weeknights or lazy weekends, this taco soup brings everyone to the table with ease. Its secret lies in combining traditional ingredients with a dash of experimentation, making each spoonful a small adventure.

    Taco Soup

    Taco soup is a hearty, flavorful dish that combines ground meat, beans, corn, and spices simmered into a thick, savory broth. The soup is cooked on the stovetop until all ingredients meld together, resulting in a chunky, comforting bowl with vibrant colors and rich aromas.
    Prep Time 10 minutes
    Cook Time 30 minutes
    Total Time 40 minutes
    Servings: 6
    Course: Main Course
    Cuisine: Mexican
    Calories: 330

    Ingredients
      

    • 1 lb ground beef or turkey, chicken, or plant-based alternative
    • 1 can diced tomatoes 14.5 oz can, undrained
    • 1 can black beans 15 oz can, drained and rinsed
    • 1 cup corn kernels fresh, frozen, or canned
    • 1 packet taco seasoning about 1 oz packet
    • 4 cups chicken broth
    • 1 medium onion finely chopped
    • 2 cloves garlic minced
    • 1 tablespoon olive oil

    Equipment

    • Large pot or Dutch oven
    • Wooden spoon or spatula

    Method
     

    1. Add olive oil to a large pot and heat over medium heat until shimmering.
      1 lb ground beef
    2. Sauté the chopped onion until it becomes translucent and fragrant, about 3-4 minutes, stirring occasionally.
      1 lb ground beef
    3. Add the minced garlic to the onions and cook for another 30 seconds until it releases a warm aroma.
      1 lb ground beef
    4. Increase the heat to medium-high, then add the ground beef to the pot. Break it apart with a spoon and cook until browned and cooked through, about 6-8 minutes.
      1 lb ground beef
    5. Drain any excess fat if necessary, then stir in the taco seasoning until evenly coated and fragrant, about 1 minute.
      1 lb ground beef
    6. Pour in the chicken broth and add the diced tomatoes (with juices), black beans, and corn. Stir everything together to combine.
      1 lb ground beef
    7. Bring the mixture to a boil, then reduce the heat to low. Cover the pot and let it simmer gently for 20-25 minutes, allowing flavors to meld and the soup to thicken slightly.
    8. Uncover and stir the soup, checking the seasoning. Adjust salt or spice if needed, then cook for an additional 5 minutes uncovered to allow excess moisture to evaporate.
    9. Turn off the heat and ladle the hot, hearty taco soup into bowls. Garnish with toppings like shredded cheese, sour cream, chopped cilantro, or sliced jalapeños, if desired.

    As the seasons shift, so do our cravings for warming, hearty dishes like this taco soup. It’s a perfect way to bring friends and family together around the table, sharing laughs and spoonsful of spicy goodness. No matter the occasion, this soup is here to make dinner both easy and memorable.

    Plus, it’s endlessly adaptable—add beans, swap out meats, or toss in leftover vegetables. Once you master this base, your kitchen transforms into a stage for your culinary mischief. That’s the real comfort in cooking: knowing you can create something special with just a few simple ingredients.

  • Unexpected Pumpkin Muffin Secrets That Will Transform Your Baking

    Unexpected Pumpkin Muffin Secrets That Will Transform Your Baking

    Once you try this version, you’ll see pumpkin muffins in a whole new light. They’re not just a seasonal indulgence but a year-round delight. Plus, the tweaks I’ve added keep them moist and flavorful longer—no more dry crumbs or bland bites.

    Moist Pumpkin Muffins

    These pumpkin muffins are made by mixing mashed pumpkin with wet and dry ingredients, then baking until golden and fluffy. The addition of ingredients like yogurt and oils helps keep them moist and tender, resulting in a soft crumb with a slight rise. They have a warm, inviting appearance with a light, spongy texture.
    Prep Time 15 minutes
    Cook Time 20 minutes
    Total Time 35 minutes
    Servings: 12
    Course: Main Course
    Cuisine: American
    Calories: 210

    Ingredients
      

    • 1 1/2 cups all-purpose flour
    • 1 teaspoon baking soda
    • 1/2 teaspoon ground cinnamon
    • 1/4 teaspoon ground nutmeg
    • 1/2 cup granulated sugar
    • 1/4 cup brown sugar light or dark
    • 1/2 cup plain Greek yogurt
    • 1/4 cup vegetable oil
    • 2 large eggs
    • 1 cup mashed pumpkin or canned pumpkin
    • 1 teaspoon vanilla extract

    Equipment

    • Mixing bowls
    • Whisk or spoon
    • Measuring cups and spoons
    • Muffin tin
    • Paper or silicone muffin liners
    • Cooling Rack

    Method
     

    1. Preheat your oven to 350°F (175°C) and line a muffin tin with paper or silicone liners. Gather all your ingredients for easy assembly.
    2. In a large mixing bowl, whisk together the dry ingredients: flour, baking soda, cinnamon, and nutmeg until well combined. This ensures even distribution of spices and leavening agents.
    3. In a separate bowl, combine the sugars—granulated and brown—and whisk them until they blend smoothly. The sugars will start to dissolve slightly, creating a fragrant mixture.
    4. Add the eggs one at a time to the sugar mixture, whisking well after each addition to develop a light, slightly frothy texture.
    5. Stir in the Greek yogurt, vegetable oil, vanilla extract, and mashed pumpkin until the mixture is smooth and evenly combined. Look for a uniform, slightly thick batter with no streaks.
    6. Gradually fold the dry ingredients into the wet mixture using a spatula or spoon. Mix gently just until no streaks of flour remain—be careful not to overmix, as this keeps the muffins tender.
    7. Spoon the batter into the prepared muffin tin, filling each cup about three-quarters full. You’ll see the batter mound nicely with a smooth top surface.
    8. Bake in the preheated oven for 18-20 minutes, or until the tops are golden and a toothpick inserted into the center comes out clean. The muffins will smell warm and inviting as they bake.
    9. Remove the muffins from the oven and let them cool in the tin for about 5 minutes. Then transfer them to a cooling rack to cool completely, allowing the crumb to set and the flavors to meld.
    10. Once cooled, the muffins will have a soft, moist crumb with a slight dome on top. Their surface is lightly textured and golden brown.

    Notes

    For an extra touch, sprinkle some cinnamon sugar on top before baking for a sweet crust.
    Whether you’re making these for guests or just a cozy weekend morning, they never fail to bring smiles around the table. Keep the recipe handy—these muffins might just inspire a new baking tradition you’ll look forward to all seasons.

  • Creamy White Chicken Chili: A Cozy Winter Treasure

    Creamy White Chicken Chili: A Cozy Winter Treasure

    As winter’s chill sets in, I found myself craving something hearty yet comforting. This White Chicken Chili offers a unique twist on traditional chili—it’s smooth, slightly tangy, and bursting with flavors you wouldn’t expect from a quick weeknight dish.

    What sets this recipe apart is its creamy white base, made with tender shredded chicken simmered in a velvety broth spiced just right. The blend of beans, with a hint of lime and cumin, creates a bright counterpoint that makes each spoonful memorable. It’s the kind of meal that warms you from the inside out, with no fuss at all.

    Every time I make this, I’m reminded of cozy Sunday afternoons spent with family, the kitchen filled with the aroma of garlic and cumin. It’s a dish that feels like a warm hug—simple, satisfying, yet full of surprises. Plus, it’s perfect for those busy days when you need comfort fast.

    White Chicken Chili

    This White Chicken Chili is a creamy, smooth soup made with shredded chicken simmered in a velvety broth seasoned with cumin and lime. It’s loaded with beans and features a slightly tangy flavor profile, resulting in a hearty yet light final texture that is both comforting and bright.
    Prep Time 15 minutes
    Cook Time 30 minutes
    Total Time 45 minutes
    Servings: 4
    Course: Main Course
    Cuisine: American
    Calories: 350

    Ingredients
      

    • 1 pound boneless, skinless chicken breasts cooked and shredded
    • 2 cups chicken broth
    • 1 can white beans drained and rinsed
    • 1 cup corn kernels fresh or frozen
    • 1 small onion diced
    • 2 cloves garlic minced
    • 1 teaspoon cumin
    • 1/2 teaspoon lime juice
    • 1 tablespoon olive oil
    • Salt and pepper to taste

    Equipment

    • Large pot or Dutch oven
    • Wooden spoon or silicone spatula

    Method
     

    1. Season the chicken breasts with salt and pepper, then cook in a skillet over medium heat until golden brown and cooked through, about 6-8 minutes per side. Remove from heat and shred the chicken with two forks.
    2. In a large pot, heat olive oil over medium heat. Add the diced onion and cook until translucent and fragrant, about 5 minutes, stirring occasionally.
    3. Stir in the minced garlic and cumin, cooking until the garlic is fragrant, about 30 seconds. The mixture should smell warm and aromatic.
    4. Add the shredded chicken, chicken broth, drained white beans, and corn to the pot. Bring the mixture to a gentle simmer, about 10 minutes, allowing flavors to meld and the soup to thicken slightly.
    5. Stir in lime juice and adjust seasoning with salt and pepper as needed. Continue simmering for another 2-3 minutes to incorporate the bright, tangy flavor.
    6. Check the seasoning, then ladle the creamy, white chili into bowls. Serve hot, garnished with fresh cilantro or a squeeze of more lime if desired.

    This White Chicken Chili has become a staple in my winter menu, thanks to its comforting nature and minimal prep. It’s a dish that balances ease and depth, ideal for cozy evenings or last-minute dinners with friends.

    Whenever I serve this chili, I know it will bring smiles around the table. The rich, creamy texture, combined with a touch of bright citrus, makes it special enough to feel like a treat, even on the busiest nights. It’s a recipe I’ll keep coming back to, season after season.

  • The Secret Sparkle: A Champagne Slushie with a Twist

    The Secret Sparkle: A Champagne Slushie with a Twist

    Imagine a summer evening where the air is thick with the scent of ripe peaches and the distant hum of city life. You want something sparkling, something chilled, but with a playful twist that surprises your senses. That’s where this champagne slushie becomes your new favorite secret to impress.

    This isn’t just any frozen cocktail; it’s a nostalgic dance of bubbly elegance and icy refreshment. Crafting it with a curious touch elevates simple ingredients into a celebration in every sip. It’s perfect for spontaneous soirées or quiet moments alone, craving a little luxury.

    Champagne Peach Slushie

    This champagne peach slushie combines sparkling wine with blended ripe peaches to create a frosty, effervescent beverage. The mixture is puréed until smooth and served chilled, offering a refreshing and visually appealing drink with a slightly slushy texture.
    Prep Time 10 minutes
    Total Time 10 minutes
    Servings: 2
    Course: Main Course
    Cuisine: American
    Calories: 150

    Ingredients
      

    • 2 cups ripe peaches, peeled and sliced preferably yellow or white peaches
    • 1 cup champagne chilled for best effect
    • 2 tablespoons honey or simple syrup optional, to taste
    • 1 cup ice cubes

    Equipment

    • Blender
    • Measuring Cups
    • peeler
    • Knife

    Method
     

    1. Peel the peaches using a peeler or knife, then slice them into smaller chunks to make blending easier.
    2. Place the sliced peaches, honey or simple syrup, and ice cubes into the blender.
    3. Pour the chilled champagne into the blender, then secure the lid firmly.
    4. Blend on high speed until the mixture is smooth, frosty, and has a slushy texture, about 30-40 seconds.
    5. Stop the blender and check the consistency; if it’s too thick, add a splash more champagne and blend briefly to incorporate.
    6. Pour the slushie into chilled glasses, allowing the icy mixture to mound slightly over the rim.
    7. Garnish with a small peach slice or a sprig of mint if desired, and serve immediately.

    Notes

    For an extra burst of flavor, add a splash of fresh lemon juice before blending. Best enjoyed immediately while frosty and bubbly.
    As you sit back with a glass of this shimmering slushie, notice how the cold numbs your tongue just enough to heighten the champagne’s crispness. The slight fruit sweetness mingles with sparkling finesse, making every sip a delicate adventure.

    This recipe arrives just in time for heatwaves or dinner parties that need a tiny bit of sparkle. It’s an easy fix for unexpected guests or a thoughtful way to elevate an ordinary afternoon. Pour, blend, sip—simple, elegant, and refreshingly unexpected.

  • Hidden Gem: Vegan Pumpkin Soup with a Twist

    Hidden Gem: Vegan Pumpkin Soup with a Twist

    As the leaves turn and autumn vibes settle in, I find myself craving something warm and unexpectedly exciting. This isn’t your average pumpkin soup – it’s a quirky vegan variation that challenges the norm with a dash of citrus and a hint of spice. The aroma of roasted pumpkin mingled with fresh ginger always surprises my guests.

    What makes this recipe a personal favorite is its ability to transform simple ingredients into a comforting masterpiece. It’s a secret weapon during busy weekdays or when friends drop by unannounced. Plus, it’s entirely plant-based, so everyone can enjoy the cozy, velvety texture without guilt.

    Spiced Vegan Pumpkin Soup with Citrus and Ginger

    This vegan pumpkin soup is made by roasting pumpkin and blending it with fresh ginger, citrus zest, and spices to create a smooth, velvety texture. The soup is finished on the stovetop to develop flavor and served warm, showcasing a bright orange color and creamy consistency.
    Prep Time 15 minutes
    Cook Time 30 minutes
    Total Time 45 minutes
    Servings: 4
    Course: Main Course
    Cuisine: Vegan
    Calories: 180

    Ingredients
      

    • 1 kg pumpkin peeled, seeded, and chopped
    • 2 thumb-sized fresh ginger grated
    • 1 tablespoon olive oil for roasting
    • 1 teaspoon cumin ground
    • 1 pinch cayenne pepper optional for heat
    • 4 cups vegetable broth
    • 1 large orange zested and juiced
    • to taste salt
    • to taste black pepper

    Equipment

    • Baking sheet
    • Blender
    • Dutch oven or large pot
    • Soup ladle

    Method
     

    1. Preheat your oven to 400°F (200°C). Spread the chopped pumpkin on a baking sheet, drizzle with olive oil, and sprinkle with cumin and cayenne. Roast for about 25-30 minutes until the pumpkin is tender and slightly caramelized around the edges.
    2. While the pumpkin roasts, grate fresh ginger and zest the orange, then juice it, saving both the zest and juice.
    3. Once the pumpkin is roasted and cooled slightly, transfer it to a blender and add the grated ginger, orange zest, and orange juice.
    4. Blend until smooth and creamy, adding a little vegetable broth if needed to help it blend fully.
    5. Pour the blended mixture into a large pot or Dutch oven. Add the remaining vegetable broth and bring to a simmer over medium heat.
    6. Allow the soup to simmer gently for 10-15 minutes, stirring occasionally, until heated through and flavors meld; season with salt and black pepper to taste.
    7. Taste and adjust seasoning, adding more salt, pepper, or orange juice as desired for brightness.
    8. Serve the soup hot in bowls, garnished optionally with extra orange zest or a drizzle of olive oil for presentation.

    Notes

    For an extra layer of flavor, add a splash of coconut milk before serving. This soup pairs well with crusty bread or a fresh green salad.

    This soup isn’t just a meal; it’s a little celebration of seasonal produce and inventive flavors. Its bright color and bold taste make it perfect for kickoff parties or a quiet night in. No matter the occasion, it reminds me that sometimes, the simplest ingredients create the most memorable dishes.

    Enjoy watching how the vibrant orange transforms into a silky, fragrant bowl that warms you from the inside out. It pairs beautifully with crusty bread or a handful of toasted pepitas. Sabotaging your plans? Never. This soup is here to sprinkle some magic into your comfort food repertoire.

  • Spooky Sweet & Savory: Halloween Bat Wings (Soy Sauce Chicken Wings)

    Spooky Sweet & Savory: Halloween Bat Wings (Soy Sauce Chicken Wings)

    As the leaves turn crisp and the air gains a chuckle-inducing chill, I find myself craving something both fun and flavorful for Halloween. These Bat Wings are not your average finger food—they turn chicken wings into tiny, spooky creatures with a glossy soy glaze that simmers to perfection. The smoky aroma alone can conjure a haunting Halloween feast in just minutes.

    Crafting these bats is a playful ordeal that transforms dinner into a mini horror show—becoming the hero of your haunted table. The wings’ crispy edges and savory-sweet soy sauce coating make every bite a delight, even for the scariest little monsters. Plus, they’re so easy to whip up when the jack-o’-lanterns glow on a busy night.

    Halloween Bat Wings

    Bat Wings are small chicken wings coated in a savory soy glaze, cooked until crispy and glossy with a smoky aroma. The dish features bite-sized, spooky-shaped chicken with crispy edges and a flavorful coating, perfect for festive occasions.
    Prep Time 15 minutes
    Cook Time 20 minutes
    Total Time 35 minutes
    Servings: 4
    Course: Main Course
    Cuisine: Halloween
    Calories: 350

    Ingredients
      

    • 1 pound chicken wings party-sized or drumettes and wingettes
    • 1/4 cup soy sauce for the glaze
    • 2 tablespoons honey adds sweetness and shine
    • 1 teaspoon sesame oil for smoky flavor
    • 1 clove garlic minced
    • 1 pinch ground pepper optional
    • 2 cups vegetable oil for frying

    Equipment

    • Baking sheet
    • Mixing bowl
    • Small saucepan
    • Cooking tongs
    • Kitchen brush

    Method
     

    1. Preheat your oven to 400°F (200°C). Line a baking sheet with parchment paper or a wire rack for crispiness.
    2. Rinse the chicken wings and pat them completely dry with paper towels to ensure crispy skin.
    3. In a small saucepan, combine soy sauce, honey, sesame oil, and minced garlic. Bring to a gentle simmer over medium heat, stirring occasionally until the glaze thickens slightly and becomes glossy.
    4. While the glaze simmers, heat vegetable oil in a deep skillet or large pot over medium-high heat until it reaches about 350°F (175°C).
    5. Add the chicken wings carefully into the hot oil, working in batches if necessary, and fry until golden brown and crispy, about 8-10 minutes. Use tongs to turn them for even frying.
    6. Transfer the fried wings to a plate lined with paper towels to drain excess oil.
    7. Using tongs or a brush, coat the hot wings generously with the soy glaze, ensuring they are evenly covered with the shiny, flavorful coating.
    8. Arrange the glazed wings on the prepared baking sheet and bake in the preheated oven for about 8-10 minutes to set the glaze and crisp the exterior further.
    9. Remove from the oven and let the wings rest for a few minutes. The glaze will set and give the wings a glossy, spooky appearance.
    10. Serve the wings hot, with their shiny, crispy surface resembling tiny spooky bats for a festive Halloween treat.

    These Halloween Bat Wings offer a fantastic combination of spooky charm and rich flavor. Perfect for ghostly gatherings or just to add some fun to the usual dinner routine. They’re a reminder that even simple ingredients can turn into a festive feast.

    As the season deepens, such playful dishes bring a sense of nostalgia and excitement. They make the celebration feel a little more special, a little more wild. And really, that’s what Halloween is all about—fun, fright, and of course, great bites.

  • Spooky Cheer: The Halloween Spider Cheese Ball

    Spooky Cheer: The Halloween Spider Cheese Ball

    Halloween parties are all about unleashing creative snacks that surprise and delight. This Spider Cheese Ball transforms a simple appetizer into a creepy, crave-worthy centerpiece. Its mischievous spider shape adds a playful touch to your spooky spread, catching both eyes and taste buds.

    What makes this recipe stand out is the way it combines creamy cheese with a crispy crunch, topped with crunchy pretzels that mimic webbed legs. It’s fun to make and even more fun to eat, especially as the anticipation of Halloween night’s spooky fun builds up. Plus, it’s guaranteed to spark conversations and giggles at any gathering.

    Spider Cheese Ball

    This Spider Cheese Ball is a creamy cheese mixture shaped into a spherical form and decorated with pretzel legs to resemble a spider. The dish combines smooth, tangy cheese with crunchy pretzels, creating a contrast in textures and a playful appearance suitable for Halloween parties. It has a firm yet spreadable consistency that holds its shape when served.
    Prep Time 15 minutes
    Total Time 15 minutes
    Servings: 8
    Course: Main Course
    Cuisine: American
    Calories: 150

    Ingredients
      

    • 8 oz cream cheese softened at room temperature
    • 1 cup shredded cheddar cheese
    • 1 teaspoon garlic powder
    • 1/2 teaspoon paprika
    • 1 dollop hot sauce optional for flavor
    • 20 pretzels pretzel sticks or pretzels for spider legs
    • additional additional pretzels or crackers for serving

    Equipment

    • Mixing bowl
    • Plastic wrap
    • Spoon
    • Baking sheet
    • Pretzel sticks or pretzels

    Method
     

    1. In a mixing bowl, combine the softened cream cheese, shredded cheddar, garlic powder, paprika, and hot sauce if using. Mix everything thoroughly until the cheese mixture is smooth and uniform in color, with no lumps remaining.
    2. Shape the cheese mixture into a tight, round ball using your hands or a spatula, making sure it holds together well.
    3. Wrap the cheese ball in plastic wrap and refrigerate for at least 30 minutes to help it firm up.
    4. Remove the cheese ball from the fridge and place it on a serving platter. Unwrap the plastic, revealing a firm, smooth sphere ready for decoration.
    5. Arrange pretzel sticks or pretzels around the cheese ball, securing them into the surface to look like spider legs.
    6. Adjust the placement of pretzels to evenly distribute them around the sphere, ensuring a balanced spider shape.
    7. Optionally, add small crackers or more pretzels around the base for extra decoration and serving options.
    8. Once decorated, serve immediately or keep refrigerated until ready to present to keep the cheese firm and fresh.

    Wrapping up, the Halloween Spider Cheese Ball is a perfect way to blend fun and flavor in your spooky season menu. Its eye-catching design makes it a highlight that everyone remembers and talks about long after the night ends.

    While simple enough for a beginner, it offers enough whimsy to impress your friends and family. Whether you’re hosting a ghostly gathering or a last-minute costume bash, this cheesy spider adds that dash of devilish delight everyone will enjoy. Happy haunting and snacking!

  • Unusual Twist on Stuffed Peppers: A Flavor Explosion

    Unusual Twist on Stuffed Peppers: A Flavor Explosion

    For years, stuffed peppers have been a comfort classic, but I decided to shake things up by blending unexpected herbs and spices into the filling. This approach transforms the humble pepper into a vibrant, aromatic dish that turns dinner into a sensory adventure. The smell of garlic, cumin, and fresh herbs wafting through the kitchen is irresistible.

    This recipe is perfect for those who love a little chaos on their plate—textures, temperatures, and flavors all dancing together. It’s a dish that sparks joy not only in taste but in watching loved ones discovering new favorites. Plus, it’s endlessly adaptable to what you have in your pantry.

    Herbed Mediterranean Stuffed Peppers

    This dish features colorful bell peppers filled with a savory mixture of ground meat, grains, herbs, and spices. The peppers are baked until tender and slightly blistered, with a hearty, flavorful filling that combines soft grains and aromatic herbs for a vibrant appearance and inviting aroma.
    Prep Time 20 minutes
    Cook Time 40 minutes
    Total Time 1 hour
    Servings: 4
    Course: Main Course
    Cuisine: Mediterranean
    Calories: 320

    Ingredients
      

    • 4 large bell peppers preferably mixed colors
    • 1 cup cooked rice or bulgur cooled
    • 1/2 pound ground beef or turkey or substitute plant-based protein
    • 1 small onion finely chopped
    • 2 cloves garlic minced
    • 1 tablespoon olive oil
    • 1 teaspoon cumin ground
    • 1/2 teaspoon paprika smoked or sweet
    • 1/4 cup chopped fresh parsley or basil
    • to taste salt and pepper
    • 1/2 cup shredded cheese optional, for topping
    • 1 cup crushed tomatoes or tomato sauce for moisture

    Equipment

    • Knife
    • Cutting board
    • Skillet
    • Mixing bowl
    • Baking dish
    • Oven

    Method
     

    1. Preheat the oven to 375°F (190°C). Cut the tops off the bell peppers and remove the seeds and membranes. Set aside.
    2. Heat olive oil in a skillet over medium heat. Add the chopped onion and minced garlic, sautéing until fragrant and translucent, about 3-4 minutes.
    3. Add the ground meat to the skillet, breaking it apart with a spoon, cooking until browned and cooked through, about 5-7 minutes. Season with cumin, paprika, salt, and pepper, stirring to evenly coat the meat with spices.
    4. In a mixing bowl, combine the cooked rice or bulgur, the cooked meat mixture, chopped herbs, and crushed tomatoes. Mix well to incorporate all ingredients evenly.
    5. Stuff each prepared pepper with the filling, pressing gently to pack it in. Place the stuffed peppers upright in a baking dish.
    6. If desired, sprinkle shredded cheese over the tops of the stuffed peppers. Cover the dish with foil.
    7. Bake in the preheated oven for about 35-40 minutes, until the peppers are tender and slightly blistered, and the filling is heated through.
    8. Remove from oven and let cool for a few minutes. Garnish with additional fresh herbs if desired.
    9. Serve the stuffed peppers warm, enjoying the vibrant colors and savory aromas that fill the kitchen.
    This stuffed peppers recipe feels especially relevant now, when comforting home-cooked meals are making a comeback in our busy lives. The bright, bold flavors serve as a reminder that even simple ingredients can surprise us. Whether for a family dinner or a weekend feast, this dish is sure to leave an impression.

  • Chill Out with the Unusual Oreo Slushie

    Chill Out with the Unusual Oreo Slushie

    Craving something that merges childhood nostalgia with a summer chill? The Oreo slushie is my unexpected savior when the heat blares outside. Its creamy, cookie-infused sweetness makes even the dullest afternoon burst with flavor. Plus, it’s so quick to make, you’d think it’s cheating.

    What’s special about this recipe is the playful texture — crunchy Oreo bits intermingled with icy smoothness. It’s like biting into a cookie, then savoring a refreshing breeze. With just a handful of ingredients, it transforms your usual milkshake into a fun, chaos-filled adventure for your taste buds.

    WHY I LOVE THIS RECIPE?

    • My secret guilty pleasure since childhood reimagined as a frozen treat.
    • It’s chaotic, charming, and perfectly imperfect every single time.
    • The smell of crushed Oreos and vanilla ice cream makes my kitchen feel like a sweet shop.
    • Super flexible — jazz it up with chocolate syrup or a splash of coffee.

    Oreo Slushie

    The Oreo slushie is a cold, creamy beverage made by blending ice, vanilla ice cream, and crushed Oreo cookies until smooth. It features a textured combination of icy softness with crunchy cookie bits, resulting in a vibrant, dessert-like drink with a speckled appearance. The final product is a refreshing, sweet treat with a slightly gritty, cookie-embedded consistency.
    Prep Time 10 minutes
    Total Time 10 minutes
    Servings: 2
    Course: Main Course
    Cuisine: American
    Calories: 250

    Ingredients
      

    • 4 whole Oreo cookies crushed
    • 2 cups vanilla ice cream cold and creamy
    • 1.5 cups ice cubes adjust for thickness
    • 1/2 cup milk whole or dairy of choice

    Equipment

    • Blender
    • Measuring cups and spoons

    Method
     

    1. Place the Oreo cookies in a zip-top bag and crush them into small crumbs using a rolling pin or the back of a spoon, capturing the crunchy bits.
    2. Add the crushed Oreos to your blender along with the vanilla ice cream, ice cubes, and milk.
    3. Secure the lid and blend on high until the mixture is smooth and thick, about 30-45 seconds, with the cookie bits evenly distributed.
    4. Stop the blender and check the consistency — it should be slushy, with tiny bits of Oreo visible and a creamy texture. If it’s too thick, add a splash more milk and blend briefly.
    5. Pour the Oreo slushie into glasses, allowing some of the cookie bits to settle and show through the rim.
    6. Finish with a sprinkle of crushed Oreos on top for added crunch and visual appeal.
    7. Insert a straw, serve immediately, and enjoy the cool, crunchy bite of your homemade Oreo slushie!

    In a world where moments of chaos often turn into sweet escapes, this oreo slushie stands out as the ultimate treat. It’s a quick fix for the heat or a nostalgic pick-me-up on a lazy day. The crunch, the cold, and the rich creaminess give every sip a joyful surprise.

    Now, whenever you need a cheerful break, blend up this frosty delight. It’s simple, fun, and just a little bit messy — exactly what makes it memorable. Cheers to enjoying every spoonful of your coolest, crispiest dessert.

  • Spooky Delight: Halloween Ghost Brownies

    Spooky Delight: Halloween Ghost Brownies

    Every October, I get a thrill from transforming simple ingredients into something witching and whimsical. This year, I dared to turn classic brownies into adorable ghostly figures, perfect for haunting your dessert table. The best part? They’re surprisingly easy to make, yet look incredibly charming and spooky.

    Imagine biting into a rich, fudgy brownie, then seeing the playful, ghostly white eyes staring back. These treats bring a dash of chaos and nostalgia to my kitchen, reminding me of late-night Halloween parties and childhood costumes. They’re simple enough for a spooky baking session or a last-minute fright-night dessert.

    Ghostly Halloween Brownies

    These brownies are rich, fudgy treats baked from a chocolate batter, resulting in dense, moist squares. Once cooled, they are decorated with white chocolate to resemble ghostly figures, with eyes added for a haunting touch.
    Prep Time 20 minutes
    Cook Time 25 minutes
    Total Time 45 minutes
    Servings: 12
    Course: Main Course
    Cuisine: American
    Calories: 230

    Ingredients
      

    • 1 cup unsalted butter melted
    • 2 cups granulated sugar
    • 4 large eggs lightly beaten
    • 1 teaspoon vanilla extract
    • 0.5 cup all-purpose flour
    • 0.75 cup unsweetened cocoa powder Dutch-processed preferred
    • 0.5 te teaspoon baking powder
    • 0.25 teaspoon salt
    • 4 ounces white chocolate melted for decorating
    • small black edible marker or small chocolate chips for eyes

    Equipment

    • Mixing bowls
    • Whisk or spatula

    Method
     

    1. Preheat your oven to 350°F (175°C) and line a 9×9-inch baking pan with parchment paper for easy removal.
    2. In a large mixing bowl, whisk together the melted butter and sugar until smooth and fragrant, about 2 minutes.
    3. Add the eggs one at a time, whisking well after each addition to create a glossy, thick batter.
    4. Stir in the vanilla extract, then sift in the cocoa powder, flour, baking powder, and salt. Fold gently until just combined; the batter will be thick and dark.
    5. Pour the batter into the prepared baking pan and spread evenly with a spatula, smoothing the surface.
    6. Bake in the preheated oven for 20-25 minutes, or until a toothpick inserted into the center comes out with moist crumbs.
    7. Allow the brownies to cool completely in the pan on a wire rack, ensuring they set and become firm.
    8. Once cooled, cut the brownies into squares or rectangles for a uniform base.
    9. Melt white chocolate in a microwave-safe bowl in 20-second intervals, stirring until smooth and shiny.
    10. Using a spoon or piping bag, dollop or pipe white chocolate onto each brownie to create ghost shapes, then use the black edible marker or small chocolate chips to add spooky eyes.
    11. Let the decorated brownies sit for 10-15 minutes to set the white chocolate, then serve these adorable, spooky treats!

    Notes

    For a more festive appearance, use mini marshmallows for the eyes or add icing for extra detail.

    Ghost Brownies aren’t just a cute Halloween snack—they’re a quick way to add a touch of fun and fright to your festivities. The combination of hearty cocoa and fluffy marshmallow details makes each bite a delight in its own right. Plus, they’re a fantastic activity to engage kids and adults alike in some spooky kitchen chaos.

    As the season gets colder and the nights grow longer, these treats become a festive staple on my dessert tray. They’re simple, mischievous, and perfect for celebrating the spooky spirit. No matter how you decorate, these little ghosts will surely bring smiles—and a few playful screams—to your gathering.