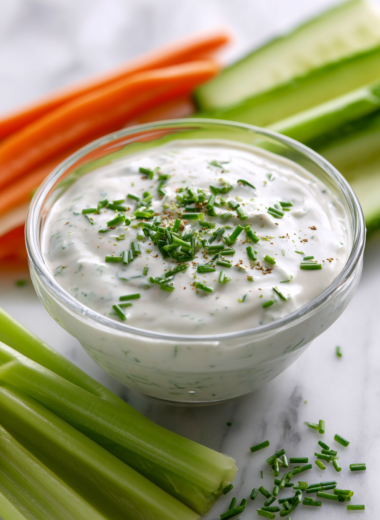
Blog

  • Mummy Brownies: A Nostalgic Twist on a Classic Treat

    Mummy brownies are not your usual chocolate square. They’re inspired by a frantic, joyful bake session in my childhood kitchen, where everything was a little chaotic but delicious. This recipe is about embracing imperfection—cracks, uneven edges, and all—because that’s what makes them special.

    Why I Keep Coming Back to These Brownies

    They remind me of childhood chaos, of messy kitchens and loud laughter. Each batch is a little different—sometimes gooey, sometimes firm—and that unpredictability keeps it interesting. Plus, the smell of melting chocolate and baking batter is pure comfort. No matter what’s happening outside, these brownies are a small, sweet anchor.

    The Essential Ingredients & Their Secrets

    • Dark chocolate: Rich, slightly bitter, makes the brownies deeply chocolatey. Swap with milk chocolate for milder sweetness.
    • Butter: Creates that fudgy texture and shiny top. Use salted butter if you like a hint of salt.
    • Sugar: Sweetens and helps set the structure. Brown sugar adds warmth.
    • Eggs: Bind everything together. For extra fudginess, use large eggs.
    • Flour: Gives structure, keeps brownies from spreading too much. Whole wheat works in a pinch.
    • Vanilla extract: Enhances chocolate flavor with a bright note.
    • Sea salt: Sprinkle on top before baking for a salty contrast.

    Tools & Equipment for Mummy Brownies

    • 20cm (8-inch) square baking pan: To hold and bake the brownie batter evenly.
    • Parchment paper: Prevents sticking and makes lifting out the brownies easier.
    • Double boiler or microwave-safe bowl: Gently melts chocolate without burning.
    • Spatula: Mixes ingredients smoothly and spreads batter evenly.
    • Wire rack: Helps brownies cool evenly and prevents sogginess.

    The How-To of Making Mummy Brownies

    Step 1: Preheat your oven to 175°C (350°F).

    Step 2: Line a 20cm (8-inch) square baking pan with parchment paper, leaving an overhang.

    Step 3: In a double boiler or microwave, melt 200g (7oz) of dark chocolate and 100g (3.5oz) of butter until smooth.

    Step 4: Whisk in 200g (1 cup) of sugar and 3 eggs, one at a time, until shiny.

    Step 5: Fold in 1 teaspoon of vanilla extract and 100g (3/4 cup) of all-purpose flour.

    Step 6: Pour the batter into the prepared pan, smoothing the top with a spatula.

    Step 7: Bake for 20-25 minutes, until a toothpick inserted in the center comes out with moist crumbs.

    Step 8: Let the brownies cool in the pan for 15 minutes, then lift out using the parchment and cool completely on a wire rack.

    Step 9: Cut into squares and serve once fully cooled.

    Cooking Checkpoints & Tips for Mummy Brownies

    • Ensure your chocolate is fully melted for a smooth batter.
    • Don’t overbake; the center should be fudgy, not dry.
    • Use high-quality chocolate for a richer flavor.
    • Watch the edges; they should be just set, not burnt.
    • Let the brownies cool completely before slicing for clean cuts.

    Common Mistakes & How to Fix Them

    • Overbaking leading to dry brownies.? Use a timer to prevent overbaking. Moist crumbs are perfect.
    • Edges turning black before center is done.? Reduce oven temperature slightly if edges burn.
    • Chocolate not fully melted, causing streaks.? Stir melted chocolate thoroughly to avoid lumps.
    • Slicing warm brownies, causing crumbles.? Allow brownies to cool completely before slicing.

    Mummy Brownies

    Mummy brownies are rich, fudgy chocolate squares with a slightly cracked and uneven surface, inspired by a joyful, chaotic childhood bake session. Made with melted dark chocolate, butter, and eggs, they develop a glossy top and tender crumb. Their rustic appearance and gooey texture make them a comforting and nostalgic treat.
    Prep Time 15 minutes
    Cook Time 25 minutes
    Total Time 40 minutes
    Servings: 9
    Course: Main Course
    Cuisine: American
    Calories: 220

    Ingredients
      

    • 200 g dark chocolate chopped or in chunks
    • 100 g butter salted or unsalted
    • 200 g sugar granulated or brown sugar
    • 3 large eggs at room temperature
    • 1 tsp vanilla extract
    • 100 g all-purpose flour
    • Sea salt Sea salt for sprinkling on top

    Equipment

    • 20cm (8-inch) square baking pan
    • Parchment paper
    • Double boiler or microwave-safe bowl
    • Spatula
    • Wire rack

    Method
     

    1. Preheat your oven to 175°C (350°F) and line the baking pan with parchment paper, leaving an overhang on the sides for easy removal.
    2. Gently melt the dark chocolate and butter together in a double boiler or microwave, stirring until smooth and glossy, filling your kitchen with a rich chocolate aroma.
    3. Whisk in the sugar into the melted chocolate mixture until combined; it will feel thick and shiny.
    4. One at a time, beat in the eggs, mixing well after each addition until the batter becomes smooth and slightly thickens, with a silky texture.
    5. Stir in the vanilla extract for a fragrant touch, then fold in the flour gently until just combined, avoiding overmixing to keep the brownies tender.
    6. Pour the batter into the prepared pan, spreading it evenly with a spatula, and tap the pan gently on the counter to settle the batter and release air bubbles.
    7. Bake for 20-25 minutes, or until the edges are set and a toothpick inserted in the center comes out with moist crumbs—be careful not to overbake for that perfect fudginess.
    8. Remove from the oven and let the brownies cool in the pan for about 15 minutes, allowing the center to firm up slightly while maintaining that gooey interior.
    9. Using the parchment overhang, lift the brownies out of the pan and transfer them to a wire rack to cool completely—this prevents sogginess and makes slicing easier.
    10. Once cooled, cut into squares with a sharp knife, embracing the cracks and uneven edges—these imperfections give the brownies their charming, rustic look.
    11. Finish by sprinkling a pinch of sea salt on top of each brownie for a salty-sweet contrast, then serve and enjoy the rich, fudgy texture and joyful chaos of these homemade treats.

    Notes

    For extra fudginess, slightly underbake and let the brownies rest before cutting. Using high-quality chocolate enhances the flavor deeply.
    These brownies carry a bit of my childhood chaos—messy, rich, and a little nostalgic. They’re perfect for when you want something sweet but with a story behind it. Feel free to add a pinch of sea salt or a handful of walnuts for extra personality. Enjoy the imperfect, gooey slice of history that these brownies give you.

  • Black Bean Burgers: A Hidden Gem for Lazy Weekends

    Black bean burgers often get a bad rap as being a bit dull or rubbery, but with a few tweaks, they turn into something surprisingly satisfying. I’ve been making these for years, tweaking the spice blends and textures until they felt just right. They’re a great way to use up that can of beans lurking in the back of your pantry during lazy weekends.

    Why I Keep Coming Back to This Recipe

    Because it’s honest, flexible, and forgiving. It’s a recipe I can tweak based on what’s in the fridge or my mood. Plus, the smell of toasted spices and sizzling patties makes it feel like home, no matter how hectic the day. It’s my go-to for a quick, satisfying lunch or dinner that always reminds me I can make something hearty without much fuss.

    Ingredient Breakdown & Substitutions

    • Black beans: Main binder, creamy interior, slightly oozy. Swap with chickpeas for a nuttier flavor.
    • Onion: Adds crunch and sweetness. Shallots work if you want a milder note.
    • Garlic: Brings a pungent, aromatic punch. Roasted garlic gives a smoky depth.
    • Cumin: Earthy, warm spice. Paprika lends a smoky aroma, but chili powder can add heat.
    • Lime juice: Brightens everything. Lemon juice is a fine substitute.
    • Breadcrumbs: Gives structure. Use crushed oats for a gluten-free tweak.
    • Egg: Acts as a binder. Flaxseed meal with water can be vegan.

    Tools & Equipment for Perfect Burgers

    • Can opener: Open and drain the black beans.
    • Potato masher or fork: Mash the beans to the right consistency.
    • Mixing bowl: Combine all ingredients evenly.
    • Skillet or non-stick pan: Cook the patties evenly with a good sear.
    • Spatula: Flip the patties without breaking them.

    Step-by-Step Guide to Perfect Black Bean Burgers

    Step 1: Start by draining and rinsing a can of black beans. Mash them with a fork or potato masher until mostly smooth, leaving some chunky bits for texture.

    Step 2: In a mixing bowl, combine the mashed beans with chopped onion, garlic, cumin, smoked paprika, and a splash of lime juice. Mix well.

    Step 3: Add an egg and a handful of panko breadcrumbs to help bind everything together. Season with salt and pepper.

    Step 4: Form the mixture into 4-6 patties, about 1.5 cm thick. Chill for 15 minutes to help them firm up.

    Step 5: Heat a non-stick skillet over medium heat, about 160°C (320°F). Cook the patties for 4-5 minutes per side, until golden brown and slightly crispy.

    Step 6: Serve on toasted buns with your favorite toppings — I like avocado and a dollop of spicy mayo.

    Cooking Checkpoints & Tips for Success

    • The mixture should be sticky but not overly wet. If it’s too loose, add more breadcrumbs.
    • Cook the patties until they’re golden brown and crispy on the outside. If they’re still soft, give them more time.
    • Ensure the skillet isn’t too hot to prevent burning the outside while the inside remains raw. Medium heat works best.

    Common Mistakes & How to Fix Them

    • Mixture too loose, falling apart.? Add a little more breadcrumbs if the mixture is too sticky or wet.
    • Over-torched patties.? Reduce heat if patties are burning on the outside before cooking through.
    • Soft, fragile patties.? Chill the patties longer if they’re difficult to shape or keep falling apart.
    • Blah, dull taste.? Use fresh spices for more vibrant flavor.

    Black Bean Burgers

    Black bean burgers are hearty, vegetarian patties made from mashed black beans combined with spices, vegetables, and a binder. They develop a crispy exterior when cooked in a skillet, with a tender, slightly chunky interior that’s full of flavor and texture. Perfect for a quick, satisfying meal, these burgers are easily customizable with toppings and sauces.
    Prep Time 15 minutes
    Cook Time 10 minutes
    Total Time 25 minutes
    Servings: 4
    Course: Main Course
    Cuisine: Vegetarian
    Calories: 250

    Ingredients
      

    • 1 can black beans drained and rinsed
    • 1/2 small onion finely chopped
    • 2 cloves garlic minced
    • 1 teaspoon cumin ground
    • 1/2 teaspoon smoked paprika
    • 1 tablespoon lime juice
    • 1/2 cup breadcrumbs or crushed oats for gluten-free
    • 1 egg beaten, or vegan substitute like flaxseed meal with water
    • Salt and pepper to taste

    Equipment

    • Can opener
    • Potato masher or fork
    • Mixing bowl
    • Skillet or non-stick pan
    • Spatula

    Method
     

    1. Drain and rinse the black beans, then mash them with a fork or potato masher until mostly smooth with some chunky bits remaining.
    2. Combine the mashed beans in a mixing bowl with the finely chopped onion, minced garlic, cumin, smoked paprika, and lime juice. Mix everything thoroughly until well integrated.
    3. Add the beaten egg and breadcrumbs to the bowl, stirring until the mixture becomes sticky and holds together. Season with salt and pepper.
    4. Divide the mixture into 4 to 6 portions and gently shape each into a patty about 1.5 centimeters thick. Place the formed patties on a tray and chill for 15 minutes to help them set.
    5. Heat a skillet over medium heat until hot and add a little oil. Carefully place the chilled patties into the skillet, cooking for about 4-5 minutes on each side until they turn golden brown and develop a crispy crust.
    6. Once cooked, transfer the patties to a plate. Serve them on toasted buns with your favorite toppings like avocado, lettuce, or spicy mayo for a satisfying meal.

    Notes

    Chilling the patties before cooking helps them hold together better. Feel free to customize with different spices or toppings to suit your taste.
    These black bean burgers aren’t just a quick fix — they carry a quiet satisfaction that sneaks up on you. There’s something about mashing those beans, mixing in the spices, and shaping them into patties that feels like reclaiming a little kitchen magic. You can customize toppings or spice levels, making each batch uniquely yours. Enjoy them with a side of crispy sweet potato fries or just a simple salad, and relish the simplicity of good, honest food.

  • Monster Meatloaf: A Hearty, Unexpected Twist on Classic Comfort Food

    When I first made this monster meatloaf, I was craving something wildly satisfying, a bit rebellious even. It’s not your tidy, perfect loaf—think rugged, with rough edges and bold flavors. That rustic charm makes every bite feel like a small victory, a little messy but full of soul. It’s the kind of dish that feels like a warm hug, but with a little wild side.

    Why I Keep Coming Back to This Recipe

    Because it’s honest, no-frills comfort that adapts easily. The smoky crust, the juicy bite—each time, I tweak a spice or add a splash of hot sauce. It’s imperfect, loud, and real, just like a good meal should be. I keep returning because it’s forgiving and satisfying in ways that make kitchen messes worth it.

    Monster Meatloaf: The Key Players

    • Ground beef: The backbone—juicy, rich, needs a bit of fat for moisture.
    • Onions: Adds sweetness and depth; sauté if you want softer flavor.
    • Bread crumbs: Bind the loaf; panko gives crunch, regular fine crumbs stay tender.
    • Egg: Helps hold everything together; skip if you prefer a veggie version.
    • Worcestershire sauce: Brings umami and a smoky punch—don’t skip this.
    • Milk: Keeps the mixture moist; use cream if you want extra richness.
    • Seasonings: Salt, pepper, maybe a dash of paprika—season boldly, it shows.

    Tools of the Monster Meatloaf Trade

    • Large mixing bowl: For combining all the ingredients without making a mess.
    • Roasting pan or baking sheet: To hold the loaf during baking, ensuring even heat.
    • Meat thermometer: To check when the internal temp is just right.
    • Kitchen spatula or large spoon: For mixing and shaping the loaf.

    Step-by-step: Crafting a Monster Meatloaf

    Step 1: Preheat your oven to 180°C (350°F).

    Step 2: In a large bowl, combine ground beef, chopped onions, minced garlic, and bread crumbs.

    Step 3: Add an egg, Worcestershire sauce, and a splash of milk. Mix until just combined.

    Step 4: Shape the mixture into a large, irregular loaf—think monster-sized, with a rugged, rustic look.

    Step 5: Place on a baking sheet lined with parchment paper or a lightly greased roasting pan.

    Step 6: Bake for about 50-60 minutes. Look for a dark, caramelized crust.

    Step 7: Check the internal temperature—should reach 70°C (160°F).

    Step 8: Let it rest for 10 minutes before slicing.

    Crisp, Juicy, and Done: Meatloaf Checks

    • Crust should be deep golden and slightly crispy.
    • Center should be firm but still juicy when pressed.
    • Internal temperature hits 70°C (160°F).

    Oops Moments: Common Meatloaf Mishaps

    • Tough, dense loaf.? OVER-MIXED THE MEAT → Stop mixing as soon as ingredients are just combined to keep it tender.
    • Dry, crumbly slices.? LOAF TOO DRY → Add a splash more milk or a beaten egg to keep it moist.
    • Flattened, sad-looking loaf.? LOAF COLLAPSES → Don’t handle it too much when shaping, and ensure even baking.
    • Flat flavor.? UNDERSALTED → Taste the mixture before baking and add a pinch more salt if needed.

    Monster Meatloaf

    This rustic, rugged meatloaf combines juicy ground beef with sautéed onions, breadcrumbs, and bold seasonings, baked until its dark, caramelized crust is crispy and inviting. The mixture is shaped into a large, uneven loaf that exudes charm and personality, with a juicy interior that offers a satisfying bite. Its imperfect appearance and hearty flavor make it a comforting, rebellious twist on a classic dish.
    Prep Time 15 minutes
    Cook Time 1 hour
    Total Time 1 hour 15 minutes
    Servings: 6
    Course: Main Course
    Cuisine: American
    Calories: 550

    Ingredients
      

    • 1.5 pounds ground beef preferably with some fat for juiciness
    • 1 medium onion finely chopped or sautéed for softer flavor
    • 1/2 cup bread crumbs panko or regular fine crumbs
    • 1 large egg helps bind the mixture
    • 2 tablespoons Worcestershire sauce adds umami and smoky depth
    • 1/4 cup milk keeps the loaf moist
    • to taste salt season boldly
    • to taste pepper add for flavor

    Equipment

    • Large mixing bowl
    • Baking sheet or roasting pan
    • Kitchen spatula or large spoon
    • Meat thermometer

    Method
     

    1. Preheat your oven to 180°C (350°F) and gather all your ingredients.
    2. In a large bowl, combine the ground beef, finely chopped onion, bread crumbs, Worcestershire sauce, and milk.
    3. Add the egg, season generously with salt and pepper, then mix everything together until just combined. Avoid over-mixing to keep the meat tender.
    4. Shape the mixture into a large, irregular loaf on a baking sheet lined with parchment paper or lightly greased, giving it a rugged, rustic appearance.
    5. Bake the loaf in the preheated oven for about 50-60 minutes, until it develops a deep golden, slightly crispy crust and the top looks caramelized.
    6. Use a meat thermometer to check the internal temperature; it should reach 70°C (160°F) to ensure it’s fully cooked and juicy inside.
    7. Once cooked, remove the meatloaf from the oven and let it rest for 10 minutes. This helps the juices settle and makes slicing easier.
    8. Slice the monster meatloaf into thick, rustic pieces, revealing its juicy interior and crispy crust.
    9. Serve hot, enjoying the bold flavors and rugged texture that make this dish a comforting, rebellious favorite.

    Notes

    Feel free to tweak the seasonings or add hot sauce for extra flair. The key is embracing the rustic, imperfect charm of this meatloaf.
    This monster meatloaf isn’t just about feeding a crowd or leftovers—it’s about embracing the chaos of a big, imperfect loaf that’s packed with flavor. Each slice crackles with a smoky crust and juicy, spicy interior. Feel free to add your own twists—maybe a dash of hot sauce or a sprinkle of cheese—whatever makes it feel like yours. It’s a messy, satisfying dish that keeps you coming back, slice after slice.

  • Spiderweb Donuts: A Tangled Twist on a Classic Sweet

    I stumbled on the idea of spiderweb donuts during a chaotic bakery shift. They feel like a small act of rebellion—messy, a little spooky, but undeniably fun. Baking these feels like threading a web of sugar and flour, each step a tiny act of patience and playfulness.

    Why These Donuts Keep Calling Me Back

    They’re a playful twist on a classic, perfect for messy, creative baking moments. The web pattern always sparks a smile, and the rich chocolate glaze makes each bite a little guilty pleasure. Baking them feels like a tiny rebellion—chaotic, charming, and utterly satisfying.

    What’s in the Web? Ingredient Insights

    • All-purpose flour: The backbone, gives structure and chew. Skip self-rising if you prefer a crisper finish.
    • Granulated sugar: Sweetens the dough, balances salt. Use honey or maple syrup for a different vibe.
    • Active dry yeast: Leavens the dough, brings a slight tang. Fresh yeast also works, just proof it first.
    • Milk: Adds moisture, keeps dough tender. Almond or soy milk can swap in here.
    • Butter: Richness and flavor. Margarine can be a quick substitute for a lighter touch.
    • Chocolate glaze: Creates the web pattern—dark, glossy, slightly bitter. Dark or milk chocolate, your call.

    Tools of the Trade for a Webby Wonder

    • Large mixing bowl: For combining and kneading the dough.
    • Rolling pin: To flatten the dough evenly.
    • Mini donut cutter: To cut out perfect donut shapes.
    • Deep frying pan or pot: To fry the donuts safely and evenly.
    • Slotted spoon: To turn and remove donuts from hot oil.
    • Cooling rack: To drain excess oil and cool the donuts.

    Step-by-step Guide to Crafting Your Spiderweb Donuts

    Step 1: Mix flour, sugar, salt, and yeast in a large bowl. Stir in warm milk and melted butter until a shaggy dough forms.

    Step 2: Knead the dough on a floured surface for about 8 minutes until smooth and elastic. Cover and let rise until doubled, about 1 hour.

    Step 3: Roll out the dough to about 1 cm thickness. Use a small round cutter to cut out donuts, then make a tiny hole in the center.

    Step 4: Heat oil in a deep pan to 180°C (350°F). Fry donuts in batches, turning occasionally, until golden and puffed, about 2-3 minutes per side.

    Step 5: Drain on paper towels. While still warm, dip in glaze and let set, creating a web-like pattern with chocolate or icing.

    Cooking Tips to Keep Your Webs Perfect

    • Dough should be soft but not sticky; add flour if it sticks excessively.
    • Oil temperature must stay steady around 180°C (350°F); too hot and donuts burn, too cool and they soak up oil.
    • Web pattern should be uneven—imperfections add charm, so don’t stress over symmetry.
    • Fry until donuts are golden and sound hollow when tapped; avoid overcooking for tender insides.

    Common Pitfalls and How to Dodge Them

    • Oil too hot or cold, leading to burnt or greasy donuts.? Keep oil at steady 180°C (350°F).
    • Under-kneaded dough, resulting in dense donuts.? Dough should be kneaded well.
    • Large or blunt cutter tearing dough.? Use a small, sharp cutter.
    • Greasy webs due to excess oil.? Let donuts drain fully.

    Spiderweb Donuts

    Spiderweb donuts are soft, fluffy fried treats with a playful web pattern on top, created by twisting chocolate glaze over freshly fried dough. Made with simple ingredients like flour, sugar, yeast, and milk, they boast a tender interior and a glossy, slightly crispy exterior. The web design adds a fun, spooky touch perfect for creative baking moments.
    Prep Time 15 minutes
    Cook Time 10 minutes
    Total Time 1 hour 25 minutes
    Servings: 8
    Course: Main Course
    Cuisine: Bakery
    Calories: 250

    Ingredients
      

    • 2 ½ cups all-purpose flour sifted
    • ¼ cup granulated sugar
    • 1 teaspoon active dry yeast proof if using fresh yeast
    • ¾ cup warm milk about 110°F (43°C), almond or soy milk works too
    • 2 tablespoons melted butter
    • ½ cup chocolate glaze dark or milk chocolate, melted

    Equipment

    • Large mixing bowl
    • Rolling pin
    • Mini donut cutter
    • Deep frying pan or pot
    • Slotted spoon
    • Cooling Rack

    Method
     

    1. Mix the flour, sugar, and yeast in a large bowl until well combined, creating a fluffy, slightly grainy mixture.
    2. Gradually pour in the warm milk and melted butter, stirring with a spoon or spatula until a shaggy dough starts to form.
    3. Knead the dough on a floured surface for about 8 minutes until it becomes smooth, elastic, and slightly tacky to the touch.
    4. Place the dough back in the bowl, cover with a damp cloth, and let rise in a warm spot for about 1 hour, or until it doubles in size.
    5. Once risen, punch down the dough gently, then roll it out on a floured surface to about 1 cm thickness.
    6. Use a small round cutter to cut out donut shapes, then punch a tiny hole in the center of each with your finger or a smaller cutter.
    7. Heat oil in a deep pan or pot to 180°C (350°F). Carefully slide in a few donuts at a time, frying until golden brown and puffed, about 2-3 minutes per side.
    8. Use a slotted spoon to remove the donuts from the oil, draining on a cooling rack or paper towels to remove excess oil.
    9. While the donuts are still warm, dip each one into the melted chocolate glaze, turning gently to coat completely.
    10. Create a web pattern by drizzling additional melted chocolate or icing over the glazed donuts in a circular, crisscross pattern, resembling a spiderweb.
    11. Allow the glaze to set for a few minutes until shiny and firm, then serve these playful, webbed donuts fresh for the best experience.
    These donuts aren’t just about the look—they taste like a sweet, slightly chewy cloud with a crisp shell. The web pattern adds a spooky charm, perfect for seasonal gatherings or just a fun bake on a lazy weekend. Don’t shy away from customizing the glaze or adding sprinkles—make it your own, tangled masterpiece.

  • A Hidden Twist on Pumpkin Whoopie Pies: The Unexpected Spice Balance

    A Hidden Twist on Pumpkin Whoopie Pies: The Unexpected Spice Balance

    Pumpkin whoopie pies carry a cozy, fall vibe, but I’ve always loved how they adapt beyond the season. There’s something about the soft, spiced cake paired with creamy filling that feels like a tiny celebration. I like to think of them as a sweet little canvas, waiting for a splash of something unexpected.

    Why I Keep Coming Back to This Recipe

    They’re forgiving, adaptable, and have that nostalgic charm — plus, the slight heat from chili makes each bite interesting. Sharing these friends-made treats sparks quick smiles, even in busy moments. They remind me that simple ingredients, combined thoughtfully, can surprise and comfort all at once.

    Breaking Down the Pumpkin & Spice

    • Canned pumpkin: Adds moistness and a gentle earthiness, like pumpkin bread in every bite. Substitute with sweet potato for a sweeter, denser flavor.
    • Brown sugar: Gives the cookies a rich, caramel-like sweetness that balances the spices. Honey or maple syrup can replace it, but adjust the moisture.
    • Cinnamon & nutmeg: Classic warm spices that evoke cozy fall days. For a punchier spice, add a pinch of allspice or clove.
    • Ancho chili powder: Unexpected but delightful; adds a smoky heat that plays against the sweetness. Swap with chipotle for a more intense smoky kick.
    • Cream cheese or mascarpone (for filling): Creates a tangy, creamy filling that cuts through the sweetness. Greek yogurt can be a lighter alternative.
    • Vanilla extract: Brightens all the flavors with a subtle floral note. Almond extract works for a different aroma.
    • Eggs: Bind everything together and give structure. Flax eggs work if you want to keep it vegan.

    Tools & Equipment You’ll Need

    • Mixing bowls: To combine wet and dry ingredients separately.
    • Electric mixer or whisk: To beat the butter and sugar until fluffy.
    • Baking sheet & parchment paper: To bake the cookies evenly without sticking.
    • Ice cream scoop or spoon: To portion the cookie dough uniformly.
    • Cooling rack: To cool cookies quickly and evenly.
    • Piping bag or spatula: To spread or pipe the filling neatly.

    Steps to Pumpkin Pie Bliss: From Mixing to Cooling

    Step 1: Preheat your oven to 180°C (350°F).

    Step 2: Line a baking sheet with parchment paper, ready for the cookies.

    Step 3: In a bowl, whisk together the flour, baking soda, cinnamon, and a pinch of nutmeg.

    Step 4: In a separate large bowl, beat the softened butter with brown sugar until fluffy, about 3 minutes.

    Step 5: Add the eggs one at a time, then stir in the pumpkin puree and vanilla extract.

    Step 6: Gradually mix in the dry ingredients until just combined; the dough should be moist but scoopable.

    Step 7: Drop spoonfuls onto the prepared sheet, spacing them about 5 cm apart.

    Step 8: Bake for 12-14 minutes, until they are just set around the edges but still soft in the center.

    Step 9: Let the cookies cool for 10 minutes on the sheet, then transfer to a wire rack.

    Cooking Checkpoints & Tips for Success

    • Cookies should be lightly golden at the edges but still soft in the middle.
    • The filling should be smooth, thick but spreadable, with a hint of warmth from the chili.
    • If the cookies crack when you lift them, they’re baked just right.
    • Ensure the filling is chilled before piping to prevent melting and mess.

    Common Mistakes & How to Fix Them

    • Over-mixing the batter.? Over-mixing the batter makes cookies dense. Fix: Mix just until ingredients are combined.
    • Skipping chilling the dough.? Cookies spread too much. Fix: Chill dough for 15 minutes before baking.
    • Adding too much liquid to the filling.? Filling is runny. Fix: Chill the filling for 10-15 minutes before piping.
    • Removing cookies too early from the sheet.? Cookies crack when cooling. Fix: Let cookies cool on the baking sheet for 10 minutes, then transfer.

    Spiced Pumpkin Whoopie Pies with Chili Cream Filling

    These pumpkin whoopie pies feature soft, spiced cakes made with pumpkin puree, cinnamon, nutmeg, and a touch of smoky chili powder. Paired with a tangy cream cheese filling, they have a tender, moist texture and a cozy, flavorful punch that makes each bite both comforting and unexpectedly exciting.
    Prep Time 20 minutes
    Cook Time 14 minutes
    Total Time 34 minutes
    Servings: 12
    Course: Main Course
    Cuisine: American
    Calories: 150

    Ingredients
      

    • 1 1/2 cups all-purpose flour
    • 1 teaspoon baking soda
    • 1 teaspoon cinnamon
    • 1/2 teaspoon nutmeg
    • 1/4 teaspoon ancho chili powder or substitute chipotle
    • 1/2 cup unsalted butter softened
    • 1/2 cup brown sugar
    • 1 large egg
    • 1/2 cup canned pumpkin or sweet potato puree
    • 1 teaspoon vanilla extract
    • 4 oz cream cheese softened
    • 1/4 cup powdered sugar
    • 1/2 teaspoon vanilla extract for filling
    • 1/4 teaspoon chili powder for filling

    Equipment

    • Mixing bowls
    • Electric mixer or whisk
    • Baking sheet & parchment paper
    • Ice cream scoop or spoon
    • Cooling Rack
    • Piping bag or spatula

    Method
     

    1. Preheat your oven to 180°C (350°F) and line a baking sheet with parchment paper.
    2. In a small bowl, whisk together the flour, baking soda, cinnamon, nutmeg, and chili powder to evenly combine.
    3. In a large bowl, beat the softened butter and brown sugar together with an electric mixer until light and fluffy, about 3 minutes. The mixture should look creamy and slightly paler in color.
    4. Add the egg to the butter mixture and beat until well incorporated. Then stir in the pumpkin puree and vanilla extract until the mixture is smooth.
    5. Gradually add the dry ingredients to the wet mixture, mixing on low speed just until combined. The dough will be moist and slightly sticky but scoopable.
    6. Use an ice cream scoop or spoon to drop dollops of dough onto the prepared baking sheet, spacing them about 5 cm apart. Slightly flatten each mound with the back of the spoon.
    7. Bake the cookies for 12-14 minutes, or until the edges are just golden and the centers look slightly soft but set. The cookies will spread and develop a gentle crackle on top.
    8. Remove the baking sheet from the oven and let the cookies cool on it for about 10 minutes, allowing them to firm up slightly.
    9. Transfer the cookies to a wire rack to cool completely before assembling. Meanwhile, prepare the filling by beating the softened cream cheese, powdered sugar, vanilla extract, and chili powder together until smooth and fluffy.
    10. Once cooled, pipe or spread a generous dollop of the chili cream filling onto the flat side of one cookie, then top with another cookie to form a sandwich.
    11. Repeat with remaining cookies and filling. Chill the assembled whoopie pies for at least 30 minutes to let the flavors meld and the filling set before serving.

    Notes

    For extra flavor, sprinkle a pinch of chili powder on the filling before assembling. These treats are best enjoyed within a few days of baking. Chilling the assembled pies helps the flavors develop and the filling to firm up.
    These pumpkin whoopie pies are not just a treat but a little nostalgic escape, especially with that unexpected dash of ancho chili powder in the filling. They’re perfect for sharing, even if it’s just with yourself on a quiet afternoon. Enjoy them warm or at room temperature, and don’t shy away from customizing the filling with your favorite spices or a splash of bourbon.

  • Jack O’ Lantern Burgers: A Playful Autumn Twist

    Autumn is the perfect time to turn the kitchen into a playground. These Jack O’ Lantern Burgers aren’t just about the look—they’re about the thrill of playing with flavors and textures. I love how the smoky, spicy notes contrast with the sweet, tender bun, making each bite a surprise.

    Why these burgers stick in my mind

    Because they’re a snapshot of childhood Halloween spirit, turned savory and grown-up. The smoky heat, the cheesy stretch, the playful carving—each bite sparks a memory of crisp air and flickering lights. Plus, they’re just messy enough to feel like a small rebellion in the kitchen, a reminder to keep things fun and spontaneous.

    What makes these burgers special — ingredient insights

    • Ground beef: Juicy, rich flavor—preferably 80/20 for the best balance of fat and meat.
    • Caramelized onions: Sweet, sticky, with a smoky undertone—skip if you’re in a rush.
    • Smoky chipotle sauce: Adds depth and a gentle heat—swap with smoked paprika for milder heat.
    • Cheddar cheese: Melted and gooey, it’s the glue holding everything together.
    • Buns: Soft but sturdy—consider brioche for extra indulgence.
    • Lettuce, tomato, pickles: Fresh, crunchy, and tangy—your classic burger toppings.
    • Spicy mayo: Creamy with a kick—mix mayo with hot sauce or sriracha.

    Tools of the trade for spooky, tasty burgers

    • Cast-iron skillet: Provides even heat and a perfect crust.
    • Spatula: Helps flip the patties with control.
    • Chef’s knife: For carving the pumpkin face and prepping toppings.
    • Basting brush: For melting cheese and glazing the buns.
    • Wooden board: Chopping and assembling.

    Step-by-step guide to your spooky, tasty creation

    Step 1: Start by gathering all your ingredients and prepping your station. It’s chaos but kind of cozy.

    Step 2: Mix the ground beef with chopped caramelized onions, a splash of smoky chipotle sauce, and salt. Don’t overwork the meat.

    Step 3: Shape into patties, about 2 cm thick. Keep your hands light—no dense burgers!

    Step 4: Heat a cast-iron skillet over medium-high heat, about 200°C (390°F).

    Step 5: Cook the patties for 4 minutes per side. Look for a deep caramel crust and a little sizzle.

    Step 6: During the last minute, add slices of cheddar and cover to melt. The aroma should be rich and gooey.

    Step 7: While the burgers rest for 5 minutes, toast your buns lightly in the same pan.

    Step 8: Assemble with lettuce, tomato, pickles, and a generous dollop of spicy mayo. Finish with a fun, carved jack-o’-lantern face on the bun.

    Cooking checkpoints to keep you on track

    • Look for a deep, golden crust on the burger; it’s a sign of proper caramelization.
    • Check the internal temperature—aim for 70°C (160°F)—that’s the sweet spot for juicy, cooked-through patties.
    • The cheese should be gooey, bubbling, and slightly browned at the edges, signaling it’s melt-ready.

    Common mistakes and how to fix them

    • Over-salting the beef.? Use too much salt? Rinse and pat dry, then adjust salt in the next batch.
    • Sticking to the skillet.? Burger sticking? Oil the pan a little more or let the patties rest before flipping.
    • Undermelting the cheese.? Cheese not melting? Cover the pan or lower heat for a minute.
    • Overcooking the patties.? Burger too dry? Add a slice of butter on top or serve immediately.

    Jack O’ Lantern Burgers

    These playful burgers feature juicy ground beef patties infused with caramelized onions and smoky chipotle sauce, topped with melted cheddar cheese and nestled in soft buns. The buns are carved with fun jack-o’-lantern faces for a festive Halloween touch. The combination of smoky, spicy, and cheesy flavors creates a savory, satisfying bite with a fun, spooky presentation.
    Prep Time 20 minutes
    Cook Time 15 minutes
    Total Time 35 minutes
    Servings: 4
    Course: Main Course
    Cuisine: American
    Calories: 650

    Ingredients
      

    • 500 g ground beef (80/20) preferably
    • 1 cup caramelized onions finely chopped
    • 2 tbsp smoky chipotle sauce
    • 4 slices cheddar cheese preferably sliced
    • 4 buns soft burger buns brioche or similar
    • 1 leaf lettuce washed and dried
    • 1 slice tomato sliced
    • 4 pickles pickles sliced
    • 1/2 cup mayonnaise for spicy mayo
    • 1 tbsp hot sauce or sriracha to mix with mayo

    Equipment

    • Cast-iron skillet
    • Spatula
    • Chef’s knife
    • Basting brush
    • Wooden board

    Method
     

    1. Gather all your ingredients and set up your station for efficient assembly. The kitchen should smell warm and savory as the onions caramelize.
    2. Mix the ground beef with the chopped caramelized onions, smoky chipotle sauce, and a pinch of salt. Handle the meat gently to keep the patties juicy and avoid overworking it.
    3. Divide the mixture into four equal portions and shape each into a patty about 2 cm thick. Keep your hands light to prevent dense burgers.
    4. Preheat your cast-iron skillet over medium-high heat until it’s hot and slightly shimmering. You should hear a gentle sizzle when the patties hit the pan.
    5. Place the patties in the skillet and cook for about 4 minutes per side, until they develop a deep caramel-colored crust and sizzle invitingly.
    6. During the last minute of cooking, lay a slice of cheddar cheese on each patty and cover the pan to melt the cheese thoroughly—look for bubbling and slight browning at the edges.
    7. While the cheese melts, slice your buns and lightly toast them in the same pan until golden brown and slightly crispy, about 1-2 minutes.
    8. Prepare the spicy mayo by mixing mayonnaise with hot sauce or sriracha until well combined and creamy with a bit of kick.
    9. Assemble each burger by layering lettuce, tomato slices, pickles, and a generous dollop of spicy mayo on the bottom bun. Top with the cheesy beef patty and cap with the top bun.
    10. Using a chef’s knife, carve fun jack-o’-lantern faces into the top buns for a spooky, festive look. The carving should be precise but playful.
    11. Serve the burgers immediately, with the carved buns sitting proudly on top. Enjoy the savory, smoky flavors and fun Halloween presentation.
    These Jack O’ Lantern Burgers aren’t just for Halloween—they’re a reminder to embrace fun in the kitchen. Feel free to swap ingredients, add your favorite toppings, or make them vegetarian with hearty mushrooms or lentils. The goal is to enjoy the process and serve up a meal that sparks joy and a little nostalgia. So, get creative, and don’t forget—sometimes the messiest attempts turn out the best.

  • Halloween Trifle: A Spooky Layered Delight with a Twist

    Halloween is the one time I let my dessert go wild. This trifle is my way of embracing chaos—layers of color and flavor that look as spooky as they taste. It’s an easy build, but each layer should feel deliberate, almost like a mini art project in the kitchen.

    Why I Keep Coming Back to This Trick

    The joy of layering and the surprise of each bite keeps me engaged. It’s a flexible dessert that invites creativity. Plus, it’s a reminder that even simple ingredients can turn into something festive and memorable.

    Hauntingly Good Ingredients, Simplified

    • Pumpkin puree: Bright orange, smooth, and earthy—use canned or roasted pumpkin. Swap for sweet potato puree for a sweeter, denser flavor.
    • Mixed berries: Juicy and tart, they add vibrant purple hues. Frozen berries work in a pinch—just thaw and drain.
    • Whipped cream: Light, airy, and slightly sweet—make your own or buy ready-made. Use coconut cream for a dairy-free version.
    • Spiced cake or cookies: Crunchy and flavorful, they anchor the layers. Ginger snaps or speculoos cookies are perfect swaps.
    • Edible glitter or colored sugar: Adds a spooky shimmer—use sparingly for a magical effect.

    Tools of the Spooky Trade

    • Large glass trifle bowl: Show off your layers and keep everything visible.
    • Whisk: Beat the cream to soft peaks without overdoing it.
    • Sharp knife: Slice fruits and cake cleanly.
    • Mixing spoon: Layer ingredients smoothly and evenly.

    Crafting the Perfect Halloween Trifle: Step-by-Step

    Step 1: Gather your ingredients and tools first. You’ll need a large glass trifle bowl, a whisk, a sharp knife, and a mixing spoon.

    Step 2: Start by preparing the spooky layers—think bright orange pumpkin, deep purple berries, and ghostly whipped cream.

    Step 3: Layer your ingredients in the bowl, starting with the cake or cookie base, then alternating with fruit and cream. Chill for at least 2 hours before serving.

    Key Moments to Watch While Making Your Trifle

    • Color should be vivid and bright, especially the fruit layers—no dull or brownish hues.
    • The cream should hold soft peaks but not be stiff—over-whipping can turn it grainy.
    • Layers should be distinct and visible, with no mix of liquids and solids—think visually appealing and tidy.

    Troubleshooting Your Spooky Creation

    • Over-whipped cream? If the cream turns grainy, stop whipping immediately.
    • Lackluster layers? Dull colors? Add a splash of brightly colored fruit juice or edible glitter.
    • Layer mixing? Layers merge together? Chill longer between layers.
    • Soggy layers? If fruit is too watery, drain excess juice before layering.

    Halloween Spooky Trifle

    This Halloween-themed trifle layers vibrant pumpkin puree, juicy berries, crunchy spiced cookies, and airy whipped cream in a clear glass bowl, creating a visually striking and festive dessert. The assembly involves careful layering to ensure distinct, colorful strata that delight the senses and evoke a spooky atmosphere. The final product is a creamy, crunchy, and colorful treat with a playful, artful appearance.
    Prep Time 20 minutes
    Cook Time 10 minutes
    Total Time 2 hours 30 minutes
    Servings: 8
    Course: Main Course
    Cuisine: Festive
    Calories: 250

    Ingredients
      

    • 1 cup pumpkin puree canned or roasted
    • 1 cup mixed berries thawed if frozen
    • 1 cup whipped cream soft peaks, homemade or store-bought
    • 1 cup spiced cake or cookies ginger snaps or speculoos
    • 1 teaspoon edible glitter or colored sugar for shimmer

    Equipment

    • Large glass trifle bowl
    • Whisk
    • Sharp knife
    • Mixing spoon

    Method
     

    1. Gather your ingredients and tools: a large glass trifle bowl, a whisk, a sharp knife, and a mixing spoon.
    2. Slice the spiced cookies or cake into small, bite-sized pieces, creating a crunchy base for your layers.
    3. Pour a layer of pumpkin puree into the bottom of the trifle bowl, spreading it evenly with a spoon until the surface looks smooth and bright orange.
    4. Add a handful of mixed berries over the pumpkin layer, distributing them evenly for a burst of color and tart flavor.
    5. Spoon a layer of whipped cream over the berries, smoothing it gently to create a soft, white contrast.
    6. Place a layer of spiced cookies or cake pieces over the whipped cream, pressing them slightly into the cream to nestle them in place.
    7. Repeat the layering process—pumpkin, berries, whipped cream, and cookies—until the bowl is filled, ending with a final layer of whipped cream.
    8. Sprinkle a pinch of edible glitter or colored sugar on top for a spooky shimmer, then chill the trifle in the fridge for at least 2 hours to allow flavors to meld.
    9. Once chilled, serve the trifle with a long spoon, revealing the colorful layers and enjoying the festive, crunchy, and creamy textures.
    This Halloween trifle isn’t just a dessert; it’s a centerpiece that sparks conversation. The vibrant colors and playful layers make it feel like a celebration of all things spooky and sweet. Feel free to swap in your favorite seasonal fruits or tweak the cream for extra richness. It’s messy, joyful, and exactly what a holiday like this needs.

  • Unconventional Halloween Cake Pops: A Spooky Spin with a Surprise Center

    These Halloween cake pops started as a way to make spooky treats more playful and less fussy. The surprise filling adds a fun, chaotic element that keeps everyone guessing. I love how each batch feels like a tiny, edible mystery—crunch, goo, and all.
    Plus, they’re surprisingly forgiving for a holiday that loves to throw decorating chaos at you. The process is messy but rewarding, especially when you see the faces of friends or kids discovering that delicious secret inside.

    Why I Keep Making These Year After Year

    They’re a perfect mix of chaos and creativity, and every batch feels like a small, edible story. The surprise fillings spark joy and surprise, making each Halloween memorable. Plus, they’re surprisingly forgiving—messy, yes, but deeply satisfying. It’s a tradition that keeps the spirit of playful baking alive, especially when the kids or friends get involved.

    Inside the Candy Box: Key Ingredients and Tips

    • Chocolate melts: I use high-quality dark or milk chocolate for a glossy finish; cut with a teaspoon of coconut oil to keep it smooth. Swap for white chocolate if you want a lighter look.
    • Cake base: Use day-old cake crumbs mixed with frosting—keeps the texture dense enough to hold surprises. Any leftover sponge is fine, just crumble well.
    • Filling options: Caramel, fruit preserves, or even peanut butter—pick your flavor and heat it slightly if too thick. Oozing and smoky, these fillings make each bite special.
    • Decorative sprinkles: Choose spooky shapes or metallics for that extra Halloween shimmer. Keep a mix handy for quick decoration.
    • Cake pop sticks: Wooden or plastic, sturdy enough to hold your creation steady. I like the shorter ones for smaller hands or more controlled dipping.
    • Food coloring: Use gel colors for vibrant, mess-free hues. Just a few drops can turn your pops into mini Halloween art.
    • Edible glitter or dust: For that shimmer that catches the light—applies best after the coating sets, adding a final magical touch.

    Tools That Make the Magic Happen

    • Microwave or double boiler: For melting the chocolate smoothly without scorching.
    • Cake pop sticks: To hold the balls steady while decorating and drying.
    • Styrofoam block or cake pop holder: To keep the dipped pops upright and stable as they set.
    • Small spoon or piping bag: To add fillings neatly into the cake balls.
    • Sharp knife or toothpick: To create a small hole for inserting the surprise filling.

    Crafting the Perfect Halloween Cake Pop: Step-by-Step

    Step 1: Start by melting your chocolate and coating the cake balls to create a smooth, even shell. Chill until set, about 30 minutes.

    Step 2: Insert a surprise element—like a caramel or fruit jam—into each cake ball before coating, ensuring a gooey center.

    Step 3: Dip each chilled ball into the melted chocolate, swirling off excess to achieve a sleek finish.

    Step 4: Decorate with spooky sprinkles, edible glitter, or even tiny candy eyes for that perfect Halloween touch.

    Step 5: Let the cake pops rest in the fridge for at least 15 minutes before serving to set the coating and filling.

    Key Tips and Tricks for Halloween Cake Pops

    • Ensure the cake balls are well chilled before dipping—warm hands can melt the coating.
    • Watch the chocolate temperature—overheated chocolate can crack or become stringy.
    • Test your filling amount—too much can cause drips; too little, a dry center.
    • Use a styrofoam block to stick the cake pops in while drying for a neat finish.

    Common Pitfalls and How to Fix Them

    • Chocolate overheated or dried out.? MELTED CHOCOLATE SEIZES OR HARDENS—Add a bit of vegetable oil and gently reheat to restore smoothness.
    • Cake mixture too warm or overworked.? CAKE BALLS FALL APART—Ensure they are chilled enough and not overmixed.
    • Too much filling or overly liquid consistency.? Filling leaks or slides out—Make sure the hole is just the right size and the filling isn’t too runny.
    • Slow dipping or thick coating.? Cake pops crack when dipped—Dip quickly and smoothly, and avoid overworking the coating.

    Halloween Surprise Cake Pops

    These playful Halloween cake pops feature a crunchy chocolate shell with a gooey surprise filling inside, creating a fun, chaotic treat perfect for spooky celebrations. The process involves shaping cake crumbs with frosting, inserting flavorful fillings, and coating in glossy melted chocolate, resulting in bite-sized, edible mysteries that delight both kids and adults alike.
    Prep Time 30 minutes
    Cook Time 30 minutes
    Total Time 1 hour
    Servings: 12
    Course: Main Course
    Cuisine: Halloween
    Calories: 150

    Ingredients
      

    • 12 pieces cake balls prepared from crumbled cake mixed with frosting
    • 200 g dark or milk chocolate melts high-quality, for coating
    • 1 tsp coconut oil to thin chocolate melts
    • 12 tsp caramel or fruit preserves for surprise filling
    • Spooky sprinkles, edible glitter decorative toppings for decoration
    • 12 sticks cake pop sticks sturdy enough to hold the pops

    Equipment

    • Microwave or double boiler
    • Cake pop sticks
    • Styrofoam block or cake pop holder
    • Small spoon or piping bag
    • Sharp knife or toothpick

    Method
     

    1. Start by melting your chocolate melts in a microwave or double boiler until smooth and glossy, then stir in a teaspoon of coconut oil to keep it fluid.
    2. Using a small spoon or piping bag, carefully fill a piping bag with caramel or fruit preserves, then pipe a small amount into the center of each cake ball, creating a tiny well for the surprise filling.
    3. Insert a cake pop stick into each cake ball, ensuring it goes through the filling, then gently mold the cake balls into smooth spheres, sealing the filling inside.
    4. Place the filled cake balls on a tray and chill in the refrigerator for about 30 minutes until firm and cold.
    5. Once chilled, dip each cake ball into the melted chocolate, swirling gently to cover completely and remove excess coating.
    6. Decorate the coated cake pops with spooky sprinkles or edible glitter for a festive Halloween look, pressing toppings gently onto the surface.
    7. Place the decorated cake pops upright in a styrofoam block or cake pop holder and chill in the refrigerator for at least 15 minutes to set the coating and filling.
    8. Once set, carefully remove the cake pops from the holder and serve on a spooky platter, ready to delight everyone with their surprise-filled centers.

    Notes

    Ensure the cake balls are well chilled before dipping to prevent cracking. Use a gentle swirling motion when coating to achieve a smooth finish. Feel free to customize fillings and decorations for a personalized spooky touch.
    These cake pops aren’t just a treat; they’re a storytelling moment at your Halloween table. The hidden fillings transform each bite into a little adventure, making them a hit whether you’re handing them out or keeping them close. Plus, the messy, fun process makes for a great kitchen chaos to embrace with friends or kids. Have fun customizing the colors and fillings, and don’t be shy to get a little spooky with your decorations.

  • Pumpkin Mac and Cheese: A Cozy Twist for Chilly Days

    Pumpkin Mac and Cheese: A Cozy Twist for Chilly Days

    Pumpkin mac and cheese might sound like a holiday special, but it’s actually a quiet hero for any fall weeknight. The pumpkin adds a subtle sweetness and velvety texture that elevates the usual cheesy bowl. It’s a dish that feels familiar but with a cozy twist that’s worth the extra step.

    Why I keep coming back to this dish

    It’s a perfect comfort food with a seasonal twist that feels both nostalgic and fresh. The pumpkin’s sweetness balances the richness of cheese, and it’s forgiving to tweak with leftovers or pantry staples. Plus, roasting pumpkin fills the kitchen with a warm, sweet aroma that makes everything feel right.

    Breaking down the key ingredients

    • Pumpkin: Sweet, earthy, and velvety when roasted, it’s the soul of this dish.
    • Cheddar cheese: Sharp and gooey, it melts beautifully, giving that classic cheesy pull.
    • Nutmeg: A pinch adds warmth and depth, balancing the pumpkin’s sweetness.
    • Pasta: Choose a sturdy shape like cavatappi or shells that hold sauce well.
    • Milk: Creamy base; full-fat makes it richer, but you can use a lower-fat version.
    • Butter & Flour: Form the roux; start here for a smooth, luscious sauce.
    • Olive oil: Used for roasting pumpkin; look for a bright, fruity aroma.

    Tools and equipment you’ll need

    • Large pot: For boiling pasta.
    • Baking sheet: To roast the pumpkin.
    • Saucepan: To make the cheese sauce.
    • Whisk: To mix the sauce smoothly.
    • Baking dish: To bake the assembled mac and cheese.

    Step-by-step for a creamy, pumpkin-infused mac and cheese

    Step 1: Preheat your oven to 180°C (350°F).

    Step 2: Boil a large pot of salted water, cook pasta until just al dente, about 8 minutes.

    Step 3: While pasta cooks, roast pumpkin: toss chunks with olive oil, salt, and pepper. Roast on a baking sheet at 200°C (400°F) for 25-30 minutes until tender and caramelized.

    Step 4: In a saucepan, melt butter over medium heat. Add flour, whisk for 1 minute to make a roux.

    Step 5: Gradually pour in milk, whisk constantly until the sauce thickens, about 5 minutes.

    Step 6: Stir in grated cheese, pumpkin puree, and season with nutmeg, salt, and pepper.

    Step 7: Combine cooked pasta with cheese sauce, transfer to a baking dish.

    Step 8: Bake uncovered for 15 minutes until bubbly and golden.

    Cooking checkpoints to get it just right

    • Pasta should be cooked al dente — tender but with a slight bite.
    • Cheese sauce needs to be smooth and creamy, not grainy or split.
    • Pumpkin should be roasted until caramelized for added sweetness and depth.

    Common mistakes and how to fix them

    • Lumpy cheese sauce? Use too much flour in roux → Thin out with a splash of milk and whisk again.
    • Underdeveloped flavor? Pumpkin isn’t roasted enough → Roast longer until deeply caramelized.
    • Dry or burnt top? Overbaking the dish → Keep an eye on it, bake just until bubbly and golden.
    • Soggy noodles? Pasta overcooked → Drain and toss with a bit of olive oil to stop cooking.

    Pumpkin Mac and Cheese

    This pumpkin mac and cheese combines creamy cheese sauce with roasted pumpkin for a seasonal twist on a comfort classic. The dish features tender pasta coated in a velvety, cheesy sauce infused with sweet roasted pumpkin and a touch of nutmeg, finished with a golden bubbly top. It’s a cozy, visually appealing dish that balances richness with a subtle sweetness and warm spices.
    Prep Time 15 minutes
    Cook Time 45 minutes
    Total Time 1 hour
    Servings: 4
    Course: Main Course
    Cuisine: American
    Calories: 450

    Ingredients
      

    • 1 pound pasta (cavatappi or shells) uncooked
    • 2 cups pumpkin chunks peeled and cubed
    • 2 tablespoons olive oil for roasting
    • 2 cups milk full-fat or lower-fat
    • 2 tablespoons butter
    • 2 tablespoons flour
    • 1.5 cups sharp cheddar cheese grated
    • 1/4 teaspoon nutmeg ground
    • Salt and pepper to taste

    Equipment

    • Large pot
    • Baking sheet
    • Saucepan
    • Whisk
    • Baking dish

    Method
     

    1. Preheat your oven to 200°C (400°F). Toss pumpkin chunks with olive oil, salt, and pepper, then spread them evenly on a baking sheet. Roast for 25-30 minutes until caramelized and tender, filling your kitchen with a warm, sweet aroma.
    2. While the pumpkin roasts, bring a large pot of salted water to a boil. Cook the pasta until just al dente, about 8 minutes, then drain and set aside.
    3. In a saucepan, melt the butter over medium heat. Add the flour and whisk constantly for about 1 minute until the mixture turns a light golden color and smells slightly nutty.
    4. Gradually pour in the milk, whisking continuously to prevent lumps. Keep whisking until the sauce thickens and begins to bubble gently, about 5 minutes.
    5. Stir in the grated cheddar cheese, roasted pumpkin puree, ground nutmeg, and season with salt and pepper. Continue whisking until the cheese melts and the sauce is smooth, with a velvety texture.
    6. Combine the cooked pasta with the cheese and pumpkin sauce, folding gently to coat all the noodles evenly.
    7. Transfer the pasta mixture to a baking dish and spread it out evenly. Bake uncovered for 15 minutes until bubbly and the top turns golden brown.
    8. Remove from the oven and let it rest for a few minutes. The dish should be bubbling, with a slightly crispy top and creamy interior.
    This dish is a testament to how seasonal ingredients can transform comfort food. The sweet, earthy pumpkin melds perfectly with cheesy richness, making every bite a little celebration. Feel free to tweak the spices or cheese to match your mood. It’s a good one to have in your back pocket for chilly nights or when you want a bowl of something warm and familiar.

  • Spiderweb Cheesecake: A Rich, Intricate Dessert with a Touch of the Unexpected

    Spiderweb Cheesecake: A Rich, Intricate Dessert with a Touch of the Unexpected

    The idea of a spiderweb cheesecake might seem a bit whimsical, but it’s really a story of patience and detail. I fell for it during a holiday baking spree, drawn by the intricate design and the promise of creamy richness beneath. It’s not just dessert; it’s a conversation starter, a piece of edible art that feels special without needing fancy ingredients.

    Why I Keep Returning to This Cheesecake

    Its blend of precision and creativity keeps me hooked. Each time I make it, I find new ways to tweak the web design or filling spices. It’s a reminder that beauty and flavor can coexist in the kitchen, demanding patience and pride with every layer. Plus, the compliments when I serve it are worth every minute of effort.

    Deconstructing the Spiderweb Cheesecake

    • Graham crackers: Provide a crunchy, buttery base. Sub with digestive biscuits if unavailable.
    • Butter: Bind the crust together with richness and flavor. Use margarine for a dairy-free version.
    • Cream cheese: The creamy core, smooth and tangy. Full-fat gives the best texture.
    • Sugar: Sweetens the filling and balances acidity. Honey can replace part of it for a floral note.
    • Eggs: Help set the filling. Use flax eggs for a vegan take.
    • Sour cream: Creates the web’s decorative topping with a tangy zing. Yogurt works in a pinch.
    • Powdered sugar: Sweetens and thickens the topping. Adjust to taste.

    Tools for Your Web of Cheesecake Creation

    • Springform pan: Gives you a clean edge and easy removal for presentation.
    • Mixing bowls: Combine ingredients smoothly and efficiently.
    • Electric mixer or whisk: Beat the cream cheese and eggs to a silky texture.
    • Toothpick or skewer: Create the web pattern on top.
    • Spatula: Spread the topping evenly and handle delicate layers.

    Steps to Craft Your Spiderweb Cheesecake

    Step 1: Preheat your oven to 160°C (320°F).

    Step 2: Mix crushed graham crackers with melted butter and press into a 20cm (8-inch) springform pan, creating a thin, even crust.

    Step 3: Beat softened cream cheese with sugar and vanilla until smooth, then add eggs one at a time, mixing just until incorporated.

    Step 4: Pour the filling over the crust and bake for about 50-60 minutes until the edges are set but the center still jiggles slightly.

    Step 5: While baking, prepare the spiderweb topping: mix sour cream with powdered sugar and a splash of vanilla.

    Step 6: Once the cheesecake is out of the oven, let it cool in the pan for 30 minutes. Then refrigerate for at least 4 hours, ideally overnight.

    Step 7: Before serving, spread the sour cream mixture on top and use a toothpick to create a web pattern, starting from the center outward.

    Key Checks to Keep Your Spiderweb Cheesecake Perfect

    • Ensure the crust is pressed firmly and evenly to prevent cracks.
    • Bake until edges are lightly golden and the center jiggles just slightly, avoiding overbaking.
    • Create the web pattern when the topping is slightly set but still flexible to prevent smudging.
    • Refrigerate thoroughly to help the web firm up and set the design for clean slicing.

    Common Mistakes and How to Fix Them

    • Overmixing the filling can cause cracks.? CRACKED TOP? — Bake at a slightly lower temperature and avoid overmixing the filling.
    • Creating the web too early causes smudging.? WEB RUNNING? — Let the topping set for a few minutes before drawing the web.
    • Not refrigerating long enough or oven temperature inaccuracies.? CHEESECAKE TOO SOFT? — Chill longer or check oven temp with an oven thermometer.
    • Over-pressing the crust or using too much butter.? CRUSTS TOO HARD? — Use slightly less butter or press more gently.

    Spiderweb Cheesecake

    This stunning spiderweb cheesecake combines a crunchy graham cracker crust with a creamy, tangy filling, topped with a decorative web pattern made from sour cream. The intricate design and smooth texture make it a true showstopper, perfect for special occasions or holiday celebrations. Its rich flavor and eye-catching appearance make every slice a delightful treat.
    Prep Time 30 minutes
    Cook Time 1 hour
    Total Time 6 hours 30 minutes
    Servings: 8
    Course: Main Course
    Cuisine: American
    Calories: 450

    Ingredients
      

    • 1 1/2 cups graham cracker crumbs or digestive biscuits
    • 1/2 cup melted butter or margarine
    • 16 oz cream cheese softened
    • 1 cup sugar
    • 1 teaspoon vanilla extract
    • 3 eggs large
    • 1 cup sour cream
    • 1/2 cup powdered sugar

    Equipment

    • Springform Pan
    • Mixing bowls
    • Electric mixer or whisk
    • Toothpick or skewer
    • Spatula

    Method
     

    1. Preheat your oven to 160°C (320°F). Mix graham cracker crumbs with melted butter until evenly coated, then press this mixture firmly into the bottom of a 20cm (8-inch) springform pan to form a smooth crust. Bake for 10 minutes, then set aside to cool.
    2. In a large mixing bowl, beat softened cream cheese with sugar and vanilla until smooth and creamy. This creates a silky filling base with a slight tang.
    3. Add eggs one at a time to the cream cheese mixture, beating just until each is incorporated. The mixture should be thick and smooth, with no streaks.
    4. Pour the filling over the cooled crust, smoothing the top with a spatula. Bake for 50-60 minutes until the edges are lightly golden and the center jiggles slightly when moved.
    5. While the cheesecake bakes, mix sour cream with powdered sugar and a splash of vanilla until well combined. This will be used for the web decoration.
    6. Once baked, turn off the oven and let the cheesecake cool in the pan for about 30 minutes, then transfer it to the refrigerator to chill for at least 4 hours or overnight. This helps it set and develop a smooth texture.
    7. Spread the sour cream mixture evenly over the chilled cheesecake, creating a smooth top surface. Use a spatula to get a clean, flat finish.
    8. Using a toothpick or skewer, starting from the center, draw lines outward to create a web pattern. Repeat from the center to the edges, forming concentric circles for the web design.
    9. Finish by gently dragging the toothpick from the center outward along the lines to enhance the web effect. The pattern should look delicate and symmetrical, adding an artistic touch to your cheesecake.
    10. Slice the cheesecake carefully with a sharp knife, wiping it clean between cuts for neat slices. Serve chilled to enjoy the creamy texture and impressive design.

    Notes

    Ensure the web pattern is drawn when the topping is slightly set but still flexible to prevent smudging. Refrigerate thoroughly to help the web design firm up for clean slices.
    This cheesecake is a quiet marvel, with its delicate web pattern hiding a rich, creamy core. It’s a bit of a project, but the visual payoff makes it worth every step. Feel free to personalize the web design or tweak the filling to match your taste. Just remember, patience and gentle handling keep the texture silky and inviting. Enjoy every bite with a cup of strong coffee or a drizzle of berry compote.