Blog

  • Autumn’s Unexpected Classic: The Cozy Chicken Casserole Twist

    Autumn’s Unexpected Classic: The Cozy Chicken Casserole Twist

    So gather your ingredients, turn on your oven, and welcome the season with this unexpected but utterly comforting dish. It’s a chance to break out of the usual and add a little sparkle to those chilly evenings. Here’s to warm plates and stories shared around the table.

    Savory Bread Pudding

    This dish combines chunks of crusty bread soaked in a savory custard made from eggs and cream, then baked until golden and fluffy. The result is a creamy interior with a slightly crisp top, featuring ingredients like cheese, herbs, and cooked vegetables for additional flavor and texture.
    Prep Time 15 minutes
    Cook Time 40 minutes
    Total Time 55 minutes
    Servings: 4
    Course: Main Course
    Cuisine: Comfort
    Calories: 350

    Ingredients
      

    • 4 cups day-old bread cubes stale or toasted for extra flavor
    • 1 cup shredded cheese cheddar or Gruyère works well
    • 1 cup cooked vegetables such as spinach, mushrooms, or bell peppers
    • 4 eggs beaten
    • 1.5 cups heavy cream
    • 2 tablespoons fresh herbs chopped parsley or thyme
    • to taste salt and pepper

    Equipment

    • Mixing bowl
    • Baking dish

    Method
     

    1. Preheat your oven to 375°F (190°C), and generously butter your baking dish to prevent sticking.
    2. Add the bread cubes to a large mixing bowl and toss with the cooked vegetables, shredded cheese, and chopped herbs, distributing evenly.
    3. In a separate bowl, whisk together the eggs and heavy cream until thoroughly combined and slightly frothy.
    4. Pour the custard mixture over the bread and vegetable mixture, gently pressing down to ensure all pieces are immersed and soak up the custard.
    5. Season with salt and pepper to taste, then let the mixture sit for 10 minutes to allow the bread to absorb the custard fully.
    6. Transfer the soaked mixture into the prepared baking dish, spreading it evenly with a spatula.
    7. Bake in the preheated oven for about 35 to 40 minutes, or until the top is golden brown and the mixture is puffed and set in the center with a slight jiggle.
    8. Remove from the oven and allow to rest for 5 minutes, which helps it set perfectly and makes it easier to slice.
    9. Slice into portions and serve warm, enjoying the creamy interior with a crisp, golden crust on top.
    This fall-inspired chicken casserole captures the essence of the season—crisp air, warm flavors, and the joy of a dish that’s both unexpected and familiar. It’s a reminder that comfort food doesn’t have to be predictable; sometimes, it’s about throwing in a little surprise and enjoying the ride.

    As the days grow cooler, dishes like this become more than just food—they become memories in the making. A warm plate in hand, scent of roasted garlic lingering, feels like an embrace from the season itself.

  • Chill Out with an Unusual Coffee Slushie Recipe

    Chill Out with an Unusual Coffee Slushie Recipe

    Imagine a summer day when ordinary iced coffee just doesn’t cut it. You crave something cooler, smoother, with a hint of nostalgia into childhood frozen treats. This coffee slushie offers that perfect icy bite, blending rich coffee flavor with a silky texture that melts in your mouth.

    But here’s the twist: I discovered this recipe in a vintage cookbook buried in my grandma’s attic. The secret ingredient? A dash of condensed milk plus a sprinkle of sea salt. It instantly transports me back to lazy Sunday afternoons, sipping frosty drinks and watching the clouds roll.

    Coffee Slushie

    A coffee slushie is a frozen beverage that combines brewed coffee with sweetened condensed milk and a touch of sea salt, blended into a smooth, icy texture. The mixture is frozen and then pulsed until it reaches a creamy, slushy consistency with a rich coffee flavor. The final appearance is a pale, frosty drink with a silky texture that melts in the mouth.
    Prep Time 10 minutes
    Total Time 10 minutes
    Servings: 2
    Course: Main Course
    Cuisine: Healthy Drinks
    Calories: 150

    Ingredients
      

    • 1 cup hot brewed coffee cooled to room temperature
    • 1/4 cup sweetened condensed milk for sweetness and creaminess
    • a pinch sea salt enhances flavor
    • 2 cups ice cubes

    Equipment

    • Coffee maker or saucepan (for brewing coffee)
    • Blender
    • Measuring cups and spoons

    Method
     

    1. Brew a cup of coffee and let it cool to room temperature. Measuring the coffee in a cup will help you gauge the amount needed for blending.
    2. Pour the cooled coffee into a blender, then add the sweetened condensed milk for a rich sweetness and creaminess.
    3. Sprinkle a pinch of sea salt into the mixture to elevate the flavors and add a subtle savory note.
    4. Add the ice cubes to the blender, creating a mound that surrounds the liquid ingredients.
    5. Secure the lid on the blender and pulse the mixture a few times to start crushing the ice.
    6. Blend on high until the mixture is smooth, thick, and slushy, with a frosty appearance.
    7. Stop the blender and check the texture; it should be creamy and icy, with visible ice crystals but no large chunks.
    8. Pour the coffee slushie into chilled glasses, allowing the silky, frosty texture to shine through.
    9. If desired, garnish with a light sprinkle of cocoa powder or a coffee bean for presentation.
    10. Serve immediately with a straw or spoon, enjoying the cool, creamy, and invigorating flavors of the coffee slushie.
    This coffee slushie isn’t just a cool refreshment; it’s a little escape from the rush of everyday life. It’s perfect for lazy mornings or unexpected guests. Plus, it requires just a handful of ingredients and about five minutes to whip up.

    Whenever I make this, the house fills with a rich coffee aroma, and I smile knowing I’ve got a simple, satisfying treat on hand. It’s a reminder that sometimes the best ideas come from unexpected places, turning everyday ingredients into something extraordinary.

  • Chilling Secrets: The Frozen Margarita Slushie That Tells a Tropical Tale

    Chilling Secrets: The Frozen Margarita Slushie That Tells a Tropical Tale

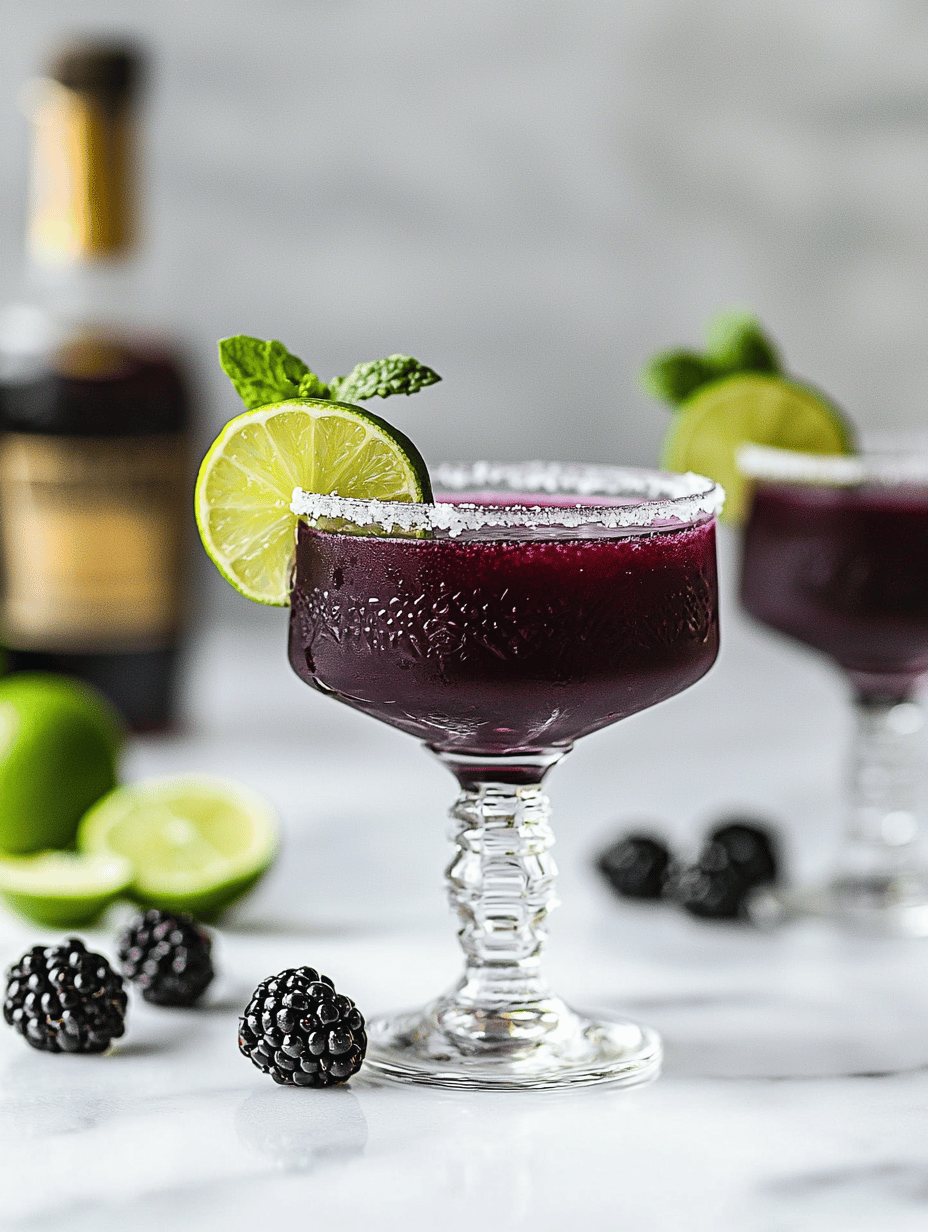
    Imagine a scorching summer day, the sun beating down relentlessly. You reach for a cold treat, not just any cold drink, but a frozen margarita slushie that whispers tales of seaside escapes and festive nights. This recipe transforms the classic margarita into a frosty, refreshingly vibrant sip that sparks nostalgia and adds a splash of fun to any outdoor gathering.

    What makes this slushie so special isn’t just its icy crunch, but its ability to transport you to a tropical paradise with each sip. Blend lime, tequila, and a hint of sweetness into a snowy texture that’s perfect for beating the heat and lifting spirits. It’s a simple pleasure that captures the festive spirit, even on the busiest days.

    Frozen Margarita Slushie

    This frozen margarita slushie is a vibrant, icy beverage made by blending lime juice, tequila, and sweetener into a snowy, slushy texture. It features a refreshing, semi-frozen consistency with a bright, tangy flavor, perfect for hot days or outdoor gatherings.
    Prep Time 10 minutes
    Total Time 10 minutes
    Servings: 4
    Course: Main Course
    Cuisine: Mexican
    Calories: 150

    Ingredients
      

    • 1 cup fresh lime juice about 4-5 limes
    • 1/2 cup tequila preferably silver or blanco
    • 1/4 cup simple syrup or agave nectar adjust sweetness to taste
    • 2 cups ice cubes roughly crushed or whole

    Equipment

    • Blender
    • Measuring cups and spoons

    Method
     

    1. Measure out the lime juice using a measuring cup, ensuring it’s freshly squeezed for bright, tangy flavor.
    2. Pour the lime juice into the blender, followed by the tequila and sweetener, creating a vibrant liquid base.
    3. Add the ice cubes to the blender, filling it up to roughly the halfway point, to achieve a snowy, slushy texture.
    4. Secure the lid on the blender and blend on high speed for about 30-45 seconds until the mixture is smooth, frosty, and uniform in appearance.
    5. Pause the blender to check the texture; it should be thick and icy but scoopable with a spoon or straw.
    6. Pour the frozen margarita slushie into chilled glasses, garnishing with lime wedges if desired for a festive touch.
    7. Serve immediately with a straw or spoon to enjoy the crisp, icy texture and bright citrus flavor.
    With just a few ingredients and a handy blender, you can whip up this frozen margarita slushie in minutes. It’s the ideal cool-down after a sun-drenched day or a lively addition to any summer celebration. Keep a stash of frozen fruit and tequila on hand for spontaneous moments of frosty joy.

    This recipe isn’t just refreshing; it’s a small reminder of carefree summer nights. Its versatility makes it perfect for customizing to your favorite flavors or experimenting with different fruits and spirits. Sometimes, all you need is a simple, frozen sip to turn things around and bring a little sparkle to your day.

  • Unexpected Pumpkin Bread Hacks for Cozy Fall Mornings

    Unexpected Pumpkin Bread Hacks for Cozy Fall Mornings

    As the leaves turn and Halloween decorations start to fade, I find myself craving something that must be both nostalgic and novel. This isn’t just any pumpkin bread; it’s a recipe that invites you to customize with unexpected spices and textures, turning an ordinary loaf into a cozy culinary adventure.

    Today I’ll share how I’ve infused my pumpkin bread with a hint of cardamom and a swirl of maple syrup, creating layers of warmth and surprise in every bite. Whether you’re an experienced baker or just starting out, this recipe offers a perfect blend of simplicity and experimentation. The aroma alone can make your kitchen feel like a fall festival.

    Let’s dive into what makes this pumpkin bread so special. Plus, I’ll share some tips to handle common baking mishaps, making your baking experience stress-free and deliciously successful.

    Spiced Pumpkin Bread with Maple Swirl

    This pumpkin bread uses a moist batter infused with warm spices and pumpkin puree, baked until golden and tender. A swirl of maple syrup adds an extra layer of sweetness and depth, resulting in a loaf with a beautiful crackled top and soft, rich interior.
    Prep Time 15 minutes
    Cook Time 1 hour
    Total Time 1 hour 15 minutes
    Servings: 8
    Course: Main Course
    Cuisine: American
    Calories: 250

    Ingredients
      

    • 1 3/4 cup all-purpose flour
    • 1 tsp baking soda
    • 1/2 tsp ground cinnamon
    • 1/4 tsp ground cardamom
    • 1/2 tsp salt
    • 1/2 cup granulated sugar
    • 1/2 cup brown sugar
    • 1/2 cup vegetable oil
    • 2 large eggs
    • 1 cup pumpkin puree preferably canned
    • 1/4 cup maple syrup
    • 1 tsp vanilla extract

    Equipment

    • Mixing bowls
    • Whisk or spatula
    • Loaf pan
    • Parchment paper
    • Cooling Rack

    Method
     

    1. Preheat your oven to 350°F (175°C). Line a loaf pan with parchment paper or lightly grease it to prevent sticking.
    2. In a large mixing bowl, whisk together the flour, baking soda, cinnamon, cardamom, and salt until well combined. This ensures an even distribution of the spices and leavening agents.
    3. In a separate bowl, beat the sugars with the oil until the mixture looks smooth and slightly airy—about 2 minutes. This helps incorporate air for a lighter crumb.
    4. Add eggs one at a time to the sugar mixture, whisking well after each addition. You’ll notice the mixture becomes shiny and thickens slightly.
    5. Fold in the pumpkin puree, vanilla extract, and maple syrup until the batter is smooth and uniform. The batter will be thick and fragrant.
    6. Gently fold the dry ingredients into the wet mixture until just combined, being careful not to overmix to keep the bread tender.
    7. Pour half of the batter into the prepared loaf pan, then drizzle the maple syrup over it. Top with the remaining batter, smoothing the surface gently.
    8. Place the loaf pan in the oven and bake for about 60 minutes, or until the top is golden and a toothpick inserted in the center comes out clean.
    9. Remove the bread from the oven and let it cool in the pan for 10 minutes before transferring it to a cooling rack. This helps set the structure and prevents cracking.
    10. Slice the pumpkin bread once it’s completely cooled to reveal the rich, moist interior with marbled maple swirls on top.
    11. Enjoy slices of this cozy pumpkin bread with butter or on their own—perfect for autumn mornings or as a sweet treat.

    This pumpkin bread isn’t just a treat for fall; it’s a celebration of cozy mornings and the magic of homemade baking. I love how the house fills with the sweet, spicy scent of cinnamon and pumpkin, turning simple ingredients into cherished memories.

    Every slice reminds me that baking is as much about the process as the result. When you have a loaf this fragrant and comforting, it becomes the centerpiece of quiet mornings or lively brunches alike. Just slice, spread your favorite butter, and enjoy the comforting sweetness that lingers on your palate.

  • Cozy Pumpkin Oatmeal with a Twist: A Breakfast Revival

    Cozy Pumpkin Oatmeal with a Twist: A Breakfast Revival

    As autumn leaves start to fall, I find myself craving breakfast that feels like a warm hug. Pumpkin oatmeal might seem simple, but I’ve added an unexpected splash of cardamom and toasted pecans for a richer, more nostalgic flavor. It’s a dish that bridges comfort and a hint of culinary adventure.

    Every spoonful awakens the senses—creamy, spiced, with a subtle sweetness that makes mornings feel special. It’s perfect for cozy weekends or when you need a break from the usual cereal routine. This recipe transforms humble oats into a festive, soul-warming bowl that sticks with you long after breakfast.

    Spiced Pumpkin Oatmeal with Toasted Pecans

    This pumpkin oatmeal features creamy cooked oats flavored with warming spices and pureed pumpkin, creating a velvety texture. Topped with toasted pecans and a hint of cardamom, it combines comforting and aromatic elements in a hearty breakfast bowl.
    Prep Time 5 minutes
    Cook Time 15 minutes
    Total Time 20 minutes
    Servings: 2
    Course: Main Course
    Cuisine: American
    Calories: 250

    Ingredients
      

    • 1 cup old-fashioned rolled oats preferably quick-cooking for creaminess
    • 2 cups water or milk for cooking the oats
    • 1/2 cup canned pumpkin puree unsweetened
    • 1 teaspoon ground cinnamon
    • 1/4 teaspoon ground cardamom optional for extra warmth
    • 2 tablespoons maple syrup or honey for sweetness
    • 1/4 cup toasted pecans roughly chopped
    • 1 pinch salt

    Equipment

    • Medium saucepan
    • Toasting pan or oven for pecans
    • Wooden spoon or spatula

    Method
     

    1. Pour water or milk into a medium saucepan and bring to a gentle simmer over medium heat.
    2. Add the oats and a pinch of salt to the simmering liquid, stirring occasionally as the oats start to plump up and absorb the liquid, about 1-2 minutes.
    3. Stir in the pumpkin puree, ground cinnamon, and ground cardamom, mixing well to evenly distribute the spices and pumpkin throughout the oats.
    4. Reduce the heat to low and cook, stirring occasionally, until the oats are tender and the mixture is thick and creamy, about 7-10 minutes.
    5. Stir in the maple syrup or honey to add sweetness and balance the spices, tasting and adjusting as desired.
    6. While the oats finish cooking, toast the pecans in a dry skillet over medium heat until fragrant and lightly golden, about 3-5 minutes. Alternatively, toast them in a warm oven.
    7. Remove the toasted pecans from heat and roughly chop them for topping.
    8. Divide the cooked pumpkin oatmeal into bowls, sprinkle generously with the toasted pecans for added crunch, and serve hot.

    Notes

    For extra flavor, add a dollop of Greek yogurt or a drizzle of additional maple syrup before serving.

    This pumpkin oatmeal is my go-to for chilly mornings that call for something nourishing and indulgent. It’s a reminder that simple ingredients, when treated thoughtfully, can evoke the most vivid memories and joy. Make it your own with toppings that spark your happiness—more cinnamon, a drizzle of honey, or a handful of dried cranberries.

    All that’s left is to enjoy each bite as the aroma of pumpkin and spices fills the air. It’s a small daily pleasure that helps me start the day with a calm, grateful heart. Sometimes, breakfast is enough of an excuse to pause and savor the season.

  • Peach Crisp Reinvented: A Hidden Gem for Summer Desserts

    Peach Crisp Reinvented: A Hidden Gem for Summer Desserts

    Imagine a dessert that captures the essence of summer’s warm embrace—fragrant peaches and a crispy topping in every bite. This peach crisp isn’t just your average fruit crumble; it has a secret ingredient that makes it unexpectedly delightful. I’ve crafted this recipe to highlight a twist I discovered while experimenting in my kitchen during last year’s peach season.

    Many peach recipes focus on simplicity, but I believe the magic lies in unexpected textures and flavors intertwining beautifully. This version is perfect for lazy afternoons or breezy gatherings, where the aroma alone invites smiles. Let’s dive into a dessert that’s comfort, chaos, and nostalgia all wrapped into one bowl.

    Peach Crisp with a Secret Twist

    This peach crisp features tender, baked peaches topped with a crispy, buttery oat mixture. The dish combines the natural sweetness of ripe peaches with a crunchy topping that develops a golden-brown crust during baking, resulting in a warm, inviting dessert with contrasting textures.
    Prep Time 15 minutes
    Cook Time 40 minutes
    Total Time 55 minutes
    Servings: 6
    Course: Main Course
    Cuisine: American
    Calories: 250

    Ingredients
      

    • 4 cups peach slices pitted and sliced
    • 1/4 cup granulated sugar for peaches
    • 1/2 teaspoon ground cinnamon optional but recommended
    • 1 cup old-fashioned rolled oats
    • 1/2 cup all-purpose flour
    • 1/2 cup brown sugar
    • 1/2 cup unsalted butter cold, cut into small cubes
    • 1/4 teaspoon salt
    • 1 secrets ingredient a dash of vanilla extract adds depth to the topping

    Equipment

    • 13×9 inch baking dish
    • Mixing bowls
    • Knife
    • peeler
    • Measuring cups and spoons
    • Whisk
    • fork

    Method
     

    1. Preheat your oven to 350°F (175°C). Slice the peaches and place them in a mixing bowl. Sprinkle with granulated sugar and cinnamon, then gently toss to coat the fruit evenly.
    2. Transfer the coated peach slices into a buttered baking dish, spreading them out in an even layer.
    3. In a separate bowl, combine the oats, flour, brown sugar, and salt. Mix until evenly distributed.
    4. Add the cold, cubed butter to the dry mixture. Use a fork or your fingers to cut in the butter until the mixture resembles coarse crumbs, with some pea-sized pieces remaining.
    5. Drizzle a dash of vanilla extract over the crumb mixture and mix gently to incorporate.
    6. Spoon the crumb mixture evenly over the peaches, covering them completely.
    7. Place the dish in the preheated oven and bake for about 40 minutes, or until the topping is golden brown and bubbling around the edges.
    8. Remove from the oven and let it rest for a few minutes. The aroma should be inviting, with crispy topping and fragrant peaches.
    9. Serve warm, perhaps with a scoop of vanilla ice cream or a dollop of whipped cream if desired.
    As the oven wraps up this warm peach sensation, I find myself soaking in the lingering scent of caramelized fruit and toasted oats. This recipe is a reminder that sometimes, the simplest ingredients—peaches, a touch of sugar, and butter—can create a moment worth savoring.

    Whether it’s for a cozy family dinner or a spontaneous summer celebration, this peach crisp reminds us to enjoy the little joys. It’s a dish that sparks memories and makes new ones, all with a crispy, juicy, and irresistibly fragrant bite.

  • Spooky Delight: Halloween Monster Eyeball Cake Pops

    Spooky Delight: Halloween Monster Eyeball Cake Pops

    Every October, I find myself gravitating towards themes that blend nostalgia and a dash of chaos. This year, I decided to craft something that combines the spooky allure of Halloween with a playful twist—Monster Eyeball Cake Pops. The moment you unwrap the packaging, you’re hit with a burst of vanilla-sweet aroma, instantly transporting you to childhood candy bowls.

    What makes these cake pops special isn’t just their eerie appearance but also how surprisingly easy they are to make. With a few simple ingredients and a dash of creativity, you can turn humble cake scraps into creepy, edible art. Plus, they’re perfect for parties—they’ll have your guests squealing in delight or giggling at the sight of the googly eyes.

    Monster Eyeball Cake Pops

    Monster Eyeball Cake Pops are bite-sized treats made by shaping cake and frosting into spheres, then coating them with candy melts to create a smooth, glossy exterior. Decorated with edible googly eyes, they resemble eerie, creepy eyeballs perfect for Halloween parties, with a moist interior and a firm outer shell.
    Prep Time 30 minutes
    Cook Time 10 minutes
    Total Time 40 minutes
    Servings: 12
    Course: Main Course
    Cuisine: Halloween, Party Snacks
    Calories: 150

    Ingredients
      

    • 1 box store-bought vanilla cake mix (or homemade cake) baked and cooled
    • 1 cup buttercream frosting store-bought or homemade frosting to bind the cake crumbs
    • 12 oz candy melts white chocolate or candy coating for coating
    • 12 pieces eyeball googly candies or edible eyes for decoration
    • optional black icing or edible marker to add veins or pupils if desired

    Equipment

    • Mixing bowls
    • Cake Pans
    • Cooling Rack
    • Food Processor or Crumble Tool
    • Hand Mixer or Spoon
    • Lollipop Sticks or Skewers
    • Baking sheet
    • Microwave-safe Bowl or Double Boiler
    • Spoons or Dipping Tools
    • Small Wedges or Toothpicks

    Method
     

    1. Crumble the cooled cake into fine crumbs using your hands or a food processor until it resembles lose soil.
    2. Add the frosting gradually to the crumbs and mix thoroughly with a spoon or your hands until the mixture sticks together when pressed. It should feel moldable but not sticky.
    3. Roll the mixture into approximately 1.5-inch diameter spheres, smoothing them into uniform rounds. Place them on a parchment-lined baking sheet.
    4. Insert a lollipop stick or skewer into each cake ball, then refrigerate for about 30 minutes to firm up.
    5. Prepare the candy melts by melting in a microwave-safe bowl or double boiler until smooth and fluid, about 1-2 minutes, stirring to combine.
    6. Dip each chilled cake pop into the melted candy, turn to coat evenly, then gently tap off excess coating. Place them back on a clean parchment sheet to set.
    7. Once the coating has hardened, carefully insert the googly eye candies onto each cake pop to resemble eyeballs, pressing gently so they stay in place.
    8. If desired, use black icing or edible marker to draw veins or pupils to add extra creepy detail.
    9. Allow the decorated cake pops to sit until fully set, then they are ready to serve and enjoy as spooky treats!

    Notes

    For best results, keep the cake pops refrigerated until serving. Handle delicately to avoid damaging the coating.

    Putting together these Monster Eyeball Cake Pops offers a nostalgic yet creative outlet for this Halloween. They’re a small treat with a big impact, perfect for any spooky soirée or a playful family gathering. Watching the little ones’ faces light up at the sight of these gooey, eye-like treats is worth every effort.

    With their creepy charm and delightful flavor, these cake pops remind us that Halloween is about celebrating the weird and wonderful. So, embrace the chaos, and let your imagination run wild—sometimes the best memories are made with a little bit of sugar and a lot of fun.

  • Spooky Elegance: Halloween Eyeball Caprese Bites

    Spooky Elegance: Halloween Eyeball Caprese Bites

    Halloween is not just about candies and costumes; it’s an opportunity to embrace playful sophistication. These Eyeball Caprese Bites turn the classic Italian appetizer into a spooky, bite-sized adventure perfect for your spooky soirée.

    The secret lies in the playful mimicry of eyeballs using fresh mozzarella, cherry tomatoes, and perfect blood-red balsamic drizzle. The bright, fresh basil adds a whisper of green, contrasting the eerie red and white. They’re as fun to assemble as they are to eat, making party prep a delightful chaos.

    Every bite offers a burst of creamy cheese, a hint of basil, and a sweet vinegary punch that snaps in your mouth. This easy, eye-catching appetizer gets everyone talking—and reaching for seconds. Plus, they’re so simple, even the most distracted chef can pull them off before the clock strikes midnight.

    Eyeball Caprese Bites

    These Eyeball Caprese Bites are small appetizer skewers assembled with fresh mozzarella, cherry tomatoes, and basil, mimicking creepy eyeballs. Drizzled with balsamic reduction, they have a creamy, juicy texture with a vibrant red, white, and green appearance, perfect for spooky parties. The dish emphasizes simple assembly and fresh ingredients, resulting in an eye-catching, bite-sized treat.
    Prep Time 15 minutes
    Total Time 15 minutes
    Servings: 8
    Course: Main Course
    Cuisine: Italian
    Calories: 80

    Ingredients
      

    • 8 pieces cherry tomatoes select firm, ripe ones
    • 8 pieces fresh mozzarella balls small size for bite-sized presentation
    • 8 leaves fresh basil small leaves or torn pieces
    • to taste balsamic glaze or reduction for drizzling

    Equipment

    • Small skewers or cocktail picks
    • Balsamic glaze or reduction
    • Knife
    • Cutting board

    Method
     

    1. Skewer a cherry tomato onto a small pick or skewer.
    2. Add a small piece of basil on top of the cherry tomato, creating a green “iris”.
    3. Place a fresh mozzarella ball on top of the basil, completing the eyeball assembly.
    4. Repeat the process with remaining ingredients until all skewers are assembled.
    5. Drape a few drops of balsamic glaze over each skewer, allowing it to gently run down and mimic bloodshot eyes.
    6. Arrange the eyeball bites on a serving platter and serve immediately for a spooky, fun appetizer.

    These Eyeball Caprese Bites aren’t just creepy-cute—they also bring a fresh, flavorful twist to your Halloween spread. They look surprisingly sophisticated on a tray and add that punch of color every spooky party needs. Plus, they’re a great way to sneak in some fresh ingredients while keeping the vibe fun and festive.

    As the night unfolds, I find that small, stunning bites like these keep the chaos light and the conversation lively. They remind me that Halloween is about celebrating creativity—whether through costumes or clever snacks. Here’s to a night full of ghoulish charm and delicious, eyeball-worthy bites.

  • Whimsical Winter Wonder: The Enchanting Creamy Fall Pumpkin Soup

    Whimsical Winter Wonder: The Enchanting Creamy Fall Pumpkin Soup

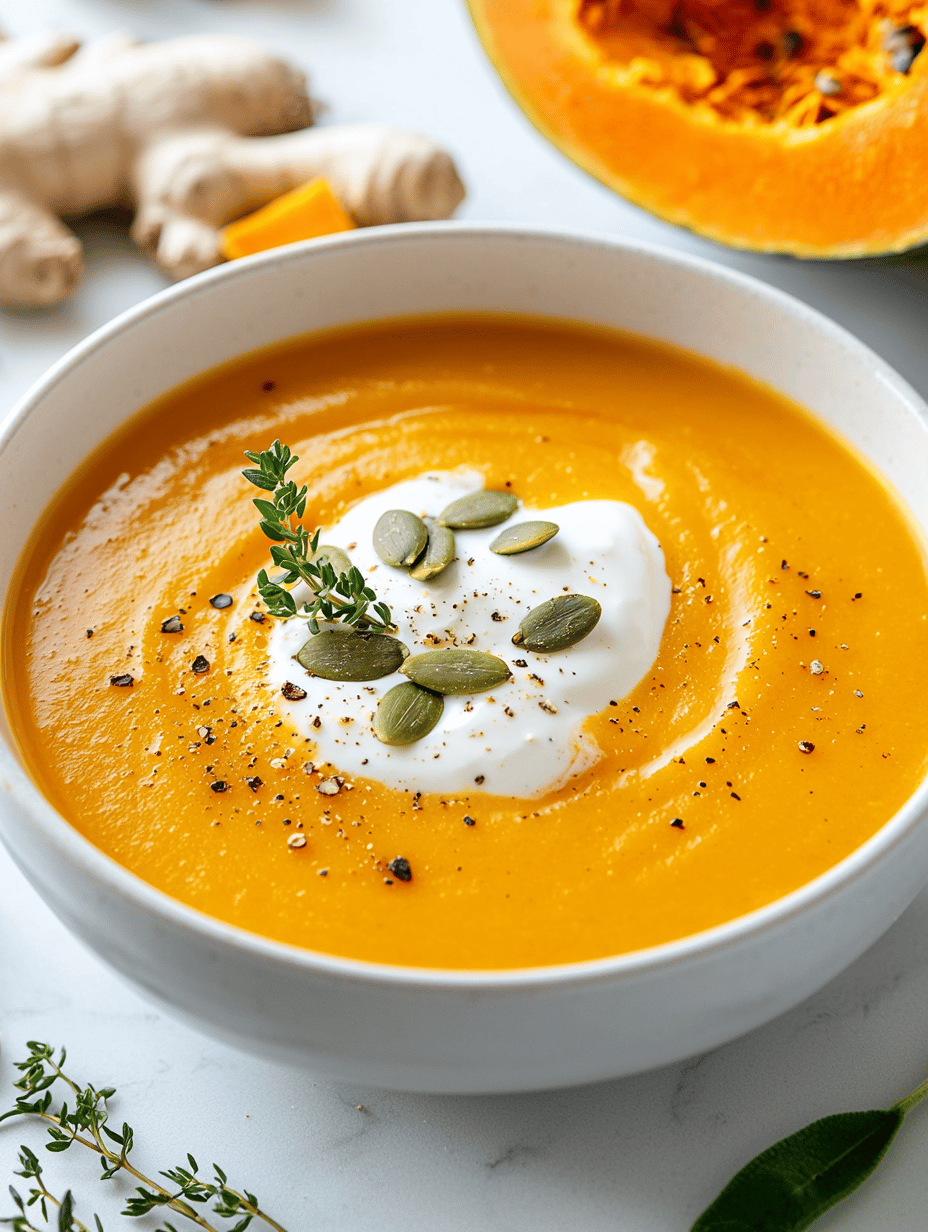
    As leaves crunch underfoot and a brisk chill fills the air, my desire for cozy, warm soups skyrockets. But this isn’t just any pumpkin soup — I drift into memories of autumns spent gathering squash and roasting spices by the fireside. What makes this version special is its whisper of unexpected ingredients, like hint of maple or a dash of smoked paprika, giving it a playful twist.

    In my kitchen, I love turning simple ingredients into a soothing bowl that warms not only the body but the soul. The aroma of roasting pumpkin paired with fresh sage transforms my space into a fall fairy tale. It’s a recipe that encourages improvisation and embraces the chaos of seasonal cooking with a touch of elegance.

    Roasted Pumpkin Soup with Maple and Smoked Paprika

    This pumpkin soup combines roasted pumpkin with aromatic spices and a touch of sweetness, creating a velvety, warm bowl. The soup is puréed to a smooth texture with a slightly thick consistency and garnished with fresh herbs for visual appeal.
    Prep Time 15 minutes
    Cook Time 45 minutes
    Total Time 1 hour
    Servings: 4
    Course: Main Course
    Cuisine: American, Fall
    Calories: 180

    Ingredients
      

    • 1 kg sliced pumpkin or squash preferably sugar pumpkin or butternut squash
    • 2 tbsp olive oil
    • 1 small onion diced
    • 2 cloves garlic minced
    • 1 tsp smoked paprika
    • 1 tbsp maple syrup preferably pure maple syrup
    • 4 cups vegetable broth
    • 1/2 cup cream or coconut milk optional for richness
    • to taste salt and pepper
    • fresh sage or parsley garnish optional

    Equipment

    • Baking sheet
    • Heavy-bottomed pot or Dutch oven
    • Immersion blender or regular blender
    • Wooden spoon

    Method
     

    1. Preheat your oven to 400°F (200°C). Spread the sliced pumpkin evenly on a baking sheet, toss with 1 tablespoon of olive oil, and roast until tender and slightly caramelized, about 30-35 minutes.
    2. While the pumpkin roasts, heat the remaining olive oil in a large pot over medium heat. Add the diced onion and cook, stirring occasionally, until soft and translucent, about 5 minutes.
    3. Stir in the minced garlic and smoked paprika, cooking for another minute until fragrant and slightly toasted.
    4. Once the pumpkin is roasted and cool enough to handle, add it to the pot. Pour in the vegetable broth and bring the mixture to a gentle simmer.
    5. Use an immersion blender to purée the soup directly in the pot until smooth and creamy, or transfer in batches to a blender and blend until velvety.
    6. Stir in the maple syrup and cream or coconut milk for added richness, then season with salt and pepper to taste.
    7. Warm the soup gently over low heat for a few minutes, allowing flavors to meld and ensuring it reaches the desired temperature.
    8. Ladle the hot soup into bowls, garnish with fresh sage or parsley if desired, and serve immediately for a comforting, seasonal meal.

    Notes

    Adjust the sweetness or spice level to personal taste by adding more maple syrup or smoked paprika. For a vegan option, use coconut milk instead of cream.

    This soup captures the essence of fall with every creamy spoonful, making it perfect for chilly weeknights or leisurely weekends. It’s a little of my culinary secret—transforming humble pumpkin into something truly memorable.

    Sharing this bowl with loved ones sparks conversations and memories, adding a cozy chapter to our seasonal traditions. Nothing beats the simple pleasure of savoring warm soup as the wind howls outside, a true weekend comfort that keeps me grounded amid seasonal chaos.

  • The Unexpected Art of Chili Trumpet: A Humble Classic’s Secret Ingredient

    The Unexpected Art of Chili Trumpet: A Humble Classic’s Secret Ingredient

    Imagine a chili that sparks not just your palate, but your curiosity. This recipe isn’t just about ground beef and beans; it’s about the subtle magic hidden within a splash of unexpected ingredient that transforms the dish entirely. I discovered this twist during a chaotic weekend kitchen session, and it’s been a revelation every time I make it.

    Chili is my comfort food, but this version carries an extra layer of nostalgia mixed with bold new flavors. It’s perfect for those rainy days when you need something hearty yet intriguing. Plus, it’s a dish that invites playful experimentation—so grab your spoon, and let’s get creative.

    Twisted Bean and Ground Beef Chili

    This chili combines traditional ground beef and beans with an unexpected splash of a unique ingredient that enhances its depth and complexity. The dish is simmered to develop a hearty, thick consistency, with a rich aroma and vibrant flavors that linger on the palate. Final texture is chunky yet velvety, featuring tender meat and softened beans throughout the spicy broth.
    Prep Time 15 minutes
    Cook Time 40 minutes
    Total Time 55 minutes
    Servings: 4
    Course: Main Course
    Cuisine: American
    Calories: 350

    Ingredients
      

    • 1 lb ground beef
    • 1 can black beans drained and rinsed
    • 1 can diced tomatoes with juices
    • 1 cup chicken broth
    • 1 small unexpected ingredient (e.g., cocoa powder or fish sauce) adds depth to the flavor
    • 1 medium onion diced
    • 2 cloves garlic minced
    • 2 tablespoons olive oil
    • 1 teaspoon chili powder
    • 0.5 teaspoon cumin
    • to taste salt and pepper

    Equipment

    • Large skillet or Dutch oven
    • Wooden spoon or spatula

    Method
     

    1. Heat olive oil in a large skillet or Dutch oven over medium heat until shimmering. Add diced onion and sauté until translucent and fragrant, about 3-4 minutes. The onion should be soft and slightly golden around the edges.
    2. Add minced garlic to the skillet and cook for another 30 seconds, until fragrant. Stir regularly to prevent burning and watch for a fragrant aroma that signals it’s ready.
    3. Increase the heat to medium-high and add ground beef to the skillet. Break it apart with a spoon or spatula, cooking until browned and cooked through, about 5-7 minutes. The beef should be no longer pink and have a rich aroma.
    4. Sprinkle chili powder, cumin, salt, and pepper over the cooked beef. Stir well to evenly coat the meat and develop a spicy aroma as the spices toast slightly, about 1 minute.
    5. Pour in the diced tomatoes (with juices), drained black beans, and chicken broth. Stir everything together, scraping the bottom of the pan to lift any browned bits that add flavor.
    6. Add the unexpected ingredient—such as a teaspoon of cocoa powder or fish sauce—stirring it into the chili to enhance its depth. You should notice a subtle aroma that hints at a richer flavor profile.
    7. Bring the chili to a simmer over medium heat. Reduce the heat to low and let it gently simmer uncovered for about 20-25 minutes, stirring occasionally. The chili will thicken, and flavors will meld as it bubbles softly.
    8. Taste the chili and adjust seasoning with additional salt or pepper as needed. The final result should be thick with a hearty, chunky texture and a robust aroma combined with a hint of the unexpected ingredient.

    Notes

    Feel free to experiment with the unexpected ingredient to customize the flavor. This chili pairs well with cornbread or rice for a complete meal.
    Making this chili feels like a small rebellion against ordinary weeknight dinners. Every spoonful delivers a warm burst of familiar spice balanced with this quirky secret ingredient. It’s not just comfort food; it’s a little culinary adventure that keeps me coming back.

    As the seasons shift and we look for hearty meals that don’t weigh us down, this chili stands out. It’s easy to prepare, endlessly customizable, and best enjoyed with good company or a cozy solo night. Sometimes, the simplest twists lead to the most memorable meals.