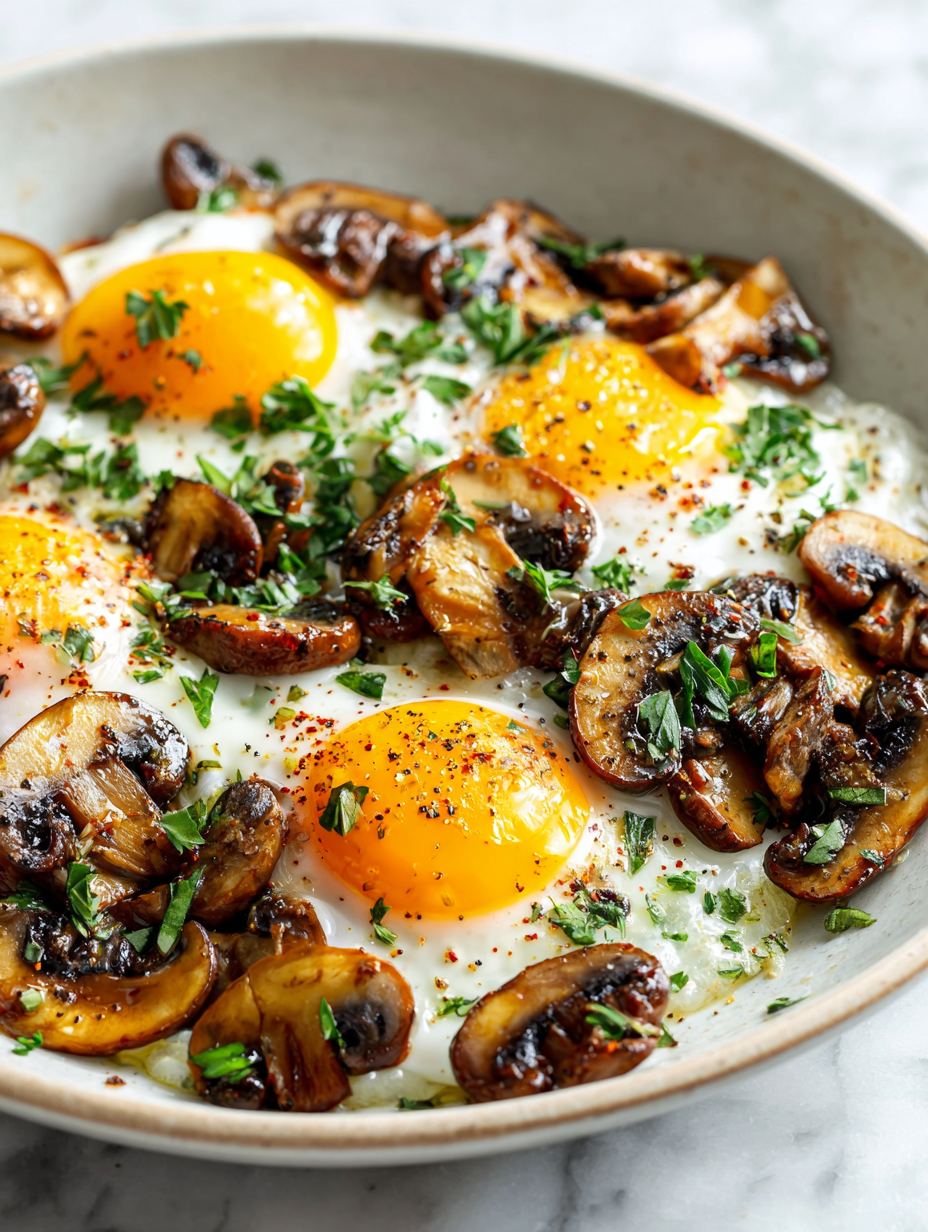
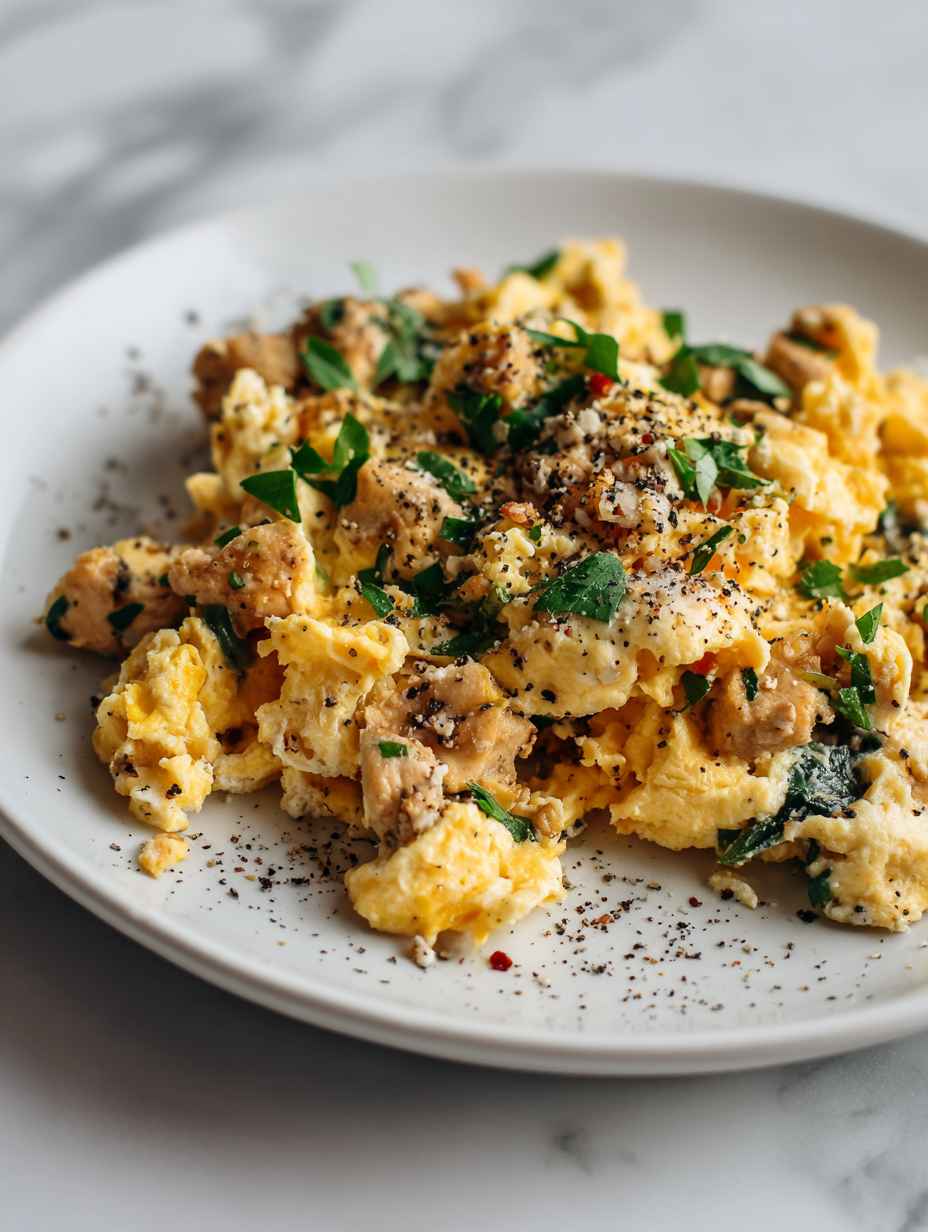
Category: Main Course

  • Spooky Stir: Bloody Spaghetti & Sausage Fingers for Halloween

    Spooky Stir: Bloody Spaghetti & Sausage Fingers for Halloween

    As October chill winds sweep in, I find myself craving something wildly fun and a tad mischievous for the holiday table. Enter Bloody Spaghetti with Sausage Fingers, a dish that’s part horror show, part comfort food. Its vibrant red sauce and creepy sausages mimic a hauntingly delicious scene straight out of a Halloween night mystery.

    This recipe is a delightful chaos of textures—tangy tomato sauce, chewy pasta, and crispy sausage fingers. It’s perfect for kids and adults alike, bringing a ghoulish grin to everyone’s face. Plus, the spooky vibe makes it an instant conversation starter during your seasonal party.

    Bloody Spaghetti with Sausage Fingers

    This dish features cooked spaghetti coated in a tangy tomato sauce, topped with creatively shaped sausage pieces resembling fingers. The sausages are baked or fried until crispy, creating a spooky, textured appearance with a combination of tender pasta and crunchy sausage parts, ready to serve as a fun and eerie Halloween meal.
    Prep Time 15 minutes
    Cook Time 25 minutes
    Total Time 40 minutes
    Servings: 4
    Course: Main Course
    Cuisine: Halloween
    Calories: 450

    Ingredients
      

    • 12 oz spaghetti uncooked
    • 1 cup tomato sauce preferably marinara
    • 4 sausages preferably cooked or pre-cooked hot dogs for easy shaping
    • 2 cloves garlic minced
    • 2 tablespoons olive oil
    • to taste salt and pepper

    Equipment

    • Large pot
    • Skillet or saucepan
    • Baking sheet or frying pan
    • Knife
    • Cutting board

    Method
     

    1. Bring a large pot of salted water to a boil. Add the spaghetti and cook until al dente, about 8-10 minutes. Drain and set aside.
    2. Heat olive oil in a skillet over medium heat. Add the minced garlic and sauté until fragrant and golden, about 30 seconds.
    3. Stir in the tomato sauce, season with salt and pepper, and simmer gently until warmed through, about 5 minutes. Toss the cooked pasta with the sauce to coat evenly.
    4. While the sauce simmers, cut the sausages into fourths lengthwise to create finger-like shapes. Use a sharp knife for clean cuts.
    5. Place the sausage pieces on a baking sheet or in a frying pan. If baking, cook at 400°F (200°C) for about 8-10 minutes until crispy and browned. If frying, cook in a skillet over medium heat until golden and crispy, about 5-7 minutes.
    6. Arrange the cooked spaghetti with sauce on serving plates. Carefully place the crispy sausage fingers on top, lining them up to resemble spooky fingers protruding from the pasta.

    Notes

    For added spooky effect, you can draw on ketchup or red sauce to create blood drips around the sausages. Serve immediately for best crispiness.

    This dish isn’t just about the screams and giggles; it’s a reminder of how playful and inventive simple ingredients can be. It’s a celebration of Halloween’s spirit—bold, cheeky, and slightly terrifying—served on a plate.

    Made with everyday pantry staples, this spaghetti screams creativity and versatility. Just a quick tweak here or there, and you’ve got a party centerpiece that’s as fun to eat as it is to make. It’s a spirited way to get everyone involved in the countdown to All Hallows’ Eve.

  • Spooky Snack Attack: The Halloween Mummy Pizza

    Spooky Snack Attack: The Halloween Mummy Pizza

    Every October, I find myself craving playful, nostalgic foods that stir up childhood memories. This year, I decided to merge the eerie charm of Halloween with the comforting crunch of pizza—enter the Mummy Pizza! Its improvisational mummy wrappings made from cheese strips turn a simple pie into a delightful, spooky spectacle.

    What I love most is how easily this recipe transforms a regular pizza into a conversation piece. The gooey cheese, the crispy crust—each bite sparks a giggle. Plus, it’s a fantastic way to get little hands involved in the kitchen chaos during this festive season.

    Mummy Pizza

    Mummy Pizza is a fun, Halloween-themed dish that involves decorating a pizza with cheese strips to resemble wrapped mummies. It combines a crisp pizza crust with gooey melted cheese, creating a playful and visually spooky appetizer or snack. The final appearance features a golden-brown crust topped with cheese strips that mimic mummy bandages.
    Prep Time 15 minutes
    Cook Time 15 minutes
    Total Time 30 minutes
    Servings: 4
    Course: Main Course
    Cuisine: American
    Calories: 350

    Ingredients
      

    • 1 pre-made pizza dough store-bought or homemade
    • 1 cup pizza sauce
    • 2 cups shredded mozzarella cheese
    • 1 cup sliced pepperoni or olives optional for eyes
    • to taste seasonings e.g., oregano, basil

    Equipment

    • Baking sheet
    • Rolling pin
    • Oven
    • Pizza cutter or knife
    • Piping bag or plastic bag with a corner cut

    Method
     

    1. Preheat your oven to 400°F (200°C). Lightly flour a surface and roll out the pizza dough into a large circle or rectangle, about 12 inches wide.
    2. Transfer the rolled dough onto a baking sheet lined with parchment paper. Spread an even layer of pizza sauce over the crust, leaving a small border around the edges.
    3. Sprinkle a generous layer of shredded mozzarella cheese evenly across the sauce, covering most of the surface to create a gooey base.
    4. Optional: Add small pieces of pepperoni or olives for the eyes, positioning them near the top of the pizza.
    5. Wander to a piping bag or plastic bag and fill it with shredded mozzarella to create cheese strips that will become the mummy’s bandages.
    6. Pipe long, thin cheese strips across the pizza in crisscrossing patterns to mimic mummy wrappings, making sure to cover most of the surface for a fun, spooky look.
    7. Once decorated, transfer the pizza into the preheated oven and bake for about 12-15 minutes, or until the crust is golden brown and the cheese is bubbly and slightly browned.
    8. Remove the pizza from the oven and let it cool for a few minutes; the cheese will set slightly, making it easier to slice.
    9. Slice the pizza into squares or triangles, revealing the cheese ‘bandages’ and eyes, and serve while warm.
    10. Enjoy the playful presentation and gooey, cheesy crunch of your Mummy Pizza!

    Notes

    For extra spooky effect, add small carved cheese or veggie eyes on the mummy’s ‘wrappings’. Feel free to customize with your favorite toppings!
    This Mummy Pizza is more than just a fun dish; it’s a reminder that cooking can be both whimsical and comforting. As the season shifts to cozy, chilly evenings, this recipe fits right in with the nostalgic, spirited vibe of Halloween. It’s a perfect centerpiece for family gatherings or a spooky movie night feast.

    With just a handful of ingredients and a sprinkle of creativity, you can whip up this creepy yet tasty treat in no time. It’s a recipe that invites chaos, laughter, and maybe a few messy fingers—what’s Halloween without a little fun? Enjoy creating these spooky mummies and making memories around the dinner table.

  • The Hidden Smokiness of Eggplant Parmesan: A Unique Twist

    The Hidden Smokiness of Eggplant Parmesan: A Unique Twist

    Most Eggplant Parmesan recipes stick to the classic baked breaded slices topped with marinara and melted cheese. But today, I want to share a version inspired by smoky, charred flavors that brings a new dimension to this familiar comfort.

    This recipe was born out of my obsession with outdoor grilling. I discovered that eggplants develop a complex, smoky aroma when charred over open flames, which transforms the whole dish. It’s a game-changer for anyone looking to elevate their vegetable game with a hint of rustic fire.

    Instead of conventional breading, I broil the slices until slightly blackened for that irresistible smoky aroma. Then, layering them with seasoned tomato sauce and a mix of cheeses creates a rich, layered experience. This dish is about celebrating the eggplant’s natural umami while adding a bit of outdoor grill magic.

    Smoky Charred Eggplant Parmesan

    This variation of classic Eggplant Parmesan involves grilling eggplant slices over open flames until charred and smoky, then layering them with seasoned tomato sauce and cheese. The dish features tender, smoky, and slightly crisp eggplant layers topped with melted cheese, creating a flavorful, layered casserole with a rustic appearance.
    Prep Time 15 minutes
    Cook Time 30 minutes
    Total Time 45 minutes
    Servings: 4
    Course: Main Course
    Cuisine: Italian-inspired
    Calories: 350

    Ingredients
      

    • 2 large eggplants sliced into 1/2-inch thick rounds
    • 2 cups marinara sauce seasoned and warmed
    • 1 cup mozzarella cheese shredded
    • 1/2 cup Parmesan cheese grated
    • 2 tablespoons olive oil for brushing
    • to taste salt and pepper for seasoning

    Equipment

    • Grill or open flame
    • Baking sheet
    • Cooking tongs
    • Oven broiler
    • Cooking brush
    • Mixing bowls

    Method
     

    1. Preheat your grill or prepare an open flame. Brush the eggplant slices lightly with olive oil and season with salt and pepper. Place the slices directly over the flame or on the grill grates, charring each side until the skin blisters and the flesh develops a smoky aroma, about 3-4 minutes per side.
    2. Remove the eggplant slices from the heat and let them cool slightly until they are comfortable to handle, about 5 minutes.
    3. Lay the grilled eggplant slices flat on a baking sheet. If some slices are larger, cut them into manageable pieces for layering.
    4. Spoon a generous layer of seasoned marinara sauce over each eggplant slice, covering the surface evenly.
    5. Sprinkle shredded mozzarella over the tomato sauce layer, followed by a sprinkle of grated Parmesan cheese for added flavor.
    6. Repeat the layering process—eggplant, sauce, cheese—until all slices are assembled into a layered stack or casserole.
    7. Place the assembled dish under the broiler in the oven until the cheese is bubbly and golden, about 5-7 minutes. Keep an eye on it to prevent burning.
    8. Remove from the oven, let it rest for a few minutes to set, then serve hot, enjoying the smoky, cheesy layers.

    Notes

    For extra smoky flavor, you can also add a touch of smoked paprika to the eggplant before grilling.

    This recipe arrives just in time for the season when fresh eggplants are at their peak. The smoky notes pair beautifully with rustic bread or a crisp green salad. It’s a dish that tells a story—one of outdoor summer evenings and simple, honest flavors.

    Sharing this version of Eggplant Parmesan feels like inviting a little of the backyard into the cozy kitchen. Every bite carries a hint of the flames, a reminder that good food is often about embracing imperfectly perfect moments. Enjoy the subtle chaos of flavors and textures this dish offers—just don’t forget that smoky aroma lingering on your fingertips.

  • The Art of the Perfect Turkey Chili: Unexpected Twist That Wins Hearts

    The Art of the Perfect Turkey Chili: Unexpected Twist That Wins Hearts

    As a food blogger obsessed with seasonal flavors, I’ve recently been diving into the comforting world of turkey chili. But this isn’t just any chili; I infuse it with a secret ingredient—smoked paprika and a touch of cinnamon—that transforms the dish into a cozy, almost spicy-sweet masterpiece. It’s the ideal way to warm up during crisp autumn evenings while keeping it light and healthy.

    Sometimes, turkey gets a reputation for being dry or bland, but not in this recipe. The slow simmer unlocks deep savory flavors paired with chunky beans and tender turkey, making every spoonful a revelation. This chili is perfect for those who crave a dish that’s hearty yet unexpectedly nuanced, with just a hint of spice lingering on the tongue.

    Turkey Chili with Smoked Paprika and Cinnamon

    This turkey chili is made using browning and simmering techniques, combining ground turkey with hearty beans and aromatic spices. The dish features a thick, chunky consistency with a rich, savory flavor profile highlighted by smoked paprika and a hint of cinnamon, creating a warm and inviting appearance.
    Prep Time 15 minutes
    Cook Time 45 minutes
    Total Time 1 hour
    Servings: 4
    Course: Main Course
    Cuisine: American
    Calories: 280

    Ingredients
      

    • 1 lb ground turkey lean preferred
    • 1 small yellow onion finely chopped
    • 3 cloves garlic minced
    • 1 tablespoon smoked paprika adds smoky flavor
    • 1 teaspoon ground cinnamon brings warmth
    • 1 can diced tomatoes 14.5 oz can, undrained
    • 1 can kidney beans 15 oz, drained and rinsed
    • 1 cup chicken or vegetable broth for simmering
    • 1 tablespoon olive oil for cooking
    • to taste salt and pepper season as needed

    Equipment

    • Large skillet or Dutch oven
    • Wooden spoon or spatula

    Method
     

    1. Heat olive oil in a large skillet over medium heat until shimmering. Add chopped onion and cook, stirring occasionally, until translucent and slightly golden, about 5 minutes. This builds a fragrant base for the chili.
    2. Add minced garlic to the skillet and cook for another 30 seconds until it becomes fragrant, filling the air with a warm aroma.
    3. Push the onion and garlic mixture to the sides of the pan and add the ground turkey in the center. Break it apart with a wooden spoon and cook until browned all over, about 7-8 minutes.
    4. Sprinkle smoked paprika and ground cinnamon evenly over the browned turkey, stirring to coat and release their warm, smoky scents.
    5. Pour in the diced tomatoes along with their juice, stirring well to combine everything and scrape up any browned bits from the bottom of the pan.
    6. Add drained kidney beans and pour in the broth, stirring to combine. Increase the heat and bring the mixture to a gentle simmer.
    7. Reduce the heat to low, cover, and let simmer gently for about 30 minutes, stirring occasionally, until the chili thickens and flavors meld beautifully.
    8. Uncover and taste the chili, then season with salt and pepper as needed to enhance the flavors.
    9. Give it a good stir and let it simmer uncovered for another 5 minutes to thicken slightly and develop rich flavors.
    10. Turn off the heat and ladle the hot chili into bowls. Garnish with your favorite toppings if desired, and serve warm.

    This turkey chili stands out as a quiet hero on our dinner table, especially as days grow shorter and cravings for something nourishing intensify. The aroma alone—smoky, peppery, with a whisper of cinnamon—can turn a normal evening into something special.

    It’s a recipe that invites experimentation, whether you add a splash of dark beer or a squeeze of fresh lime. The beauty lies in its simplicity and how it perfectly captures the essence of fall comfort. Sharing this bowl feels like wrapping yourself in a warm blanket, ready for any hectic evening to settle into calm and contentment.

  • Unexpected Twist: Orange Zest Chicken Noodle Soup

    Unexpected Twist: Orange Zest Chicken Noodle Soup

    When I think of chicken noodle soup, I imagine it backed with garlic and herbs, yet I recently discovered a secret ingredient that elevates this classic. Orange zest! Adding a splash of citrus brightness transforms the broth into something vibrant and fresh, waking up dull winter flavors.

    This recipe is about the magic of pairing the familiar with a zesty kick. It’s perfect for those days when comfort food needs a little extra sparkle, or when you want to surprise a guest with something both nostalgic and unexpected. The scent of simmering citrus peels mingling with chicken and noodles is truly intoxicating.

    Citrus-Enhanced Chicken Noodle Soup

    This chicken noodle soup features a fragrant broth infused with garlic, herbs, and a splash of fresh orange zest. It’s made by simmering chicken, vegetables, and noodles until tender, resulting in a vibrant, comforting dish with a clear, flavorful broth and a hearty texture.
    Prep Time 15 minutes
    Cook Time 30 minutes
    Total Time 45 minutes
    Servings: 4
    Course: Main Course
    Cuisine: Comfort Food
    Calories: 350

    Ingredients
      

    • 1 lb skinless chicken breasts or thighs
    • 8 cups chicken broth
    • 2 cups egg noodles of your choice
    • 3 cloves garlic minced
    • 2 tablespoons olive oil
    • 2 teaspoons dried thyme
    • 1 orange orange zest freshly grated
    • to taste salt and pepper

    Equipment

    • Large soup pot
    • Chef’s knife

    Method
     

    1. Place the chicken breasts into a large soup pot and cover with chicken broth. Bring to a gentle simmer over medium heat, then cook until the chicken is cooked through and tender, about 15 minutes. Remove the chicken, let it cool slightly, then shred it into bite-sized pieces.
    2. While the chicken is cooking, heat olive oil in a large pot over medium heat. Add the minced garlic and dried thyme, sautéing until fragrant and the garlic turns golden, about 1 minute. The kitchen will fill with a warm, savory aroma.
    3. Add the shredded chicken back into the pot along with the orange zest. Stir everything together, allowing the citrus aroma to mingle with the herbs and chicken for about 2 minutes.
    4. Increase the heat to bring the broth to a gentle boil, then add the egg noodles. Cook for about 8 minutes, or until noodles are tender and plump, and the broth is slightly thickened.
    5. Taste the soup and season with salt and pepper as needed to enhance the flavors. The broth should be vibrant and aromatic, with tender noodles and juicy pieces of chicken floating in it.
    6. Serve the soup hot in bowls, spooning the broth, noodles, and chunks of chicken into each serving. The soup should look inviting with a clear, citrus-infused broth and a hearty, steaming appearance.

    This twist on chicken noodle soup proves that a simple ingredient swap can invigorate a timeless dish. It’s an easy way to brighten up cold evenings or make a comforting lunch feel new. Sometimes, small tweaks create the biggest smiles in the kitchen.

    Enjoy the sunlit aroma of citrus mingling with savory broth, and watch as everyone eagerly ladles up each spoonful. It’s a dish that invites smiles, nostalgia, and a little bit of culinary adventure in every bowl.

  • Creep Your Dinner with Halloween Eyeball Pasta!

    Creep Your Dinner with Halloween Eyeball Pasta!

    As October chills the air, I find myself craving a dinner that’s as festively spooky as it is fun to make. Halloween Eyeball Pasta transforms a simple spaghetti dish into a playful, slightly gory centerpiece that kids and adults alike will adore. The secret? Juicy meatball “eyeballs” that seem to stare back with every twirl of your fork.

    Rolling the meatballs into perfectly round, creepy eyeballs is oddly satisfying, reminiscent of childhood costume parties and pumpkin carving chaos. The oozing marinara mimics blood, making each bite a small horror in the best way. It’s a perfect way to combine creativity with comfort food during spooky season.

    Halloween Eyeball Pasta

    Halloween Eyeball Pasta features spaghetti topped with meatball
    Prep Time 20 minutes
    Cook Time 30 minutes
    Total Time 50 minutes
    Servings: 4
    Course: Main Course
    Cuisine: Halloween
    Calories: 620

    Ingredients
      

    • 1 pound spaghetti
    • 1.5 lbs ground beef preferably 80% lean
    • 1/2 cup bread crumbs
    • 1 large egg
    • 2 cloves garlic minced
    • 1 cup marinara sauce
    • 1 small small mozzarella balls for the eyeballs
    • to taste salt and pepper
    • 1 tablespoon olive oil

    Equipment

    • Large pot
    • Baking sheet
    • Mixing bowls
    • Skillet
    • Large spoon

    Method
     

    1. Bring a large pot of salted water to a boil and cook the spaghetti according to package instructions until al dente. Drain and set aside.
    2. Preheat your oven to 400°F (200°C). In a mixing bowl, combine ground beef, bread crumbs, egg, minced garlic, salt, and pepper. Mix until well combined, then roll the mixture into equal-sized meatballs.
    3. Place the meatballs on a baking sheet lined with parchment paper and bake for about 15-18 minutes, until browned and cooked through.
    4. While the meatballs bake, heat olive oil in a skillet over medium heat. Once hot, add marinara sauce and simmer gently, creating a bubbling, fragrant sauce.
    5. Meanwhile, reheat the cooked spaghetti briefly if needed, then toss it with the hot marinara sauce until evenly coated and glossy.
    6. Once the meatballs are done, place the spaghetti on serving plates. Top each serving with three to four meatballs, and insert small mozzarella balls into the center of each meatball, pressing gently to resemble eyeballs with pupils.
    7. Arrange the eyeball meatballs on the pasta, then spoon extra marinara sauce around the dish for a spooky blood-like effect. Optionally, add chopped herbs or red pepper flakes for extra flavor and visual flair.
    8. Serve immediately while hot, allowing everyone to enjoy the fun, creepy appearance and comforting flavors of this Halloween-themed pasta.

    Notes

    For extra spookiness, you can add sliced olives or red pepper to mimic blood vessels around the eyeballs.

    This dish isn’t just about the fun visuals; it’s a flavorful riot too. The savory meatballs, coupled with tangy, spicy tomato sauce, create a wholesome yet mischievous meal. It’s perfect for a family feast that bursts with humor and flavor under the eerie glow of Halloween decorations.

    Plus, it’s surprisingly easy to pull off even during a busy weeknight. The next time you want to turn dinner into a fun, memorable moment, whip up this eerie pasta. It’s a playful reminder that sometimes, the messiest ideas make the most lasting memories.

  • The Cozy Chef’s Unusual Spin on Taco Soup

    The Cozy Chef’s Unusual Spin on Taco Soup

    Imagine a chilly evening, the aroma of spices filling the air, and a pot simmering with vibrant ingredients. That’s the magic of this taco soup, a dish that marries comfort with an unexpected twist of flavor. I stumbled upon this variation when looking to add a bit of chaos to my weekly meal routine, and it turned into a delightful discovery.

    This recipe is more than just a warm bowl; it’s a reflection of my love for bold flavors and quick fixes. Perfect for busy weeknights or lazy weekends, this taco soup brings everyone to the table with ease. Its secret lies in combining traditional ingredients with a dash of experimentation, making each spoonful a small adventure.

    Taco Soup

    Taco soup is a hearty, flavorful dish that combines ground meat, beans, corn, and spices simmered into a thick, savory broth. The soup is cooked on the stovetop until all ingredients meld together, resulting in a chunky, comforting bowl with vibrant colors and rich aromas.
    Prep Time 10 minutes
    Cook Time 30 minutes
    Total Time 40 minutes
    Servings: 6
    Course: Main Course
    Cuisine: Mexican
    Calories: 330

    Ingredients
      

    • 1 lb ground beef or turkey, chicken, or plant-based alternative
    • 1 can diced tomatoes 14.5 oz can, undrained
    • 1 can black beans 15 oz can, drained and rinsed
    • 1 cup corn kernels fresh, frozen, or canned
    • 1 packet taco seasoning about 1 oz packet
    • 4 cups chicken broth
    • 1 medium onion finely chopped
    • 2 cloves garlic minced
    • 1 tablespoon olive oil

    Equipment

    • Large pot or Dutch oven
    • Wooden spoon or spatula

    Method
     

    1. Add olive oil to a large pot and heat over medium heat until shimmering.
      1 lb ground beef
    2. Sauté the chopped onion until it becomes translucent and fragrant, about 3-4 minutes, stirring occasionally.
      1 lb ground beef
    3. Add the minced garlic to the onions and cook for another 30 seconds until it releases a warm aroma.
      1 lb ground beef
    4. Increase the heat to medium-high, then add the ground beef to the pot. Break it apart with a spoon and cook until browned and cooked through, about 6-8 minutes.
      1 lb ground beef
    5. Drain any excess fat if necessary, then stir in the taco seasoning until evenly coated and fragrant, about 1 minute.
      1 lb ground beef
    6. Pour in the chicken broth and add the diced tomatoes (with juices), black beans, and corn. Stir everything together to combine.
      1 lb ground beef
    7. Bring the mixture to a boil, then reduce the heat to low. Cover the pot and let it simmer gently for 20-25 minutes, allowing flavors to meld and the soup to thicken slightly.
    8. Uncover and stir the soup, checking the seasoning. Adjust salt or spice if needed, then cook for an additional 5 minutes uncovered to allow excess moisture to evaporate.
    9. Turn off the heat and ladle the hot, hearty taco soup into bowls. Garnish with toppings like shredded cheese, sour cream, chopped cilantro, or sliced jalapeños, if desired.

    As the seasons shift, so do our cravings for warming, hearty dishes like this taco soup. It’s a perfect way to bring friends and family together around the table, sharing laughs and spoonsful of spicy goodness. No matter the occasion, this soup is here to make dinner both easy and memorable.

    Plus, it’s endlessly adaptable—add beans, swap out meats, or toss in leftover vegetables. Once you master this base, your kitchen transforms into a stage for your culinary mischief. That’s the real comfort in cooking: knowing you can create something special with just a few simple ingredients.

  • Creamy White Chicken Chili: A Cozy Winter Treasure

    Creamy White Chicken Chili: A Cozy Winter Treasure

    As winter’s chill sets in, I found myself craving something hearty yet comforting. This White Chicken Chili offers a unique twist on traditional chili—it’s smooth, slightly tangy, and bursting with flavors you wouldn’t expect from a quick weeknight dish.

    What sets this recipe apart is its creamy white base, made with tender shredded chicken simmered in a velvety broth spiced just right. The blend of beans, with a hint of lime and cumin, creates a bright counterpoint that makes each spoonful memorable. It’s the kind of meal that warms you from the inside out, with no fuss at all.

    Every time I make this, I’m reminded of cozy Sunday afternoons spent with family, the kitchen filled with the aroma of garlic and cumin. It’s a dish that feels like a warm hug—simple, satisfying, yet full of surprises. Plus, it’s perfect for those busy days when you need comfort fast.

    White Chicken Chili

    This White Chicken Chili is a creamy, smooth soup made with shredded chicken simmered in a velvety broth seasoned with cumin and lime. It’s loaded with beans and features a slightly tangy flavor profile, resulting in a hearty yet light final texture that is both comforting and bright.
    Prep Time 15 minutes
    Cook Time 30 minutes
    Total Time 45 minutes
    Servings: 4
    Course: Main Course
    Cuisine: American
    Calories: 350

    Ingredients
      

    • 1 pound boneless, skinless chicken breasts cooked and shredded
    • 2 cups chicken broth
    • 1 can white beans drained and rinsed
    • 1 cup corn kernels fresh or frozen
    • 1 small onion diced
    • 2 cloves garlic minced
    • 1 teaspoon cumin
    • 1/2 teaspoon lime juice
    • 1 tablespoon olive oil
    • Salt and pepper to taste

    Equipment

    • Large pot or Dutch oven
    • Wooden spoon or silicone spatula

    Method
     

    1. Season the chicken breasts with salt and pepper, then cook in a skillet over medium heat until golden brown and cooked through, about 6-8 minutes per side. Remove from heat and shred the chicken with two forks.
    2. In a large pot, heat olive oil over medium heat. Add the diced onion and cook until translucent and fragrant, about 5 minutes, stirring occasionally.
    3. Stir in the minced garlic and cumin, cooking until the garlic is fragrant, about 30 seconds. The mixture should smell warm and aromatic.
    4. Add the shredded chicken, chicken broth, drained white beans, and corn to the pot. Bring the mixture to a gentle simmer, about 10 minutes, allowing flavors to meld and the soup to thicken slightly.
    5. Stir in lime juice and adjust seasoning with salt and pepper as needed. Continue simmering for another 2-3 minutes to incorporate the bright, tangy flavor.
    6. Check the seasoning, then ladle the creamy, white chili into bowls. Serve hot, garnished with fresh cilantro or a squeeze of more lime if desired.

    This White Chicken Chili has become a staple in my winter menu, thanks to its comforting nature and minimal prep. It’s a dish that balances ease and depth, ideal for cozy evenings or last-minute dinners with friends.

    Whenever I serve this chili, I know it will bring smiles around the table. The rich, creamy texture, combined with a touch of bright citrus, makes it special enough to feel like a treat, even on the busiest nights. It’s a recipe I’ll keep coming back to, season after season.

  • Spooky Sweet & Savory: Halloween Bat Wings (Soy Sauce Chicken Wings)

    Spooky Sweet & Savory: Halloween Bat Wings (Soy Sauce Chicken Wings)

    As the leaves turn crisp and the air gains a chuckle-inducing chill, I find myself craving something both fun and flavorful for Halloween. These Bat Wings are not your average finger food—they turn chicken wings into tiny, spooky creatures with a glossy soy glaze that simmers to perfection. The smoky aroma alone can conjure a haunting Halloween feast in just minutes.

    Crafting these bats is a playful ordeal that transforms dinner into a mini horror show—becoming the hero of your haunted table. The wings’ crispy edges and savory-sweet soy sauce coating make every bite a delight, even for the scariest little monsters. Plus, they’re so easy to whip up when the jack-o’-lanterns glow on a busy night.

    Halloween Bat Wings

    Bat Wings are small chicken wings coated in a savory soy glaze, cooked until crispy and glossy with a smoky aroma. The dish features bite-sized, spooky-shaped chicken with crispy edges and a flavorful coating, perfect for festive occasions.
    Prep Time 15 minutes
    Cook Time 20 minutes
    Total Time 35 minutes
    Servings: 4
    Course: Main Course
    Cuisine: Halloween
    Calories: 350

    Ingredients
      

    • 1 pound chicken wings party-sized or drumettes and wingettes
    • 1/4 cup soy sauce for the glaze
    • 2 tablespoons honey adds sweetness and shine
    • 1 teaspoon sesame oil for smoky flavor
    • 1 clove garlic minced
    • 1 pinch ground pepper optional
    • 2 cups vegetable oil for frying

    Equipment

    • Baking sheet
    • Mixing bowl
    • Small saucepan
    • Cooking tongs
    • Kitchen brush

    Method
     

    1. Preheat your oven to 400°F (200°C). Line a baking sheet with parchment paper or a wire rack for crispiness.
    2. Rinse the chicken wings and pat them completely dry with paper towels to ensure crispy skin.
    3. In a small saucepan, combine soy sauce, honey, sesame oil, and minced garlic. Bring to a gentle simmer over medium heat, stirring occasionally until the glaze thickens slightly and becomes glossy.
    4. While the glaze simmers, heat vegetable oil in a deep skillet or large pot over medium-high heat until it reaches about 350°F (175°C).
    5. Add the chicken wings carefully into the hot oil, working in batches if necessary, and fry until golden brown and crispy, about 8-10 minutes. Use tongs to turn them for even frying.
    6. Transfer the fried wings to a plate lined with paper towels to drain excess oil.
    7. Using tongs or a brush, coat the hot wings generously with the soy glaze, ensuring they are evenly covered with the shiny, flavorful coating.
    8. Arrange the glazed wings on the prepared baking sheet and bake in the preheated oven for about 8-10 minutes to set the glaze and crisp the exterior further.
    9. Remove from the oven and let the wings rest for a few minutes. The glaze will set and give the wings a glossy, spooky appearance.
    10. Serve the wings hot, with their shiny, crispy surface resembling tiny spooky bats for a festive Halloween treat.

    These Halloween Bat Wings offer a fantastic combination of spooky charm and rich flavor. Perfect for ghostly gatherings or just to add some fun to the usual dinner routine. They’re a reminder that even simple ingredients can turn into a festive feast.

    As the season deepens, such playful dishes bring a sense of nostalgia and excitement. They make the celebration feel a little more special, a little more wild. And really, that’s what Halloween is all about—fun, fright, and of course, great bites.

  • Unusual Twist on Stuffed Peppers: A Flavor Explosion

    Unusual Twist on Stuffed Peppers: A Flavor Explosion

    For years, stuffed peppers have been a comfort classic, but I decided to shake things up by blending unexpected herbs and spices into the filling. This approach transforms the humble pepper into a vibrant, aromatic dish that turns dinner into a sensory adventure. The smell of garlic, cumin, and fresh herbs wafting through the kitchen is irresistible.

    This recipe is perfect for those who love a little chaos on their plate—textures, temperatures, and flavors all dancing together. It’s a dish that sparks joy not only in taste but in watching loved ones discovering new favorites. Plus, it’s endlessly adaptable to what you have in your pantry.

    Herbed Mediterranean Stuffed Peppers

    This dish features colorful bell peppers filled with a savory mixture of ground meat, grains, herbs, and spices. The peppers are baked until tender and slightly blistered, with a hearty, flavorful filling that combines soft grains and aromatic herbs for a vibrant appearance and inviting aroma.
    Prep Time 20 minutes
    Cook Time 40 minutes
    Total Time 1 hour
    Servings: 4
    Course: Main Course
    Cuisine: Mediterranean
    Calories: 320

    Ingredients
      

    • 4 large bell peppers preferably mixed colors
    • 1 cup cooked rice or bulgur cooled
    • 1/2 pound ground beef or turkey or substitute plant-based protein
    • 1 small onion finely chopped
    • 2 cloves garlic minced
    • 1 tablespoon olive oil
    • 1 teaspoon cumin ground
    • 1/2 teaspoon paprika smoked or sweet
    • 1/4 cup chopped fresh parsley or basil
    • to taste salt and pepper
    • 1/2 cup shredded cheese optional, for topping
    • 1 cup crushed tomatoes or tomato sauce for moisture

    Equipment

    • Knife
    • Cutting board
    • Skillet
    • Mixing bowl
    • Baking dish
    • Oven

    Method
     

    1. Preheat the oven to 375°F (190°C). Cut the tops off the bell peppers and remove the seeds and membranes. Set aside.
    2. Heat olive oil in a skillet over medium heat. Add the chopped onion and minced garlic, sautéing until fragrant and translucent, about 3-4 minutes.
    3. Add the ground meat to the skillet, breaking it apart with a spoon, cooking until browned and cooked through, about 5-7 minutes. Season with cumin, paprika, salt, and pepper, stirring to evenly coat the meat with spices.
    4. In a mixing bowl, combine the cooked rice or bulgur, the cooked meat mixture, chopped herbs, and crushed tomatoes. Mix well to incorporate all ingredients evenly.
    5. Stuff each prepared pepper with the filling, pressing gently to pack it in. Place the stuffed peppers upright in a baking dish.
    6. If desired, sprinkle shredded cheese over the tops of the stuffed peppers. Cover the dish with foil.
    7. Bake in the preheated oven for about 35-40 minutes, until the peppers are tender and slightly blistered, and the filling is heated through.
    8. Remove from oven and let cool for a few minutes. Garnish with additional fresh herbs if desired.
    9. Serve the stuffed peppers warm, enjoying the vibrant colors and savory aromas that fill the kitchen.
    This stuffed peppers recipe feels especially relevant now, when comforting home-cooked meals are making a comeback in our busy lives. The bright, bold flavors serve as a reminder that even simple ingredients can surprise us. Whether for a family dinner or a weekend feast, this dish is sure to leave an impression.