Monster Rice Krispie Treats started as a wild idea—what if you made a batch so big and gooey, it felt like a small monster attack? I love how they’re part nostalgic childhood snack, part chaos in the kitchen. They’re perfect for when you want something sweet but crave that crunch and chew that only rice cereal can give.
Why I keep coming back to this recipe
Because these treats are unpredictable in the best way—crunchy, sticky, sweet chaos. Each batch reminds me of childhood, but with a modern, messy twist. They’re my go-to when I want to make something that feels like a celebration, no matter the occasion.
Inside the monster ingredients
- Marshmallows: The gooey core of these treats, creating that stretch and sweet flavor. Feel free to swap with vegan marshmallows if needed.
- Butter: Gives richness and helps everything stick together. Salted or unsalted—your choice, but salted adds a subtle contrast.
- Rice Krispies: The crispy backbone of the treat—light, airy puffs that turn golden when pressed.
- Add-ins (optional): Chocolate chips, sprinkles, or even crushed cookies—whatever makes your monster unique.
- Vanilla extract: A splash boosts sweetness and depth. Skip or substitute with almond extract for a different aroma.
Tools & Equipment for Monster Krispies
- Large mixing bowl: To hold and mix all ingredients comfortably.
- Saucepan: For melting butter and marshmallows evenly.
- Spatula: To stir and press the mixture smoothly into the pan.
- 9×13-inch pan: To shape and cool the treats.
- Wax paper or spatula: To press down and shape the treats without sticking.
Step-by-step guide to epic monster rice krispie treats
Step 1: Gather your ingredients and tools before you start. This makes the process smoother and keeps your focus on the gooey magic.
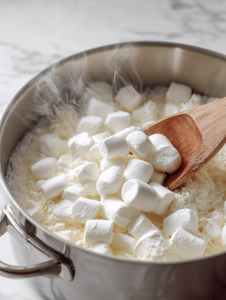
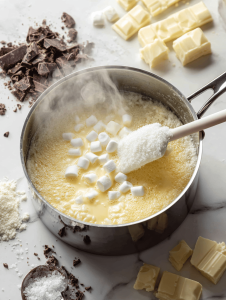
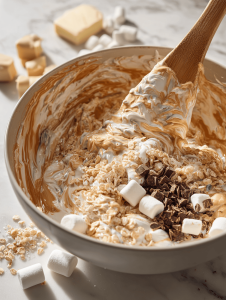
Step 2: Melt butter and marshmallows in a big saucepan over low heat. Keep stirring until smooth and fragrant—about 2 minutes. The smell of sweet melting butter with marshmallow fumes is unbeatable.
Step 3: Pour in the Rice Krispies and stir quickly to coat every puff. Keep moving fast—once the cereal hits the marshmallow, it starts to set.
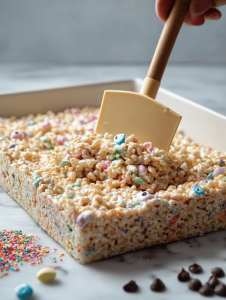
Step 4: Transfer the mixture to a greased pan. Press down firmly with a spatula or wax paper to get an even, tight layer. Don’t press too hard, or the treats turn dense.
Cooking checkpoints & tips for monster rice krispie treats
- Ensure marshmallows are fully melted and smooth before adding cereal.
- Press mixture into pan with enough firmness to hold shape but avoid over-compressing.
- Look for a shiny, slightly sticky surface before cooling—this indicates proper marshmallow melt.
- Treats should feel firm but not hard when cooled; if too soft, refrigerate briefly before cutting.
Common mistakes & how to fix them
- Overheating marshmallows, which can turn them hard and dry.? Use low heat when melting marshmallows to prevent burning.
- Pressing too hard, making the treats tough.? Press gently into the pan to avoid dense, brick-like treats.
- Using too little marshmallows, resulting in crumbly treats.? Add extra marshmallows if treats are too dry.
- Burnt marshmallow smell, which ruins the flavor.? Keep a close eye during melting—avoid scorching the marshmallows.

Monster Rice Krispie Treats
Ingredients
Equipment
Method
- Gather all your ingredients and tools to keep the process smooth and enjoyable.
- Add the butter to a large saucepan and melt over low heat, stirring gently until it’s fully melted and fragrant, about 2 minutes. You’ll notice a bubbling, golden mixture.
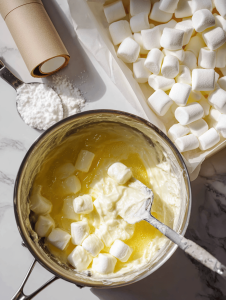
- Add the marshmallows to the saucepan and continue stirring until they melt completely, creating a smooth, glossy, sticky mixture. The marshmallows should be fully melted and bubbling gently.
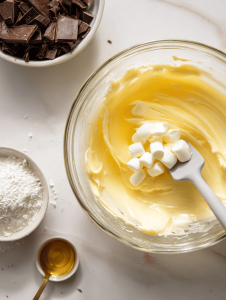
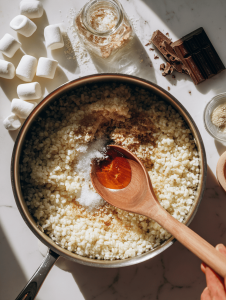
- Remove the saucepan from heat and stir in the vanilla extract for a fragrant boost. Mix well to distribute evenly.
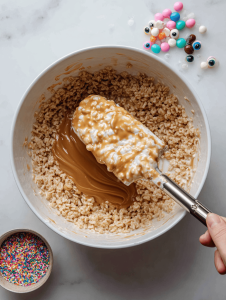
- Pour the Rice Krispies into the marshmallow mixture and stir quickly with a spatula to coat each puff evenly. The mixture will be thick and sticky, starting to set as you work.
- Transfer the mixture to a greased 9x13-inch pan. Use a spatula or wax paper to press down firmly and evenly, creating a large, compact layer. Press gently to avoid dense, tough treats.
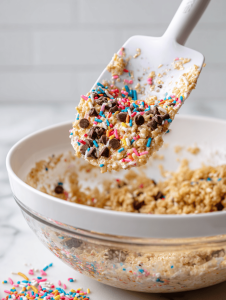
- If desired, sprinkle chocolate chips, sprinkles, or crushed cookies over the top for extra fun. Press them slightly into the surface so they stick.
- Let the treats cool completely at room temperature for about 30 minutes, or until firm and set. The surface should become shiny and slightly sticky to the touch.
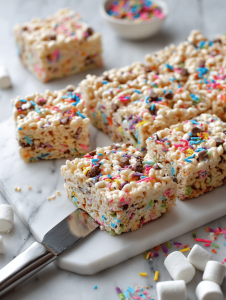
- Once cooled, cut into squares or rectangles with a sharp knife. The treats will be thick, sticky, and satisfyingly chewy with a crispy crunch on the outside.
- Serve your monstrous Rice Krispie Treats immediately and enjoy their chaotic, nostalgic goodness. Perfect for sharing or indulging in a sweet, crunchy mess!