There’s something almost meditative about slowly building up that sticky glaze on pork ribs, layer by layer. It’s a process that demands patience, but the payoff is a deep, caramelized crust that makes every bite a little more satisfying. I’ve learned that rushing the glaze only means missing out on that perfect, slightly smoky, oozy exterior.
This recipe isn’t about quick fixes or flash-in-the-pan shortcuts. Instead, it’s about embracing the slow burn, letting the sugars melt and caramelize at just the right temperature. The smell alone—sweet, tangy, with hints of smoke—makes the whole kitchen feel like a cozy, chaotic barbecue joint. It’s a bit messy, a bit sticky, but truly worth every minute.
Focusing on how a slow, deliberate glaze process transforms ordinary pork ribs into a sticky, caramelized masterpiece, emphasizing patience and the sensory journey of building flavor layer by layer.
The slow art of glaze building
- Watching the glaze turn a deep amber always feels like a small victory after patience pays off.
- That first bite, when the sticky caramelized crust gives way to tender pork—nothing short of magic.
- I love how the smell of sweet, smoky glaze clings to the air, making everyone linger at the table.
- There’s a quiet pride in mastering this slow, deliberate process—each layer building flavor and character.
- Nothing beats the chaos of sticky fingers and smoky kitchen smells during the final moments of glazing.
The story behind this recipe
- I stumbled upon this method after a late-night craving for something both sticky and smoky. The idea of slow-cooking ribs, then building that glossy, caramelized glaze, felt like a ritual I needed to learn. It’s a messy process, but the flavors that develop are worth every sticky finger and every minute.
- What really changed my approach was realizing how crucial patience is—rushing the glazing kills that deep, complex sweetness. Now, I savor every step, knowing each layer of glaze adds to the richness. It’s become a kind of meditative act, turning simple pork into something memorable, without any shortcuts.
Trivia and historical notes
- Pork ribs have been a staple in many cultures, especially in American barbecue traditions dating back to the 19th century.
- The sticky glaze technique likely evolved from Asian cooking styles, where sweet, savory, and umami flavors are layered through slow caramelization.
- Historically, ribs were considered a humble cut, but slow-cooking and glazing transformed them into a celebrated dish across barbecue competitions.
Ingredient breakdown
- Pork ribs: I prefer St. Louis cut for its balanced meat-to-bone ratio; the marbling helps keep the meat juicy and flavorful, especially when slow-cooked.
- Brown sugar: Adds that deep, caramel sweetness and helps develop a sticky crust; feel free to adjust for a less sweet glaze if you like it more tangy.
- Soy sauce: It’s the umami backbone that makes the glaze richer and darker; if you want a lighter flavor, swap in coconut aminos but you’ll miss that savory punch.
- Garlic: Fresh garlic gives a punchy, aromatic depth that balances the sweetness—don’t skip it, even if you’re tempted to go for powder in a pinch.
- Apple cider vinegar: Brightens the glaze with a tangy lift, counteracting the richness of the pork; lemon juice can be a quick swap if you’re out, but you’ll lose that subtle fruitiness.
- Sesame oil: Just a splash adds a toasty aroma and a hint of nuttiness—use sparingly, it’s potent and can overpower if overdone.
- Honey: When I want an extra glossy finish, a drizzle of honey seals in that sticky, sweet layer—try maple syrup if you prefer a milder sweetness, but keep in mind the flavor shift.
Spotlight on key ingredients
Pork ribs:
- I prefer St. Louis cut for its balanced meat-to-bone ratio; the marbling helps keep the meat juicy and flavorful, especially when slow-cooked.
- Brown sugar: Adds that deep, caramel sweetness and helps develop a sticky crust; feel free to adjust for a less sweet glaze if you like it more tangy.
- Sesame oil: Just a splash adds a toasty aroma and a hint of nuttiness—use sparingly, it’s potent and can overpower if overdone.
Brown sugar:
- I love how it caramelizes during baking, creating that irresistible sticky crust. It’s the foundation of that sweet, smoky flavor.
- Sesame oil: Adds a nutty, toasted aroma that deepens the glaze’s complexity. A little goes a long way—don’t overdo it or it’ll dominate the sweetness.
Notes for ingredient swaps
- Sweetener: Brown sugar is my go-to for that rich caramel flavor, but maple syrup or honey can add a different depth—adjust the quantity to keep that sticky, oozy texture.
- Soy sauce: I prefer traditional soy for its umami punch, but coconut aminos work well if you want a soy-free, slightly milder salty note—just watch the saltiness.
- Vinegar: Apple cider vinegar offers bright tang; if you’re out, lemon juice can be a quick swap, though it’s a bit sharper and less fruity.
- Oil: Sesame oil adds a nutty aroma that’s hard to replace, but a good splash of toasted walnut oil gives a similar depth—use sparingly, it’s potent.
- Honey: I love how honey seals in that glossy finish, but agave syrup or even molasses can work if you want a different kind of sweetness—be mindful of the flavor shift.
Equipment & Tools
- Large rimmed baking sheet: To hold the ribs and catch drips during baking.
- Basting brush: To coat the ribs evenly with glaze.
- Aluminum foil: To cover the ribs during slow roasting and trap moisture.
- Sharp knife: To cut the ribs into sections for easier serving.
Step-by-step guide to sticky ribs
- Gather your equipment: a large rimmed baking sheet, a basting brush, aluminum foil, and a sharp knife. Preheat your oven to 150°C (300°F).
- Prepare the ribs: remove the membrane with a paper towel for better glaze adhesion. Cut into manageable sections if needed.
- Mix the glaze: combine soy sauce, brown sugar, garlic, apple cider vinegar, honey, and a splash of sesame oil in a bowl. Stir until smooth.
- Place ribs on the baking sheet, bone side down. Brush generously with the glaze, making sure to coat all surfaces.
- Cover tightly with aluminum foil. Bake for 2.5 to 3 hours until the meat is tender and pulls away from the bone.
- Remove from oven, increase oven temperature to 220°C (430°F). Uncover ribs and brush with additional glaze.
- Return to oven, bake uncovered for 15-20 minutes. Watch for a sticky, caramelized crust forming and a smoky aroma.
- Check the glaze: it should be deep amber and slightly bubbly. If it’s not sticky enough, brush with more glaze and bake a few minutes longer.
- Rest the ribs: let them sit for 5 minutes. This helps the juices redistribute and the glaze to set slightly.
- Slice into individual ribs, serve with extra glaze on the side if desired. Enjoy the oozy, smoky crackle with each bite.
Let the ribs rest for 5 minutes before slicing. Serve hot with extra glaze if desired, ensuring the glaze has set into a glossy, sticky crust.
How to Know It’s Done
- The glaze is deep amber, thick, and sticky after baking.
- Meat is tender and pulls away from the bone easily when tested with a fork.
- The crust is caramelized and slightly smoky, with a crackly sheen.
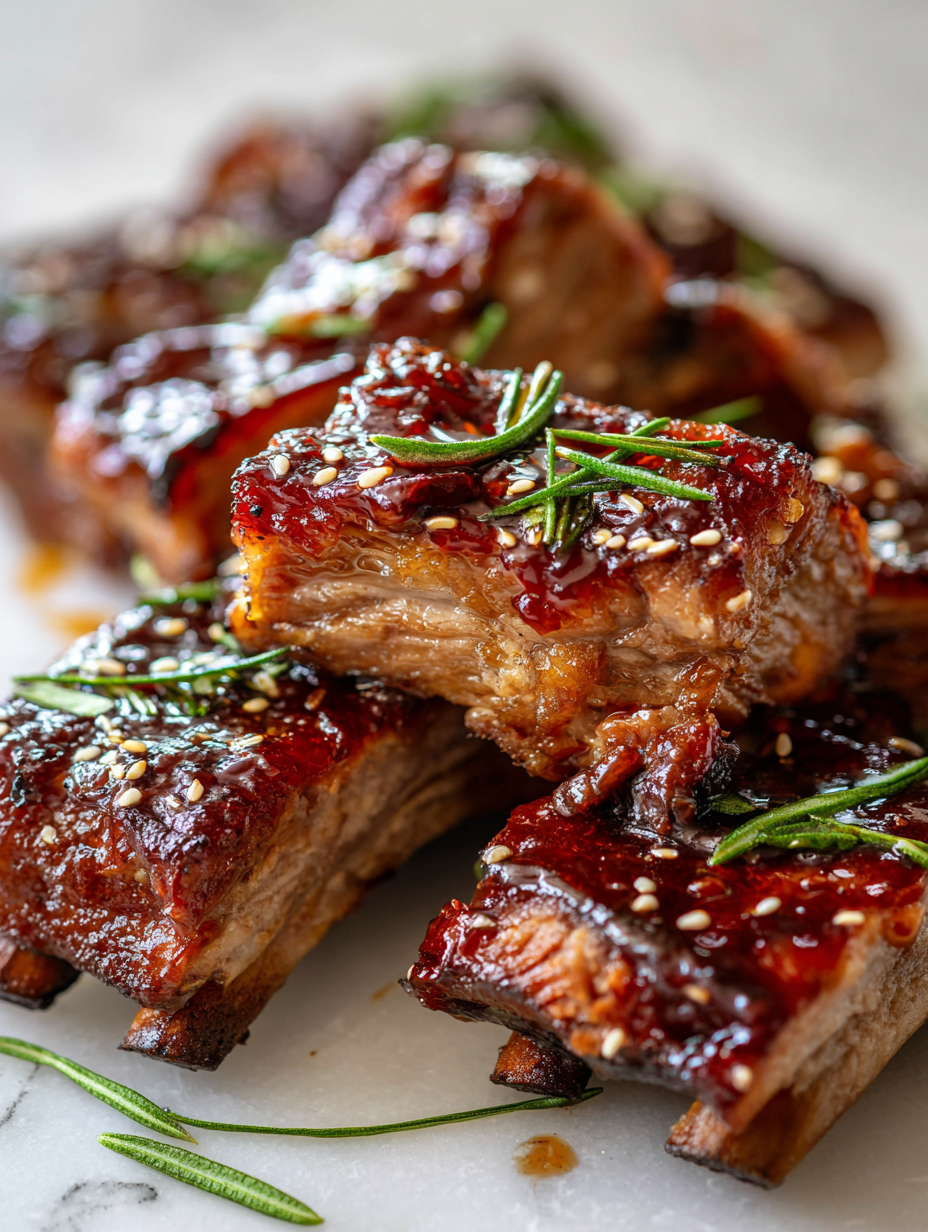
Sticky Slow-Baked Pork Ribs with Caramelized Glaze
Ingredients
Equipment
Method
- Preheat your oven to 150°C (300°F). Prepare the ribs by removing the silvery membrane from the bone side with a paper towel for better glaze adhesion.
- In a bowl, whisk together soy sauce, brown sugar, minced garlic, apple cider vinegar, honey, and sesame oil until the sugar dissolves and the mixture is smooth.
- Place the ribs on the large baking sheet, bone side down, and generously brush them with the prepared glaze, coating all sides evenly. This first layer starts building that sticky, flavorful coating.
- Cover the ribs tightly with aluminum foil and bake in the oven for about 2.5 to 3 hours, until the meat is tender and pulls away easily from the bone. The house will fill with a savory, sweet aroma during this slow cook.
- Remove the foil carefully, and increase the oven temperature to 220°C (430°F). Brush the ribs generously with more glaze, focusing on creating a thick, sticky layer.
- Return the ribs to the oven, uncovered, and bake for an additional 15-20 minutes. During this time, the glaze bubbles and caramelizes, forming a crackly, glossy crust with a smoky sheen.
- Check the glaze: it should be deep amber, thick, and sticky, with a fragrant smoky smell. If needed, brush with a little more glaze and bake a few minutes longer to deepen the caramelization.
- Remove the ribs from the oven and let them rest for about 5 minutes. This helps the juices settle and the glaze to set into a beautiful, crackly sheen.
- Slice the ribs into individual portions with a sharp knife, revealing the tender meat beneath the glossy, caramelized crust. Serve immediately with extra glaze on the side if desired.
Notes
Pro tips for sticky ribs
- Use a thick layer of glaze in the final bake—this helps build that glossy, sticky exterior.
- Keep a close eye during the high-temp finishing—sugar can burn quickly and turn bitter.
- Baste generously and often in the last stage—multiple coats create a deep, caramelized crust.
- Let the ribs rest after baking—this redistributes juices and enhances tenderness.
- Use a silicone brush for even coating—avoids excess glaze pooling and ensures uniform caramelization.
- For extra smoky flavor, add a few drops of liquid smoke to your glaze—just a tiny splash.
- If the glaze isn’t sticking well, increase oven temperature slightly and bake longer—aim for that crackly sheen.
Common mistakes and how to fix them
- FELT FORGOTTEN: Basting too early can ruin the glaze—wait until the glaze is thick and sticky.
- DUMPED: Overly thick glaze can burn—brush on thin layers and build gradually.
- OVER-TORCHED: Ribs blacken quickly—keep a close eye at high heat, and cover if they brown too fast.
- MISSED: Not letting the ribs rest causes juices to escape—rest for at least 5 minutes before slicing.
Fast fixes for sticky ribs
- If glaze is too thin, splash in a little more soy and simmer to thicken.
- When ribs stick to the pan, patch with a quick brush of hot glaze to prevent tearing.
- Splash some water or vinegar if the glaze shimmers and starts to burn—cool it down quickly.
- When ribs are over-torched, shield with foil and lower oven temperature to salvage flavor.
- DUMPED: Excess glaze can cause burning—brush lightly and build layers gradually.
Prep, store, and reheat tips
- You can prepare the glaze a day ahead; keep it in the fridge to meld flavors and reduce prep time later—just give it a quick stir before using.
- Assembling the ribs and applying the initial glaze can be done a few hours in advance; wrap tightly and store in the fridge to deepen flavors.
- Cooked ribs will keep in an airtight container in the fridge for up to 3 days; the glaze may thicken but can be reheated to loosen.
- Reheat in the oven at 180°C (350°F) covered with foil for 15-20 minutes until heated through; the glaze will become sticky and fragrant again.
- For best results, reheat ribs slowly to preserve tenderness and avoid drying out; the glaze should stay glossy, with a smoky aroma.
Top questions about sticky pork ribs
1. How do I choose the best pork ribs?
Look for ribs with good marbling and a fresh pink color. The meat should be moist and firm, not slimy or dull. The marbling helps keep the ribs juicy during slow cooking.
2. How often should I baste the ribs?
Baste the ribs every 20-30 minutes during the final baking stage. This builds up the sticky, caramelized coating and prevents it from drying out.
3. My glaze isn’t sticky enough—what now?
If the glaze isn’t thickening, turn up the oven temperature slightly or bake for a few extra minutes until it’s glossy and crackly. Keep a close eye to prevent burning.
4. What’s the ideal oven temperature and time?
Cooking at a steady 150°C (300°F) for 2.5-3 hours makes the meat tender and easy to pull from the bone without drying out.
5. Should I rest the ribs before serving?
Let the ribs rest for about 5 minutes after baking. This helps the juices redistribute and keeps the glaze glossy and set.
6. What’s the best tool for applying glaze?
Use a silicone brush for even coating of glaze. It helps prevent excess pooling and ensures a uniform, glossy crust on every rib.
7. How do I avoid burning the glaze?
To prevent burning, keep a close eye during the final bake. If the glaze starts to blacken, cover with foil and lower the heat slightly.
8. How do I handle excess fat on the ribs?
If the ribs are too fatty, trim excess fat before cooking. This prevents flare-ups and ensures a cleaner, less greasy finish.
9. How do I reheat leftover ribs?
Reheat ribs gently in the oven at 180°C (350°F) covered with foil. The glaze will re-melt and re-adhere, restoring that sticky, smoky shine.
10. Can I substitute ingredients in the glaze?
Swapping soy sauce with coconut aminos slightly softens the umami punch. Honey can be replaced with maple syrup for a different sweetness profile.
There’s something deeply satisfying about taking the time to build that sticky, smoky crust on pork ribs. It’s a messy process, but the caramel aroma and tender meat make every minute worth it. In these times, a dish like this brings a bit of slow, deliberate pleasure to the table.
Plus, it’s a reminder that good things often come with patience. The crackle of the glaze and the rich, balanced flavor stay with you long after the last bite. It’s a recipe that feels both grounding and celebratory, right when you need it most.